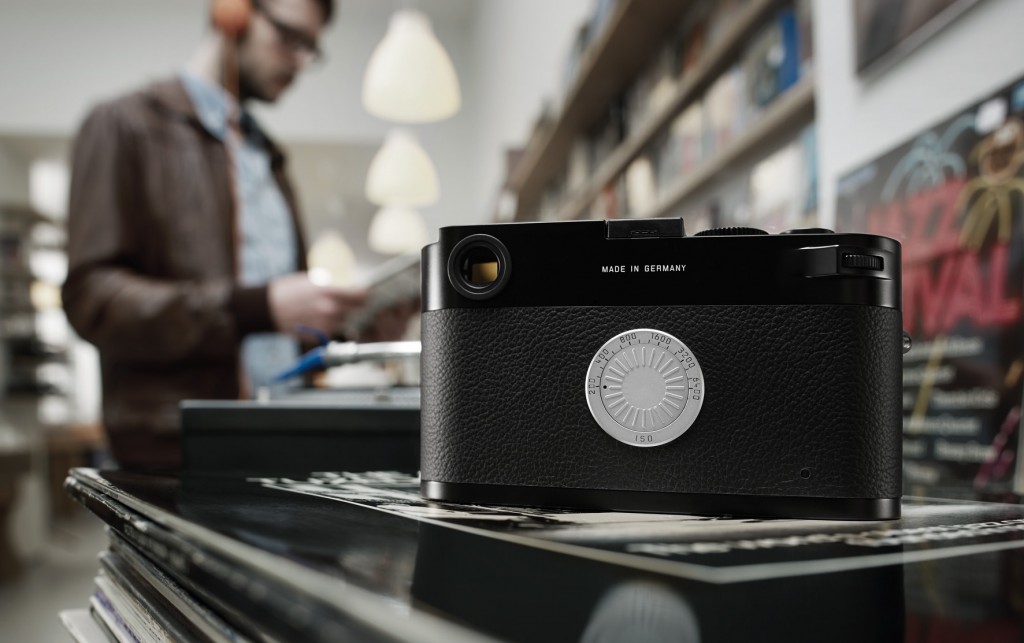
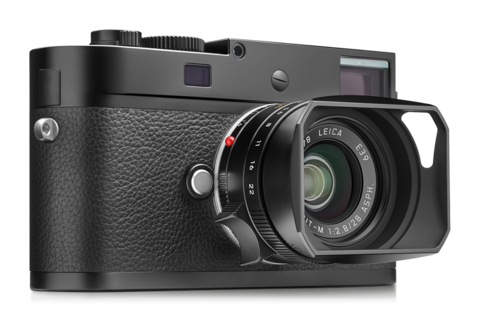
Leica has announced it’s latest addition to the digital “M” rangefinder line in the “Leica M-D” (Typ 262). The luxury camera maker has quieted the bells and whistles on it’s new M-D by omitting such pesky features as a rear display and menu system of any type. The resulting no frills body is a clean design that looks much more like the film M’s of the past then any modern variant.
Image via Leica
According to Leica – “no other camera manufacturer is dedicated to focusing on ‘Das Wesentliche’ – the sheer essentials of photography. As a result, Leica has developed the Leica M-D: a camera that delivers photography in the most consistent way. A camera that offers no more and no less than the most important features, and represents a state-of-the-art digital rangefinder”
Controlling the camera is straightforward. There is a thumb-wheel for shutterspeed and aperture is selected manually as on all “M” systems. ISO selection occupies the space typically reserved for the rear display and the ISO dial’s design harkens back to the Leica film M’s ISO/ ASA selector. The top-plate does include a hotshoe and the front of the camera spots a self-timer typical of those found on classic film bodies.
Image via Leica
Photographers interested in shooting some occasional video will need to look elsewhere. In typical “M” fashion there is no video capture to speak of unless shooting stop-motion at a blazing 3 fps in your thing.
Leica has distilled it’s latest cameras form to such a degree that it’s even left off it’s signature circular red script “Leica” badge from the front of the black on black shooter with the goal of an “unobtrusive appearance”.
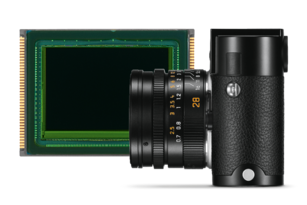
Inside the handcrafted body you’ll find Leica’s 24mp full-frame CMOS sensor and Leica Maestro image processor. The image files created by the combo are DNG RAW only, presumably because offering jpegs as an option would require a menu of some sort.
Image via Leica
So I know what your thinking. With every modern convenience and feature gutted from this new camera, the M-D is going to be the first interchangeable lens, German made digital M to be affordable for the masses………. well, not so much. Pricing for the body only Leica M-D is listed at $5,995 usd via authorized dealers. The good news is that it’s available now.
If you’re interested in handling the new Leica M-D you can find a list of authorized dealers via Leica’s website at us.leica-camera.com
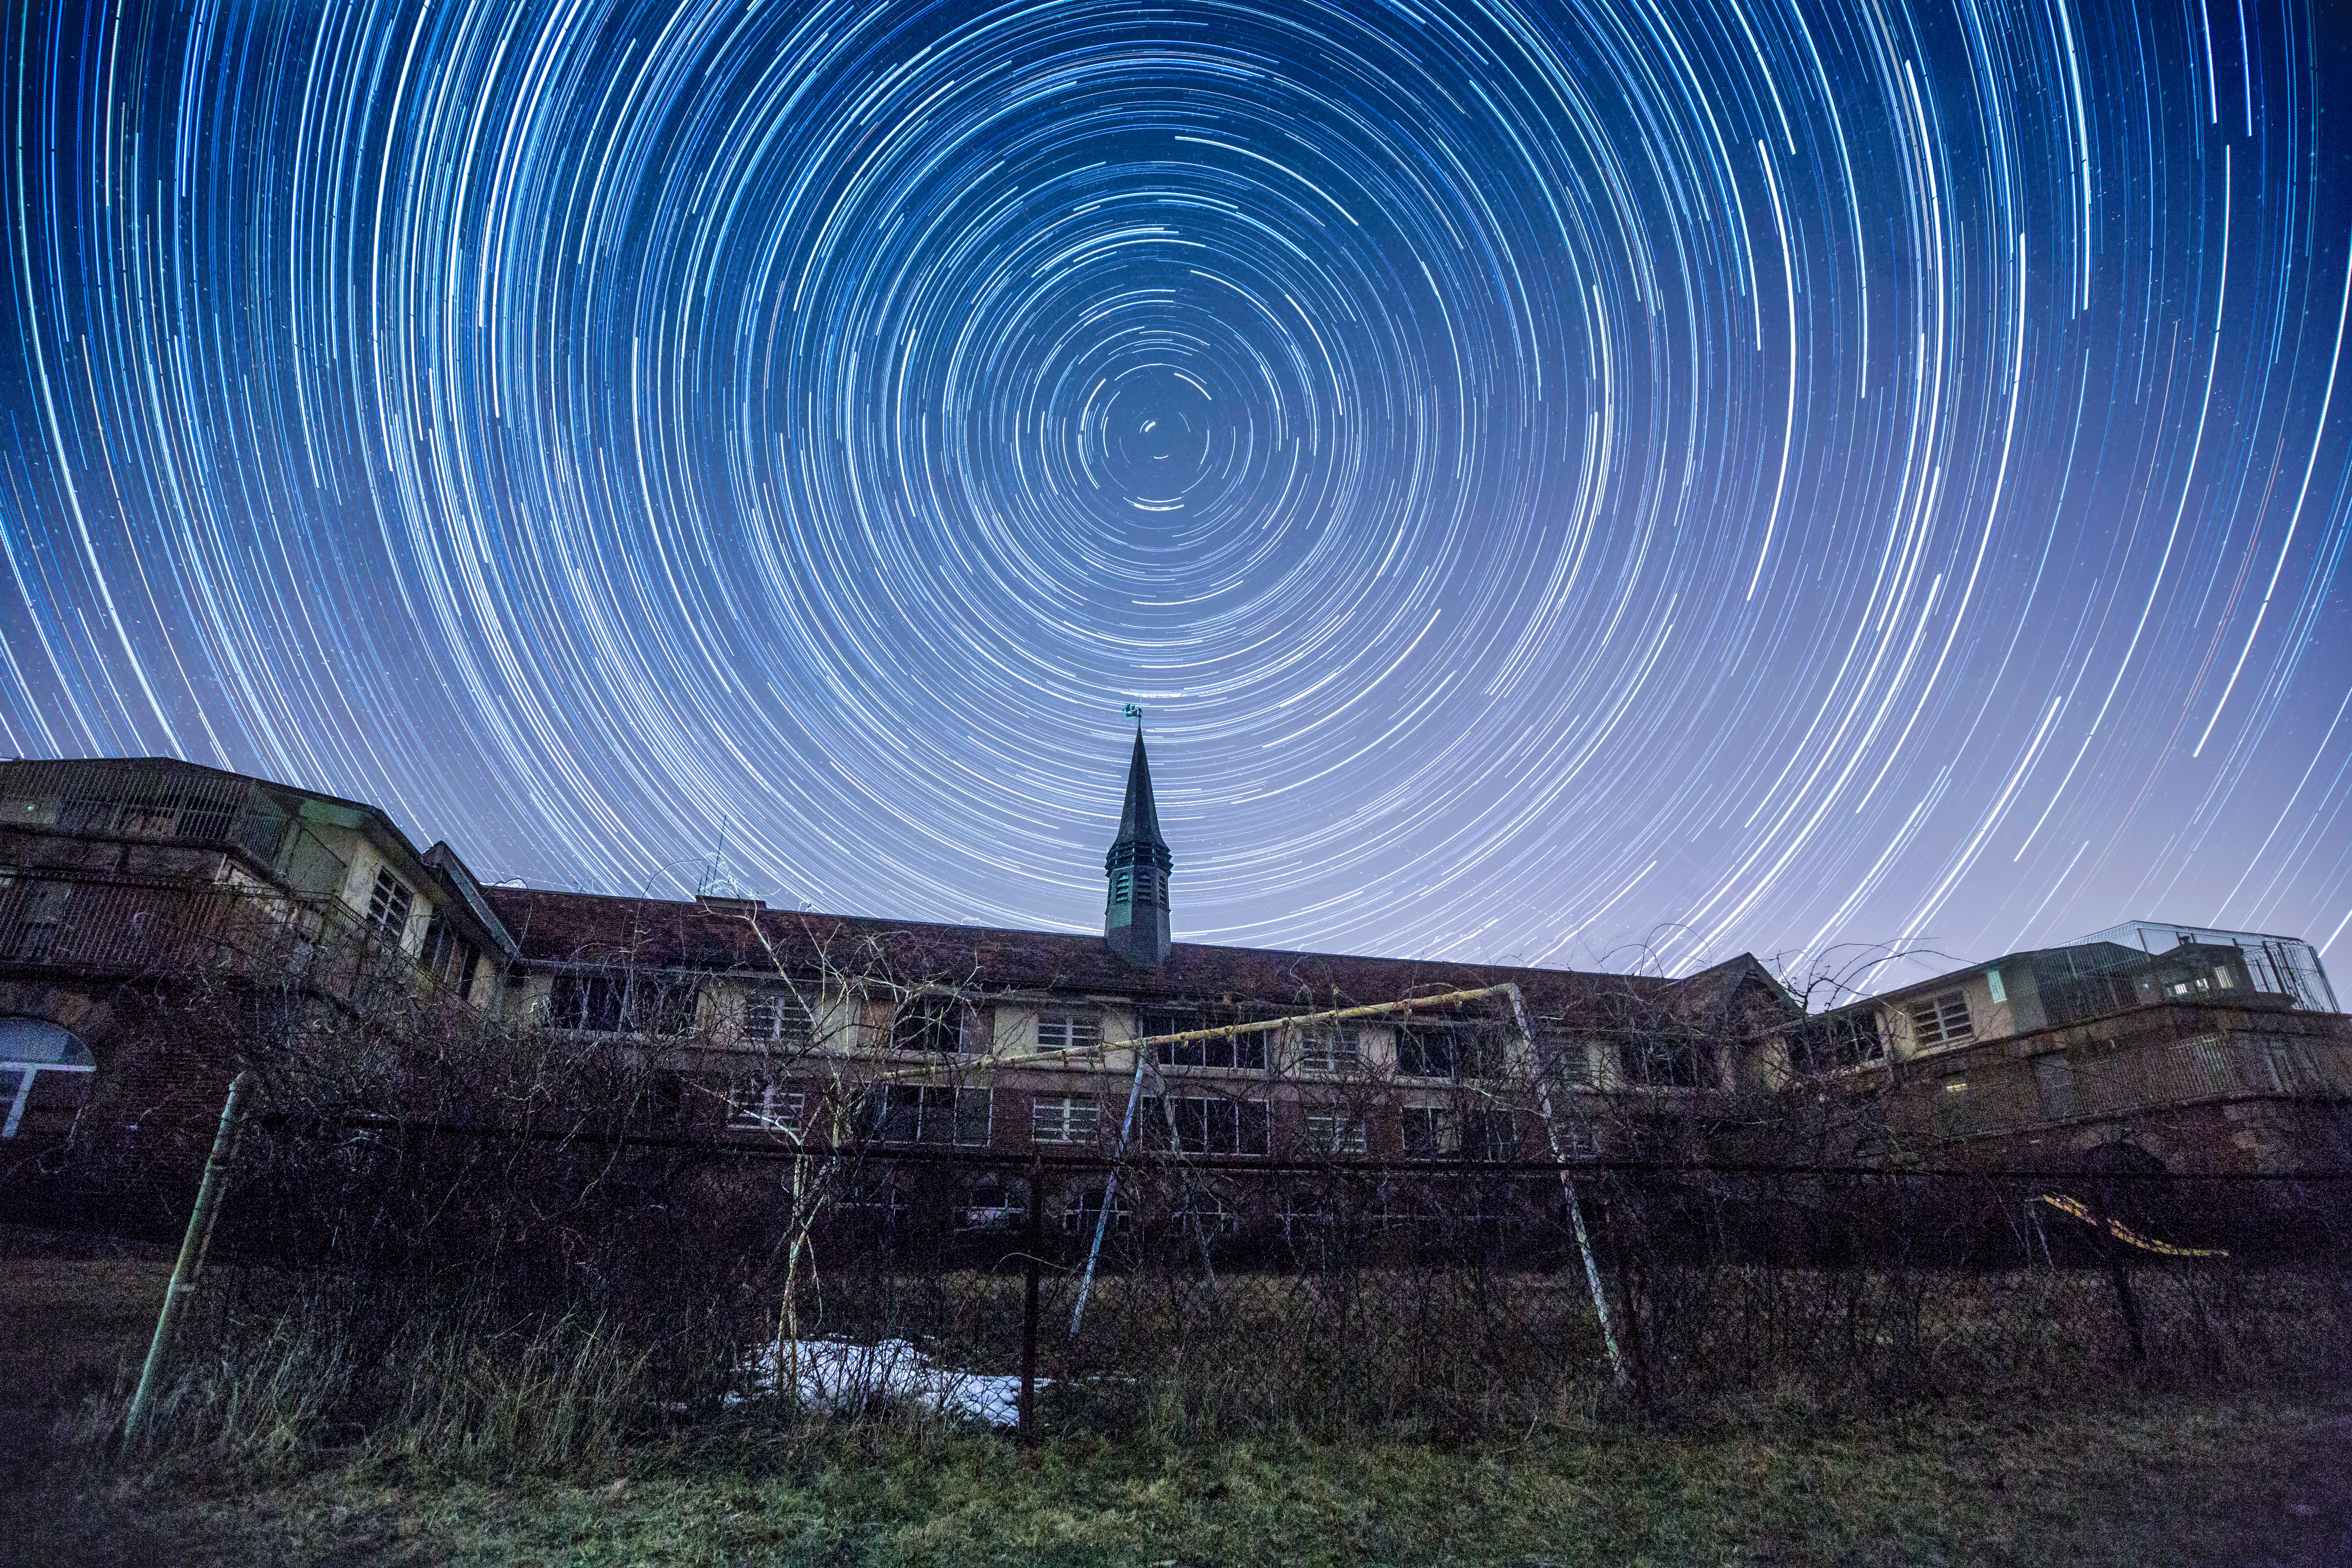
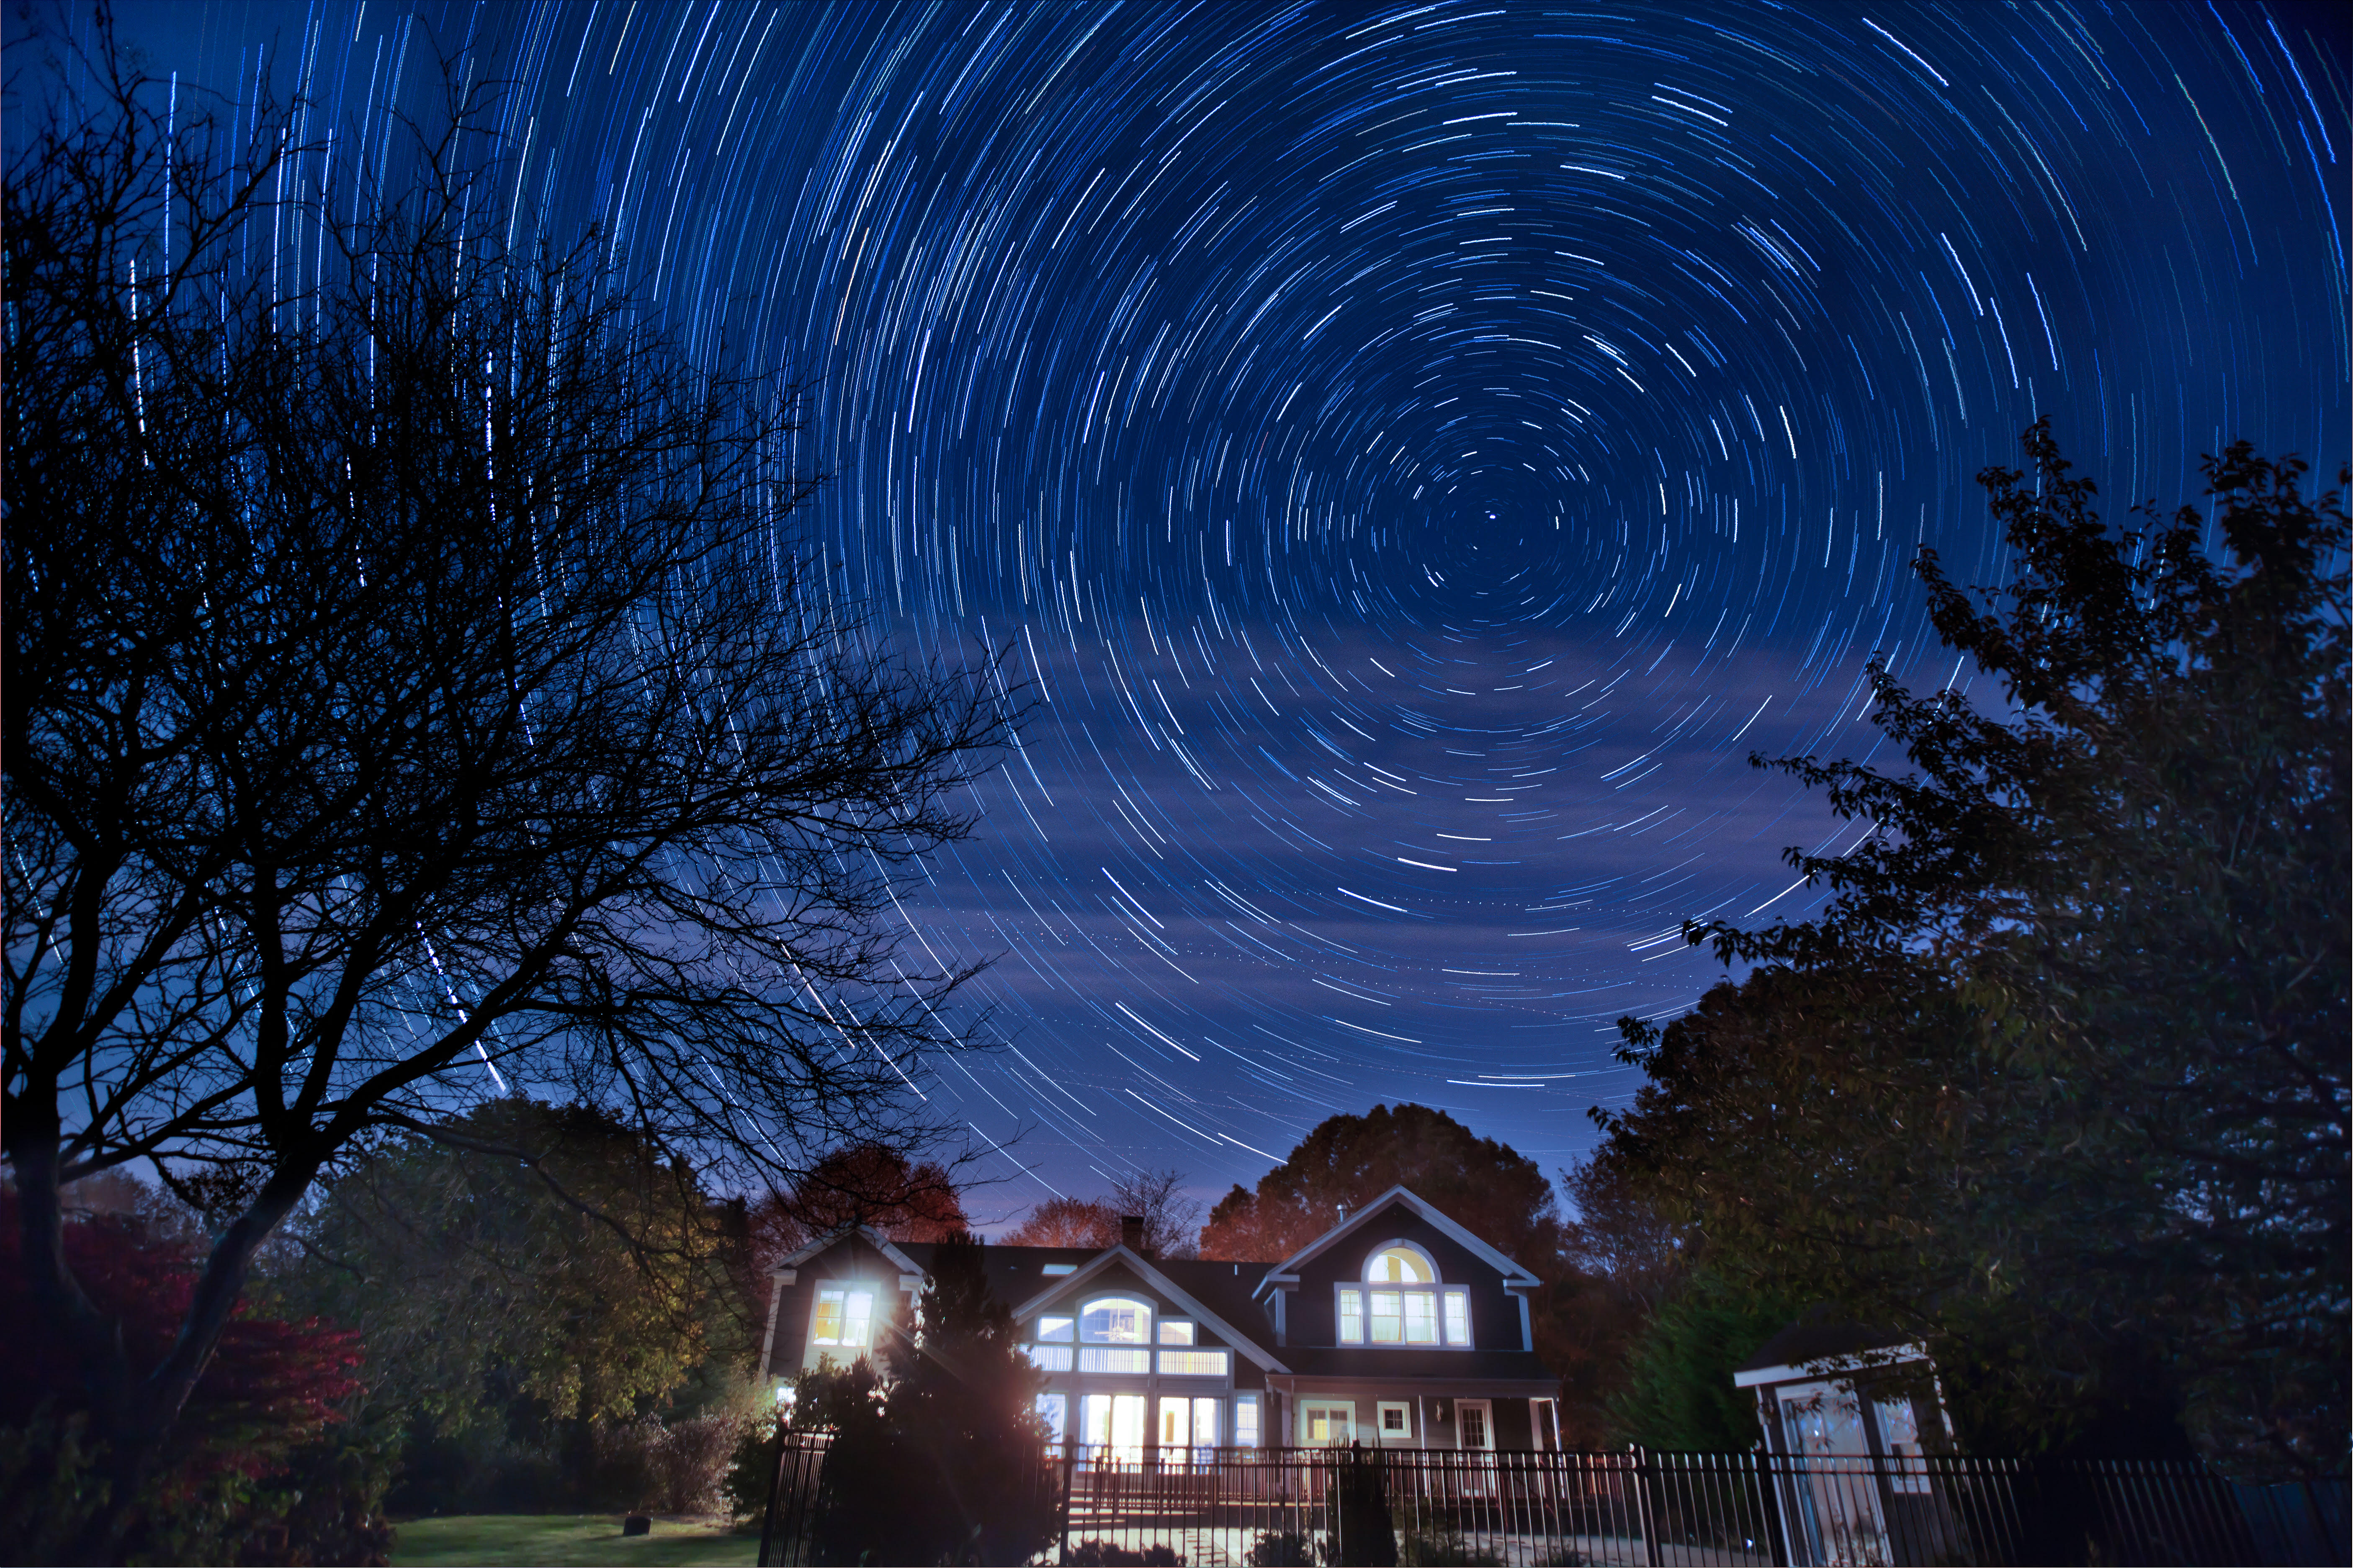
Stars make an amazing backdrop. The darker the night and the clearer the sky, the better the stars will look. Here’s how to get great pictures of stars:
Get away from the city. Lights reflect off the atmosphere, causing the night sky to glow.
Shoot well after the sun has set. Even after the sun has disappeared below the horizon, it will light the night sky.
Shoot before the moon rises. The moon reflects sunlight. Even bounced off the moon, that light is bright enough to illuminate the Earth and obscure the stars. Check the moon rise and set times for your area, and plan your shoot for when the moon’s on the other side of the Earth.
Choose a clear, cold night. Just as a hazy sky obscures the horizon, it will blur bright stars and completely hide dim stars. Day or night, lower humidity creates sharper pictures of faraway subjects.
Shoot toward the dark part of the sky. Even on a night with no moon, parts of the horizon will be brightly illuminated. When you shoot with a long enough exposure to capture the stars, those parts of the sky will appear very bright.
Get closer to the stars. The higher you are, the less the atmosphere will obscure the starlight. The next time you’re on top of a mountain, spend the night—and bring a tripod.
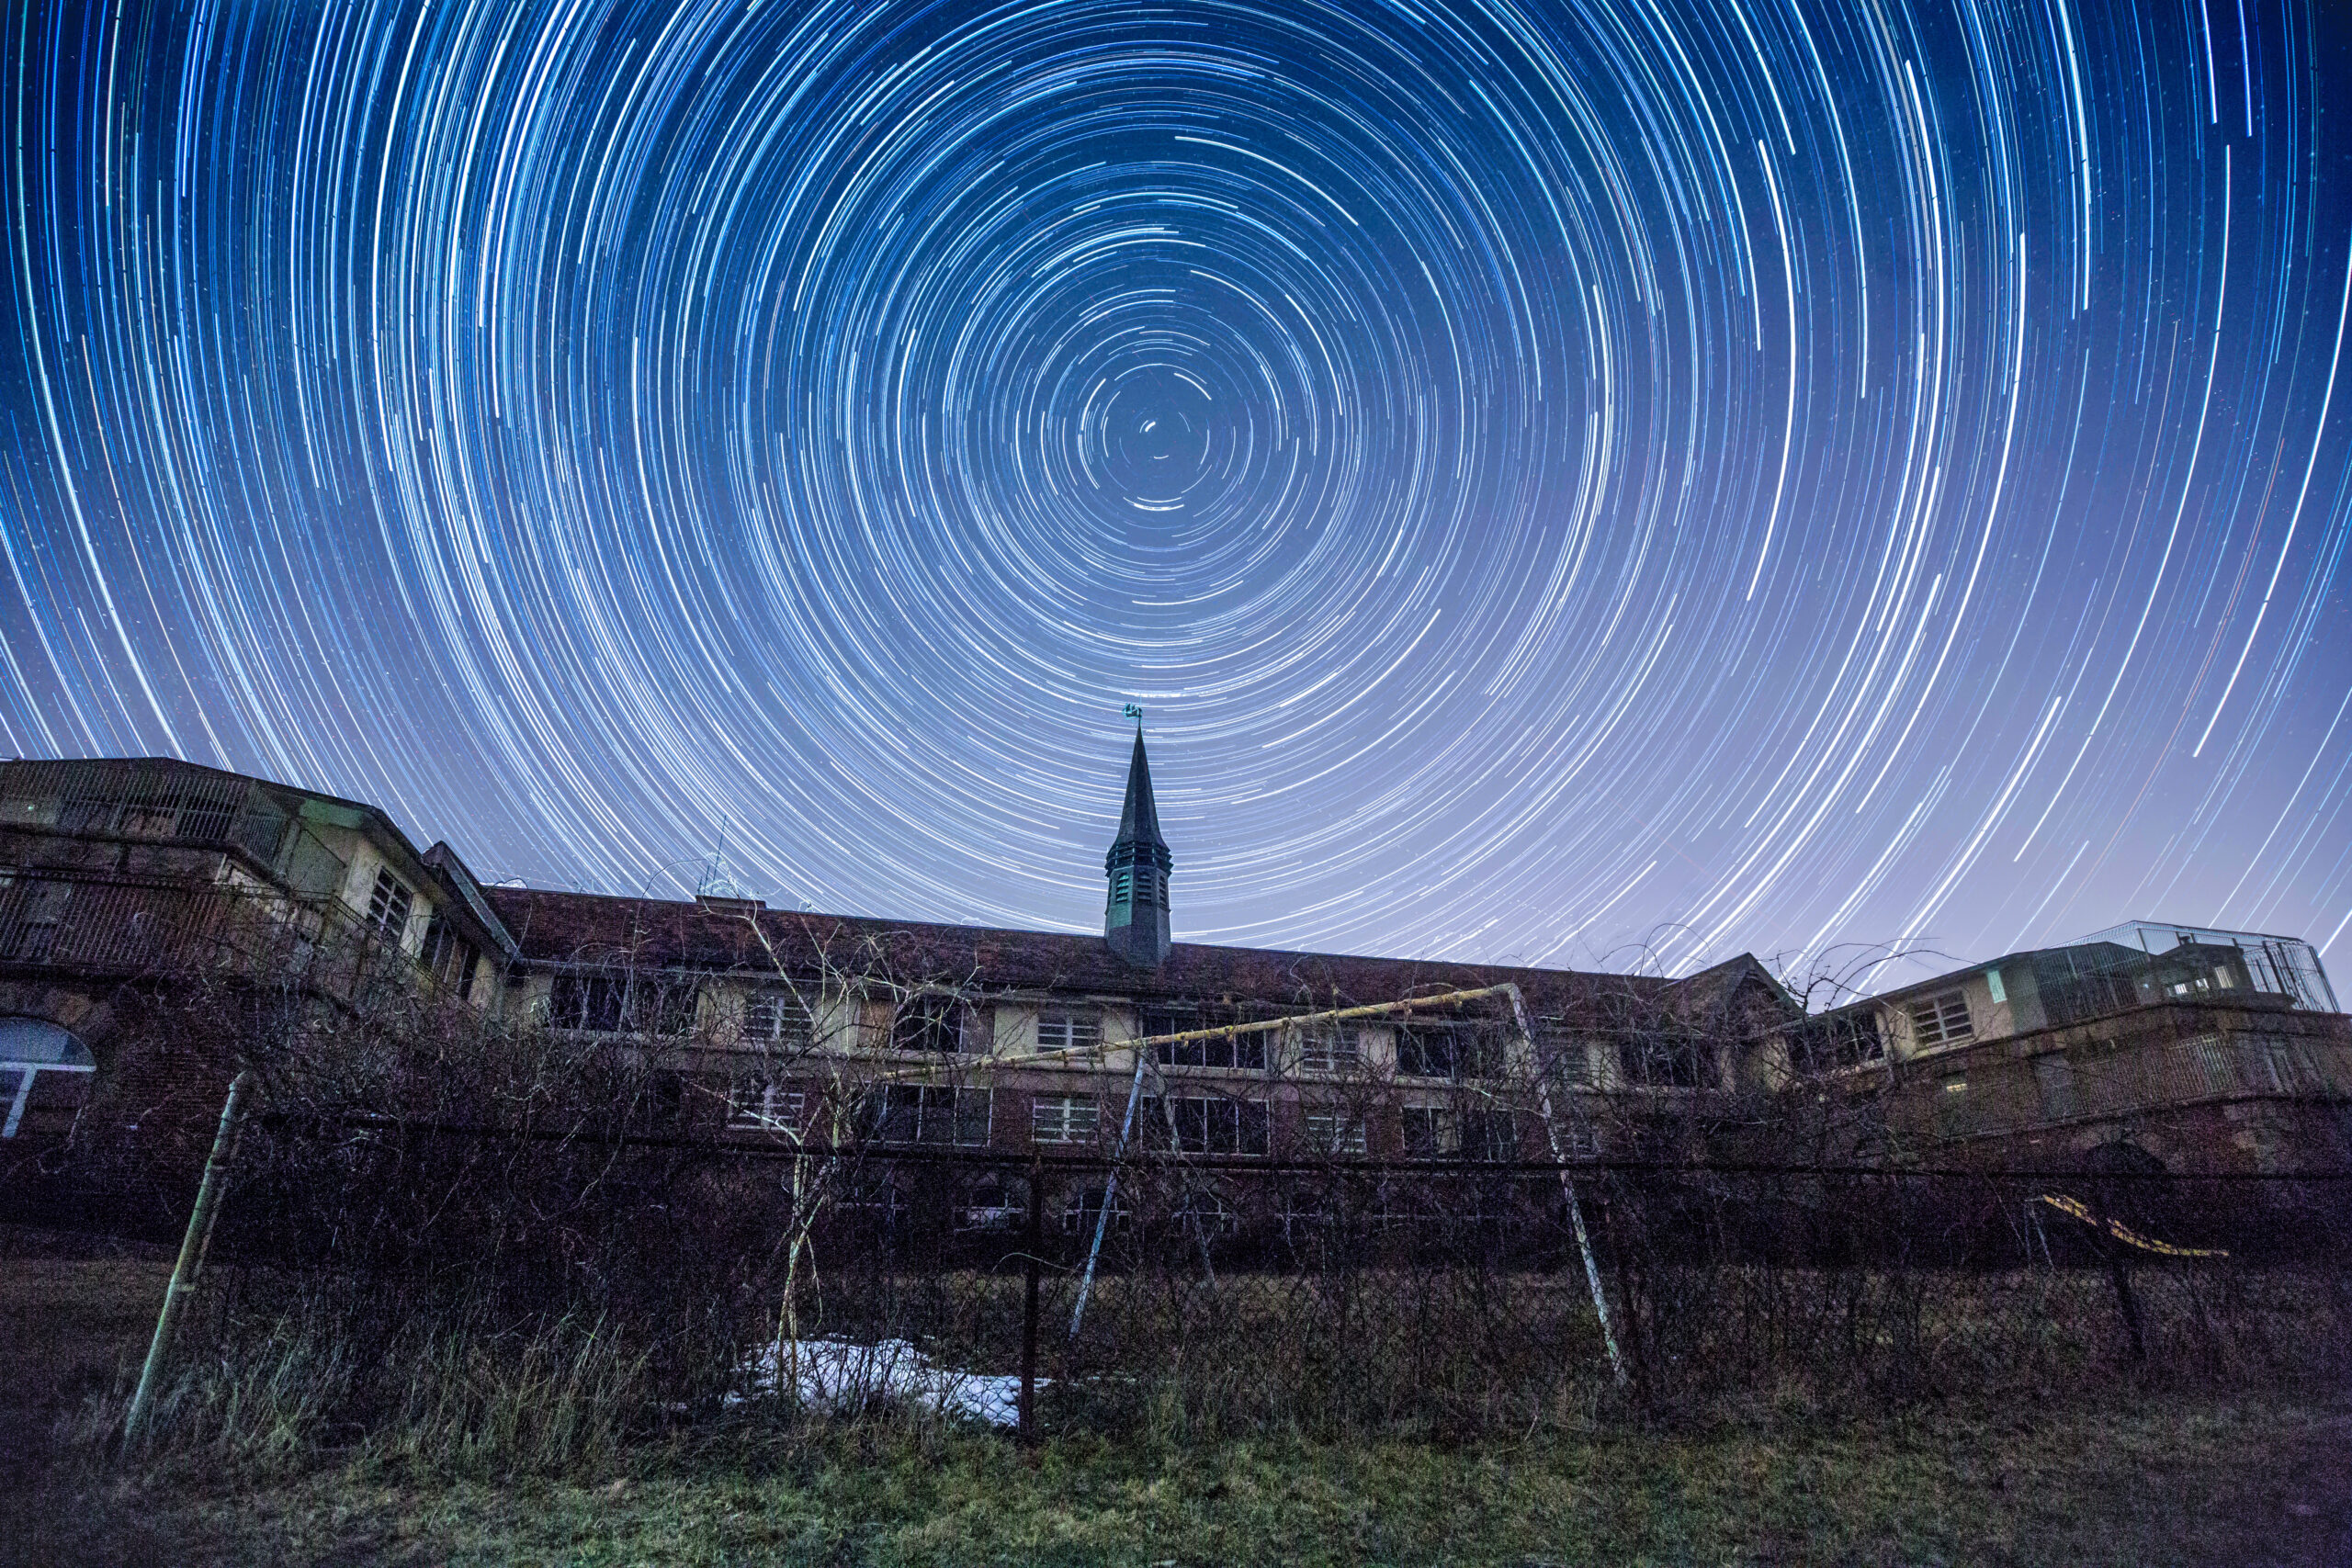
While stars are quite good at holding still for long exposures, the earth is spinning quite fast. Just like shooting from a moving car, long exposures cause everything to be blurred. Star trails can be beautiful, and many people do them intentionally to amazing effect.
To minimize star trails, keep your shutter speed at 30 seconds or less. Depending on the direction you’re facing, you still might see visible star trails at 30 seconds—or you might be able to get away with a shutter speed up to a minute.
You can also deliberately create star trails using one of two different techniques:
One long exposure. Choose a low ISO setting (such as ISO 200), a moderate f/stop number (such as f/5.6 or f/8), set your camera to Bulb mode, and use a remote timer to set a shutter speed of ten minutes or more. The exact settings will take some experimentation, because the brightness of the sky and stars can vary. This approach doesn’t require post-processing, but non-moving lights (such as the glow near the horizon) will be brighter than the stars (as shown in Figure 10-4). Additionally, depending on your camera, noise can be amplified with very long exposures.
Image stacking (the preferred method). Use a timer to take a series of thirty-second photos, and then combine them using an image stacking tool. For example, to create one hour exposure, you would take 120 thirty-second photos. Image stacking provides a darker sky and brighter stars. Image stacking can also automatically align pictures, fixing problems created by a tripod that moves slightly (something that is almost impossible to avoid over long periods of time).
Either approach requires a remote timer and manually focusing your lens. If you can’t see the stars well enough to manually focus, simply adjust the focus to infinity using the markings on your lens, take test shots with a high ISO (so you don’t have to wait as long), and refocus until the stars are sharp.
Image Stacking:
If you choose to use image stacking, set your camera to Manual mode with a shutter speed of 30 seconds, an ISO of 400, and an aperture of f/5.6. Experiment to determine the correct ISO and aperture settings to properly expose the stars with a 30-second shutter speed; if your first picture is too dark, decrease the f/stop number or double the ISO, and try again. Set your camera to continuous shooting, so that it will continue to take pictures as long as the shutter is held down. Then, use your remote timer to lock the shutter open (which simulates you holding down the shutter button). Your camera will continue to take pictures every 30 seconds until you stop it, it runs out of batteries, or it fills the memory card.
There are many different ways to perform image stacking. You can do it natively in Photoshop, manually using layers, or with the Stack-a-Matic script (http://www.russellbrown.com/scripts.html,) or by using stand-alone applications such as StarStaX (http://www.starstax.net,) Image Stacker (http://www.tawbaware.com/imgstack.htm,) or StarTrails (http://startrails.de.) Star Tracer (http://www.tawbaware.com/startracer.htm) can even fill in gaps in your star trails created by delays taking the next picture (for example, if you need to change the battery) and can lengthen star trails, allowing you to pretend you spent hours out in the dark, rather than just a few minutes.
Shooting Tips:
Bring extra batteries. Battery life is a problem, especially on cold nights. If you use image stacking, bring an extra fully charged battery, and swap it out as quickly as possible when the battery begins to run low. The time it takes you to swap the battery still might leave a tiny gap in your star trails.
Prevent lens dew. Check your lens for moisture every 20-30 minutes, and use a lens cloth to dry off your lens’ front element. It gets dewy and cold at night, and the condensation is unavoidable. This is another good reason to use image stacking; when you clean the lens, you’ll no doubt move the camera slightly. Image stacking software can automatically adjust for the alignment change. You can help reduce moisture by storing your camera in a sealed plastic bag or the trunk of your car and allowing it to gradually acclimate to the temperature before you begin taking your pictures and after you bring your camera back inside. However, this technique won’t prevent dew from forming as the temperature falls overnight.
Mind the clouds. You should also monitor the sky for clouds. If clouds roll in, no matter how wispy they are, they will ruin your star trails. With image stacking, simply release the remote shutter and stack the images that were not ruined by clouds.
Consider Your Foreground. To create really exciting star trail pictures, choose a perspective with something interesting in the foreground, such as a building, a tree, or a rock formation, and shoot wide-angle to show enough stars. If it is not naturally lit, use light painting techniques (described here) to illuminate it.
Know your Earth. Star trails move in a circular pattern revolving around the North Star (if you’re in the Northern Hemisphere), or the Southern Celestial Pole. Actually, you’re on the Earth, and the Earth is spinning on its North/South axis, so if you’re looking up at the relatively motionless stars near either axis, you’ll see them appear to be rotating around the axis point. If you’re not pointed at your hemisphere’s pole, stars trails will be slightly curved lines.
Find the North star. In the Northern Hemisphere, you can find the North Star by finding the big dipper. The two stars at the end of the big dipper’s scoop (the two stars farthest from the handle) are called the “pointer stars” because they point to the North Star. Unfortunately, there’s no star at the right location that you can use in the Southern Hemisphere. You’ll just have to find south using a compass and experiment with long exposures to align your picture.
Edit your photo. As with all night photography, shooting stars requires some post-processing. You’ll probably need to bring the black point up to hide noise and distracting light. You should also pull the color temperature toward the cool end of the spectrum to better show the different colors stars give off.
Remove airplanes. When you’re done, you’ll have several straight, dashed lines through your picture created by the blinking lights on airplanes. Airlines can be very inflexible about rerouting their flights around your pictures, so your best bet is to remove the lines in post-processing. It’s more easily done with image stacking, since the airplane would only appear in one or two frames.
Whichever approach you choose, plan to wait for hours while the software processes your pictures. The more pictures and the larger the files, the longer the processing will take. If the script or application outputs a file with each image in a separate layer (as the Stack-a-Matric script can,) merge the layers before saving it—otherwise your file might take several gigabytes of space.
Happy shooting!
This is an excerpt from our book Stunning Digital Photography, if you like it and want to learn more, you can purchase the book here or search for us on Amazon.
You take a beautiful photo that you proudly post on your social media. One day, you discover that your photo has been shared on someone else’s account. It’s getting hundreds—no, thousands—of likes! Your photo is going viral! You could be the next Grumpy Cat! But…the owners of that account didn’t credit you for your image. You’re crushed. You worked hard to develop your talent only to have the fruit of your labor stolen from you.
Copyright, infringement, violations, intellectual property, model release, commercial use—this word soup of legalese can be confusing or downright terrifying for uninitiated photographers. However, in the age of rapid digital photo sharing, legal violations of photographers’ rights are rampant. As a content creator, it’s important to be aware of your rights under the law as well as best practices to protect your property.
The purpose of this article is to introduce you to some of the key legal terms and ideas that can affect you and to provide reputable resources where you can find more information. This article deals broadly with US federal law and is not meant to be comprehensive; it’s a starting point. So bookmark this page and use it as a handy research tool the next time you have a question about your rights as a photographer. As always, if you have questions about your specific situation and you need legal advice, speak with an attorney in your area.
Matt travels and shoots non-stop. His channel has great camera info, reviews, photography tips and travel videos. He also reviews seafood restaurants! Subscribe here if you haven’t already.
Jim Harmer and crew at Improve Photography make great tutorials, gear reviews, and all around good photography info. They also have a great podcast. Follow them here!
Great blog with tons of contributors, covering all sorts of photography news. They delve deep into the art of photography and all that encompasses. Read more here and subscribe to their YouTube channel.
That’s our list! I’m sure we missed a few, let us know in the comments below.
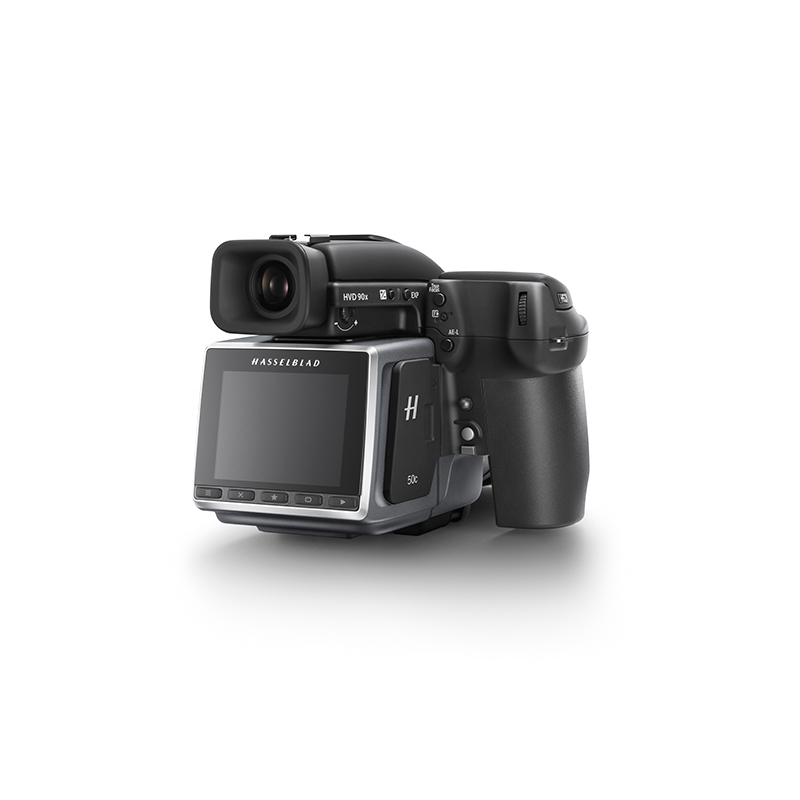
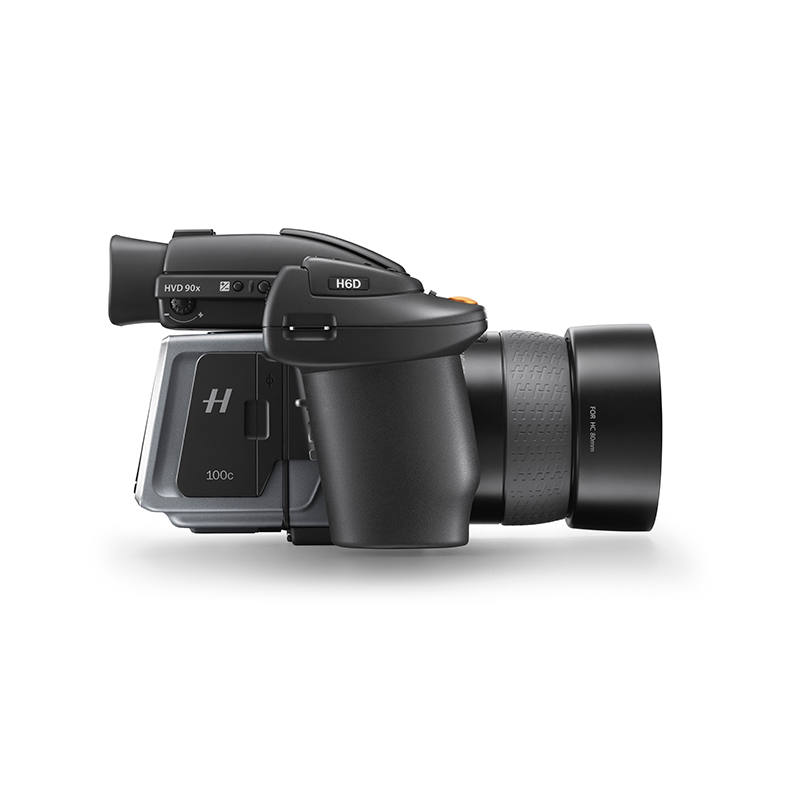
Swedish camera maker Hasselblad has announced it’s all new H6D premium medium format camera system. The luxury shooter has been designed from the ground up with quality and speed in mind. Not to be outdone in the megapixel war, the H6D has two CMOS sensor equipped medium format backs available in both 50 and 100 megapixel varieties.
Image courtesy of Hasselblad
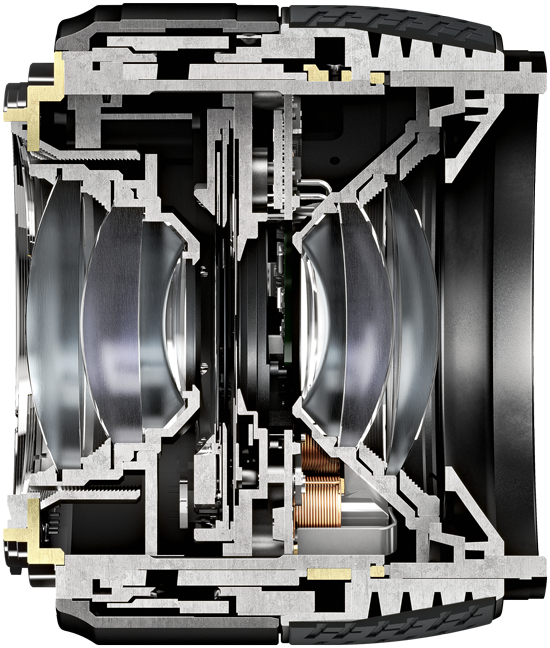
To help resolve all of that medium format detail Hasselblad has released new lenses specially built to exploit the dense pixel counts of the sizable sensors. The HC and HCD lenses are said to be fully 100+ megapixel compatible. These updated lenses will sport new orange accents to set them apart from the classic H range which remains compatible with the updated body.
Image courtesy of Hasselblad
The new Hasselblad H6D isn’t just about resolving power. The body is feature rich and speced to impress photographers with pockets deep enough to take one home. Shutter speeds are available from 1-hour up to 1/2000th of a second. The sensors output 16 bit color definition with the 100 megapixel back capable of 15-stops of dynamic rage.
Image courtesy of Hasselblad
Connectivity of the H6D was a point of focus with speedy USB 3.0 wired transfer and dual card slots on hand in both CFast and SD flavors. Wi-Fi is also built in to the H6D which is a modern convenience not seen before in Hasselblad’s medium format cameras. User input can be handled on a very contrasty rear display which is touch enabled.As if capturing insanely detailed and massive still images weren’t enough, the H6D is also 4K capable. Af of this writing there is very little that has been said about the way the H6D handles it’s 4k capture.
Those of you interested in taking a H6D for a spin can sign-up to request a demo at www.Hasselblad.com
U.S. pricing and availability is yet to be set in stone. That said, if you have to ask about pricing this system is not likely for you.
The Hasselblad site shows a price sheet: The Hasselblad H6D-50c will cost $25,995/€22,900; the H6D-100c is priced at $32,995/€28,900
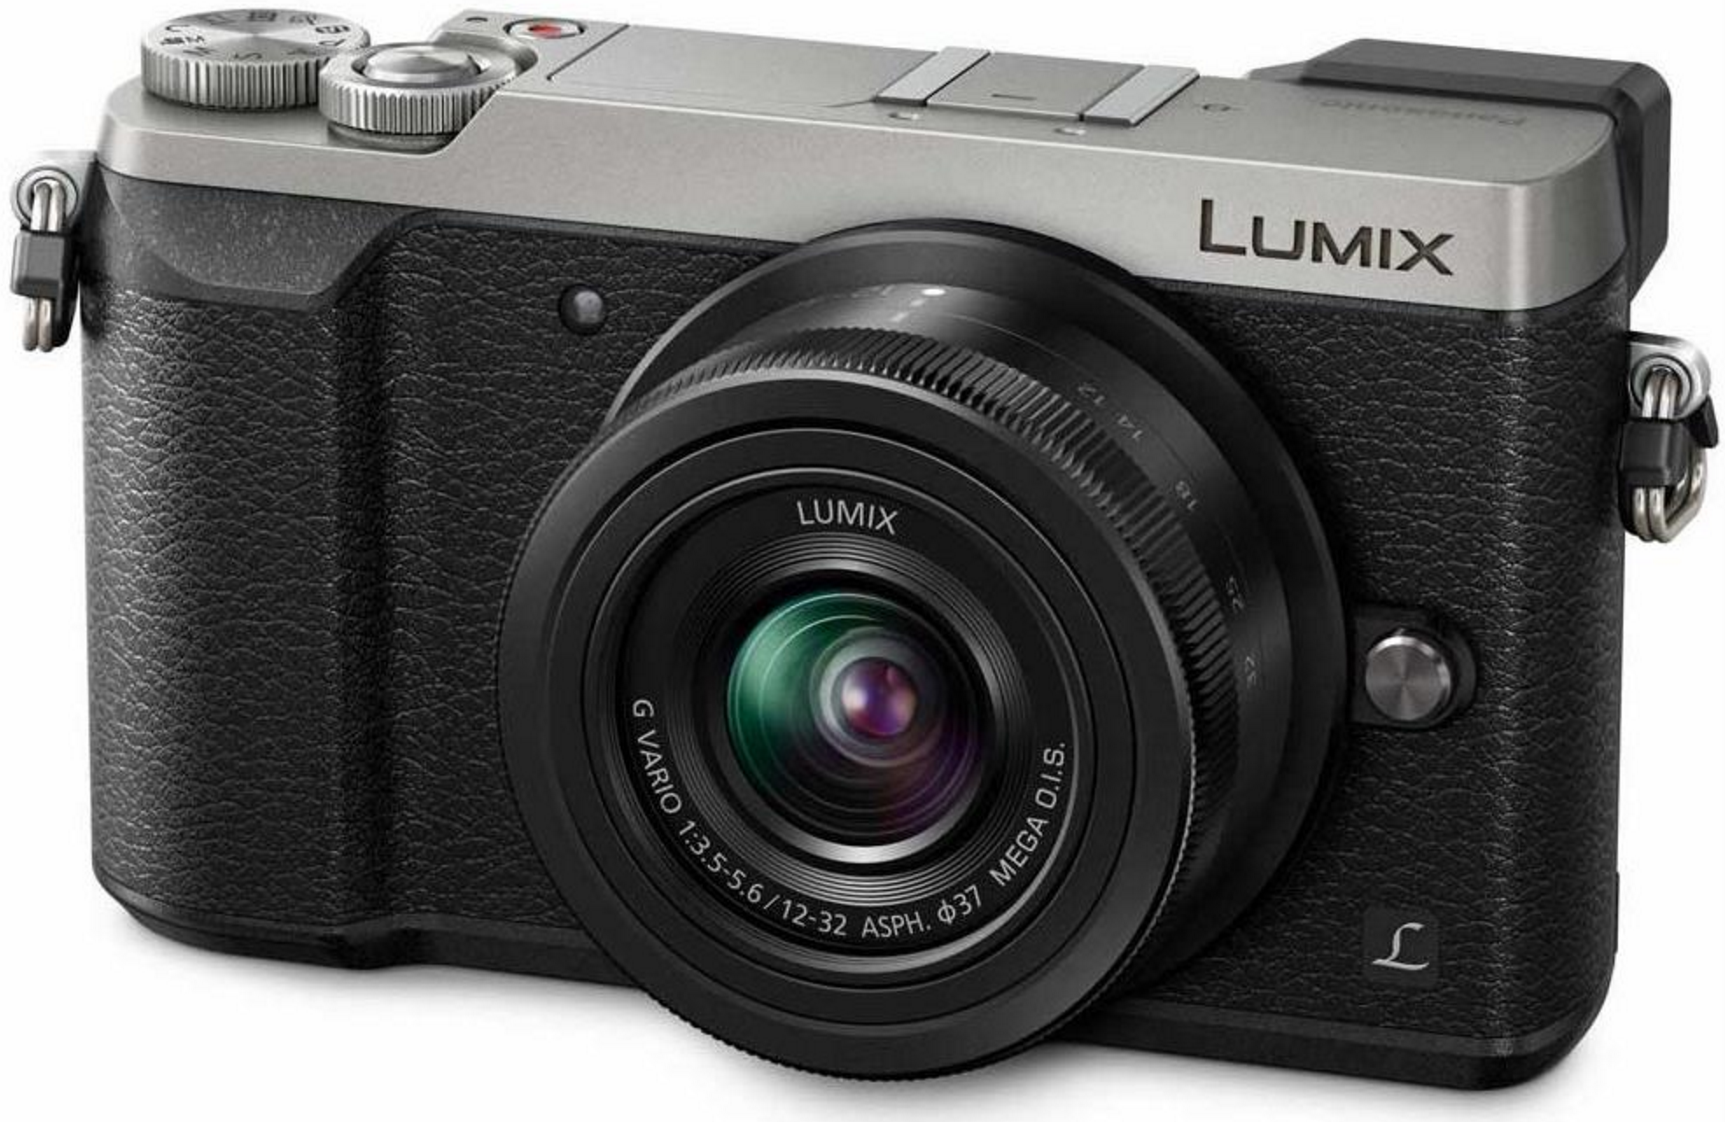
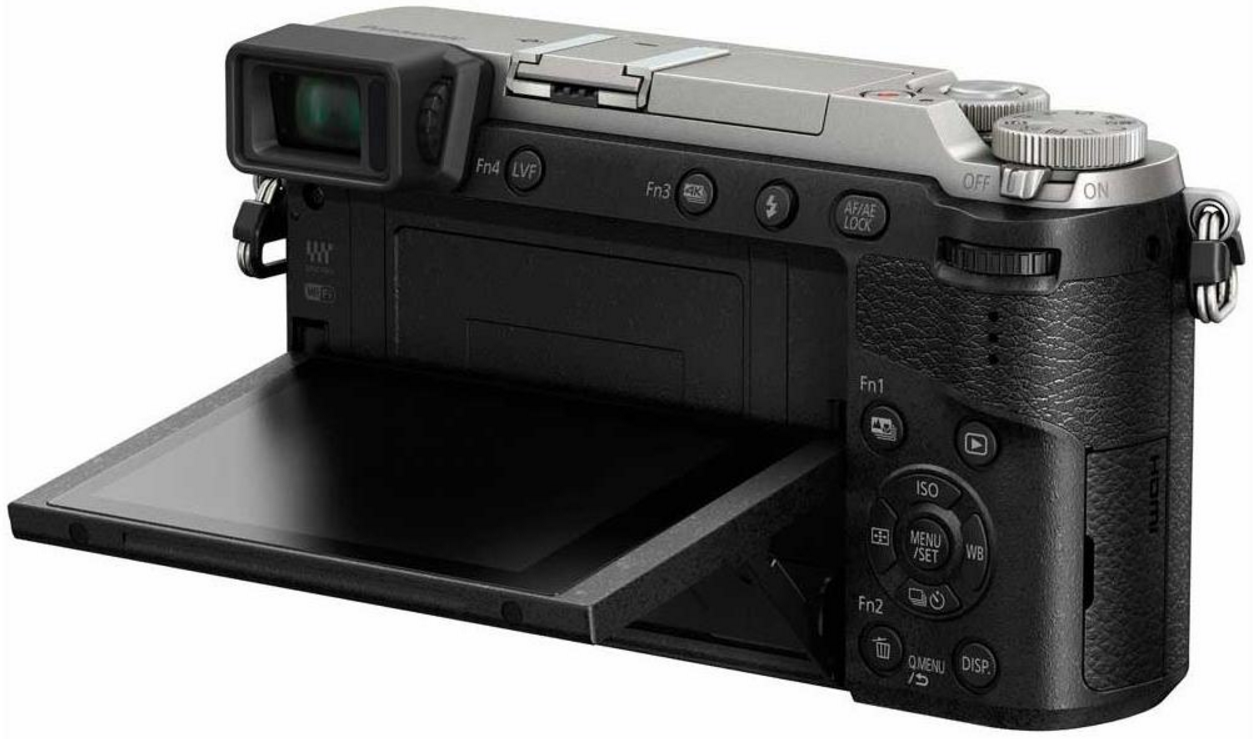
Panasonic has just announced a new camera: the Lumix GX85, an interchangeable lens Micro Four Thirds (MFT) camera.
Spec’d to compete in the mid-range enthusiast market, the interchangeable lens shooter offers a heap of features considering it’s $800 USD price tag. Like most MFT cameras, it has a 16mp sensor. However, the imager drops the anti-aliasing filter, which we’ve found increases sharpness by 15-25%. You’ll get sharper pictures but not bigger files.
Available only as a kit with the Panasonic 12-32mm f3.5-5.6 zoom (24mm to 64mm 35mm equivalent focal range), this compact body sports not only 5-axis in-body stabilization but the ability to stabilize content shot in 4k at up to 30fps. That means you can use unstabilized lenses handheld, for either video or low-light stills. That’s not at all a common feat; you’d need to jump up to the $3,000 Sony a7S II to get 4k recording with in-body stabilization.
Not only is the GX85 4k capable, it also leverages those 4k files to offer an impressive suite of possibilities where still image pulls are concerned. Options like post focusing and aperture bracketing are present, which bring with them some interesting post-shoot correction possibilities. The post focus option is quite interesting and was a feature added via firmware update to previous Lumix cameras. That kind of after-the-sale attention to older models brings with it a level of trust in a brand.
The GX85 ticks a lot of boxes outside of it’s cutting edge firmware, too. The MFT body sports an electronic viewfinder and a tilt screen with touch sensitivity. A pop-up flash is also on board. It’s design allows it to be bounced which is a welcomed touch. In-camera Wi-Fi rounds out a list of impressive features offered by the GX85.
Competition is stiff in this category, and $800 can buy you a good-quality APS-C camera with a bigger sensor and better image quality, such as the mirrorless Sony a6000 or the Canon T6i DSLR. Neither camera can match the GX85’s stabilized sensor or 4K video, however, and MFT shooters are passionate about the wide variety of cross-branded lenses. Time will tell if stabilized sensors and a stable of lenses can beat back the allure of a larger sensor and it’s army of pixels.
The Panasonic Lumix GX85 is slated for a May release and is currently being offered as a kit only.
TL;DR: Finally, a zoom worthy of the amazing a7R II. The combination of the a7R II and the Sony 24-70 f/2.8 GM match the Canon and Nikon equivalents for image quality, and you get the benefits of 4k video, sensor stabilization, a tilt screen, and an electronic viewfinder. If the 70-200 f/2.8 is as good as this lens, pros will be selling their DSLRs.
We’ll have a full video review out soon, but in the meantime, here are our thoughts and some sample images.
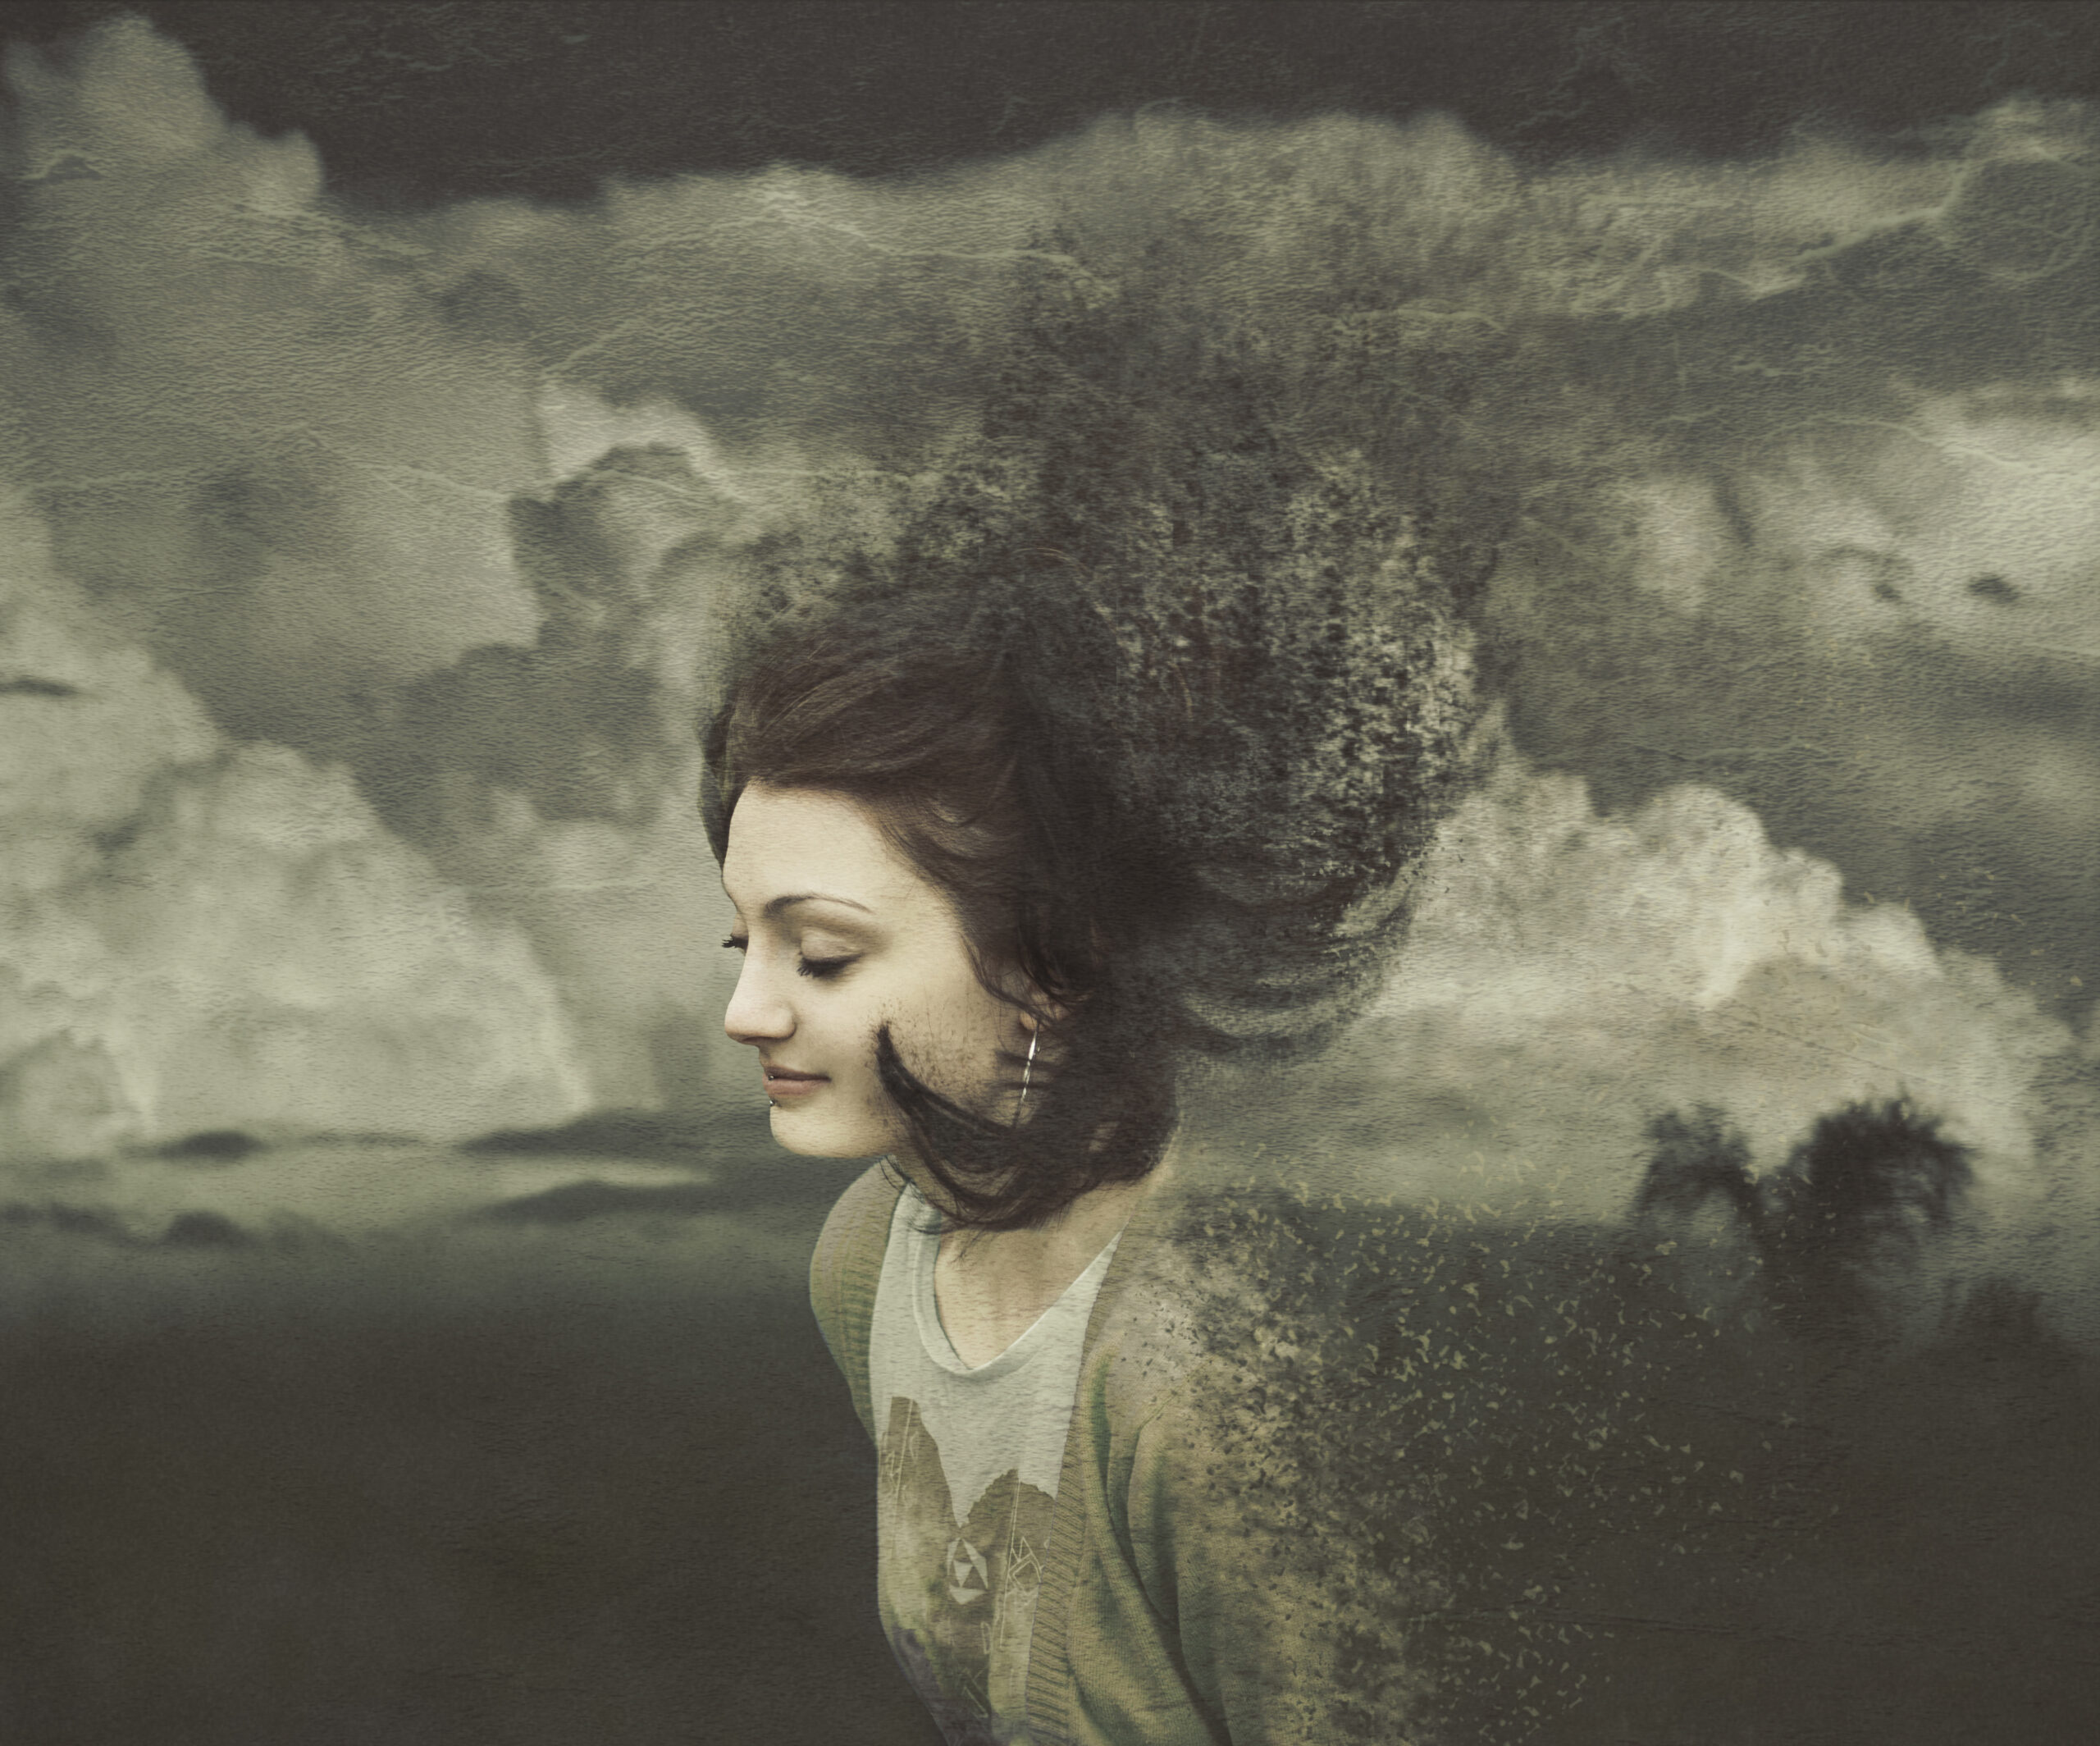
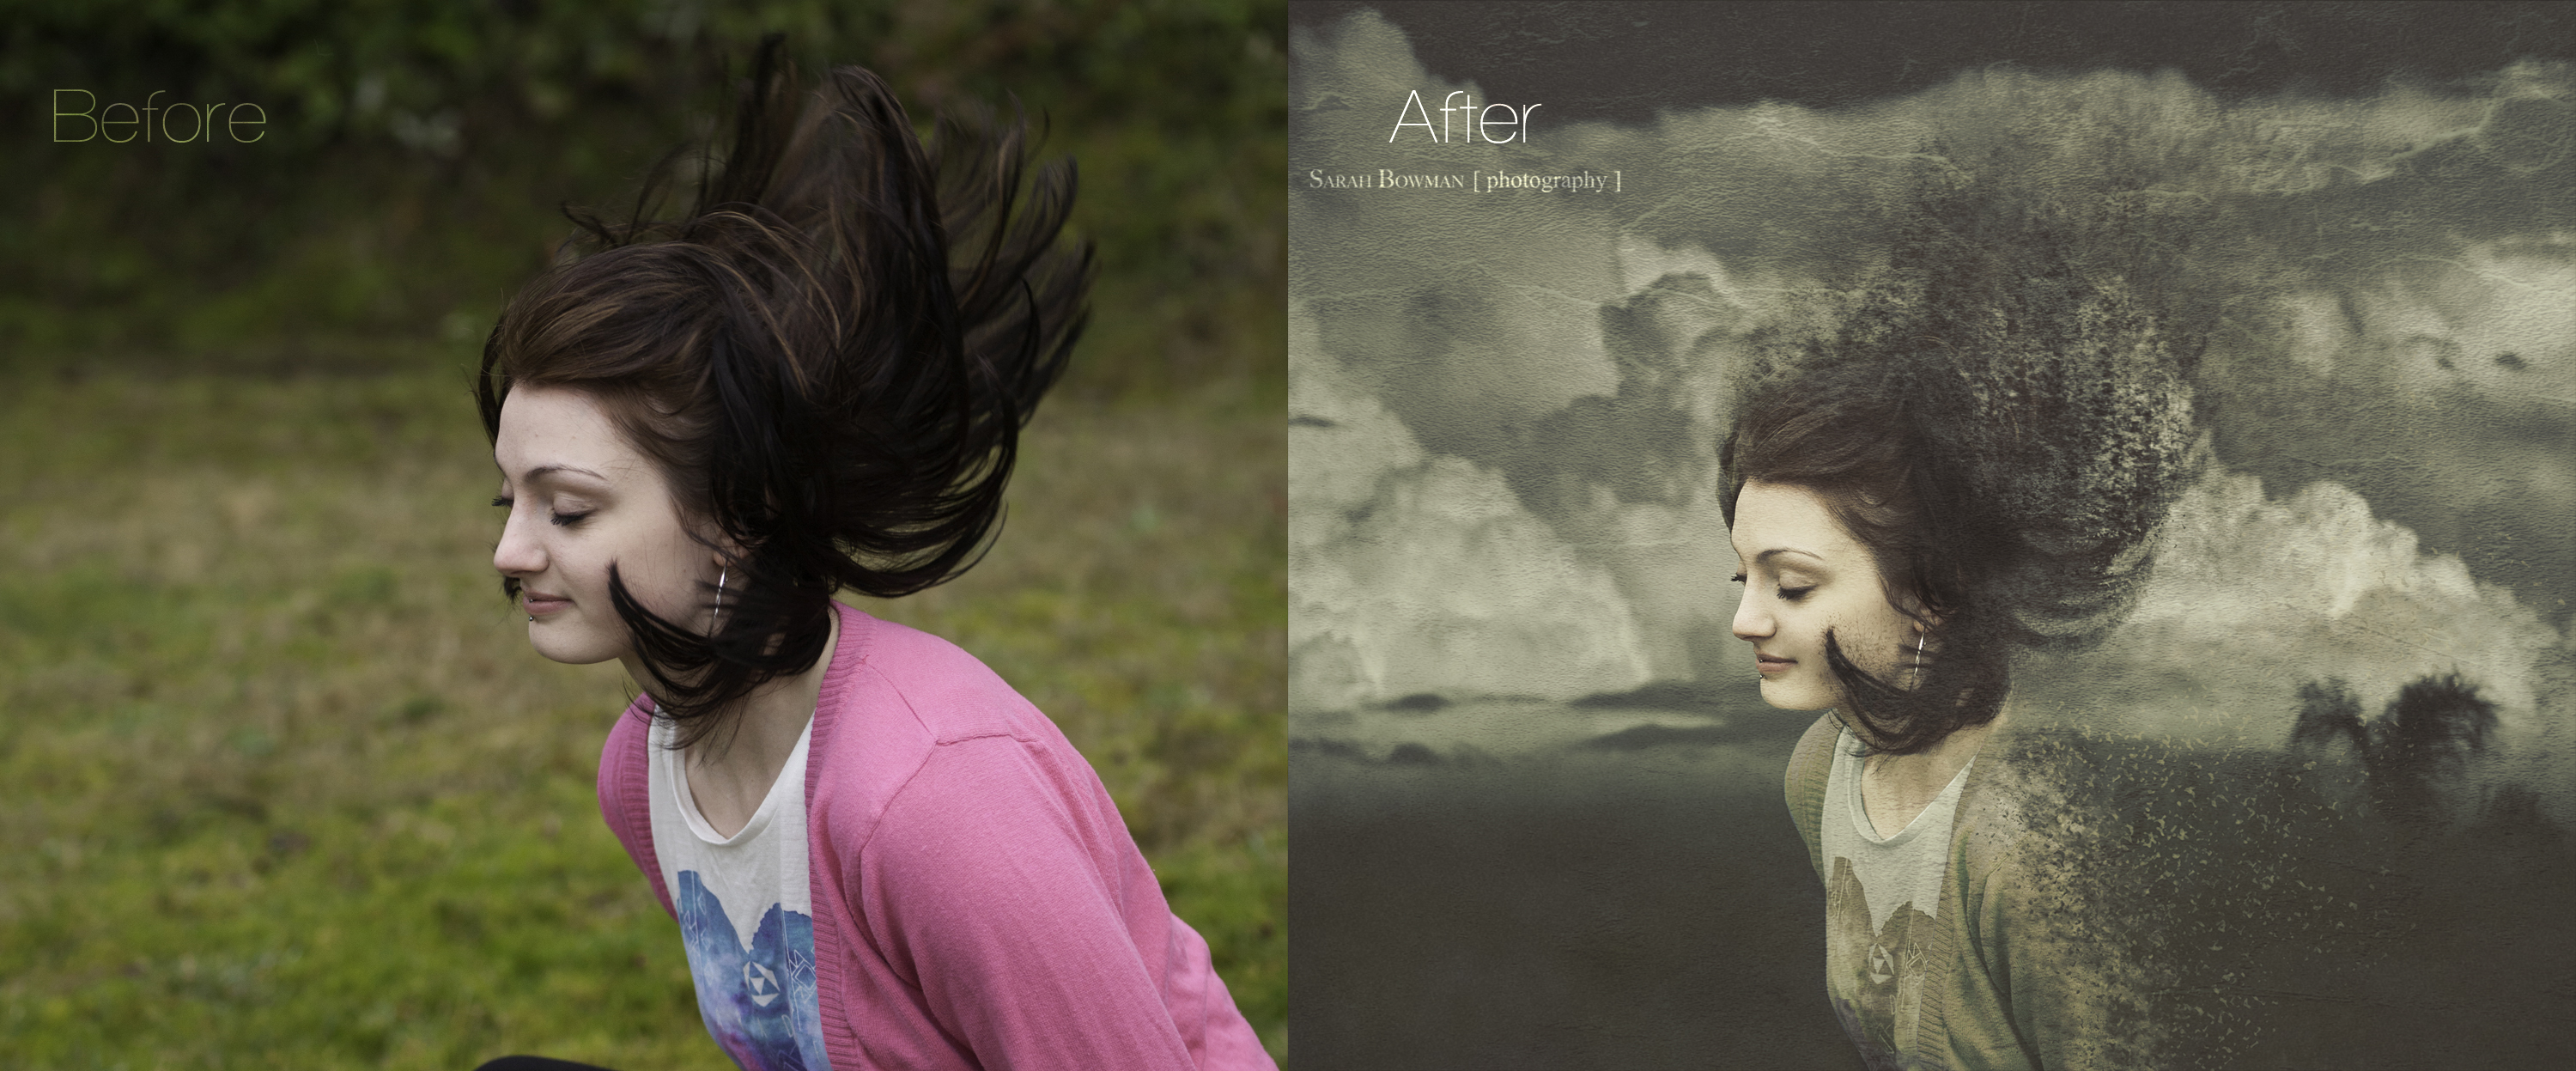
This image nearly ended up in my trash-can; however, I kept on playing around with ideas in Photoshop. Looking at the flow of her hair, I wondered if I could make it look as though she was fading away. The method is surprising simple and doesn’t take that many steps!
It’s always frustrating when you have an idea but either don’t have a handy subject, are too shy to ask, or are just really impatient and want to try it ASAP! This is why self-portraiture is such a great option. Another good reason would be If you are interested in trying a few new techniques but aren’t confident with how it may turn out.