Posted on

Beginner Photography: Night

Wow, you guys. Night photography is incredibly difficult and I love it. Between keeping your camera steady for long exposures, balancing mixed lighting, and simply finding a focal point, I really had my work cut out for me. 

First off, if you want to really get into night photography, read chapter 10 in Stunning Digital Photography. There are so many things that go into making a proper night shot, and so many different types of night photography depending on where you shoot and what your subject is. If you want to do star trails, start with this video:

And there’s a lot more free info on this page of our site.

I live in a city and don’t fancy staying out in the woods by myself to attempt star trails, so that was off my list. And as cool as light painting is, I wasn’t really interested in trying that yet either. So I went for what we have plenty of in the city: lights. As always, I was using my (borrowed) Olympus E-M10 and Lumix 14-42mm. I also borrowed a tripod from a dear and generous friend, as there was no way I was attempting night photography by hand. The first night I went out was a bit after sunset, and it got dark quick. I shot the Ben Franklin Bridge from a pier beneath it and amazingly captured some star constellations in the sky above it! Then I went down to the Philadelphia Water Works behind the art museum to try and get a shot of Boathouse Row, a lovely string of boathouses along the river decked out with Christmas lights. That shoot was… less successful. I didn’t have quite enough reach with my lens, the angle wasn’t great, and it was too dark out to make interesting light in the sky or on the water. Since it was so dark and we were so far from the houses, my shutter speed was crazy slow which made the water look smooth and glassy instead of freezing the motion. Because of this I went out again two nights later and tried again at the blue hour, when the sun had just set. I think this time was a bit more successful, but I still wasn’t thrilled with the results. The angle and distance from the houses just didn’t make a compelling shot.

So here’s what I picked up from my shoots:

  • Be prepared. Dress for the weather, bring a tripod for long exposures (you’ll need them!) and a spare battery (they die quicker in the cold). If you’re in a rural area, bring a flashlight! You don’t want to be messing with your camera in the dark. Also choose your time, setting, and weather wisely. A clear night makes for better shots than any inclement weather or haze.

  • Choose your camera settings in advance. I set my camera to aperture priority, chose a moderate aperture and low ISO to reduce the noise and let the camera set the shutter speed as necessary. The first night I went out I bracketed my shots to get a good range of exposures to work with. The next night I just adjusted my exposure compensation by hand when I felt I needed to. You’ll want your shots to be brighter than you’d think, because you can recover more details when you edit them.
  • Editing is key. Shooting in the city, you get lots of ambient light and your lighting is mixed from all the different light sources. Adjusting the white balance in post is a must. I needed to adjust the crop drastically for every shot (my tripod didn’t have a smooth pan and tilt.)

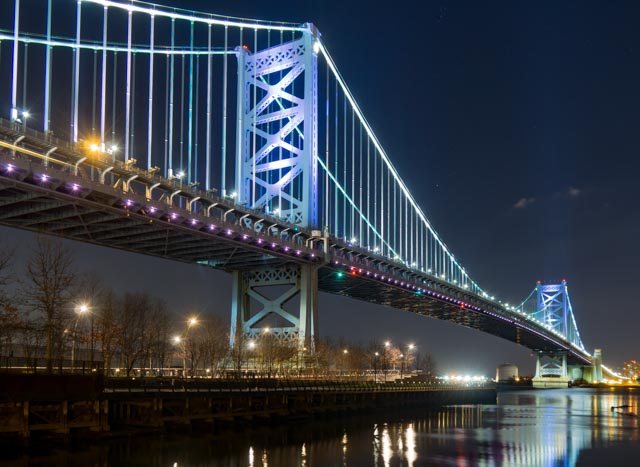
So my first shots were of the bridge, and here’s the one I liked the best:

Not sure if you can see in a jpg, but the big dipper is at the top! 

Now I’ll show you boathouse row on my first shoot vs. my second shoot:
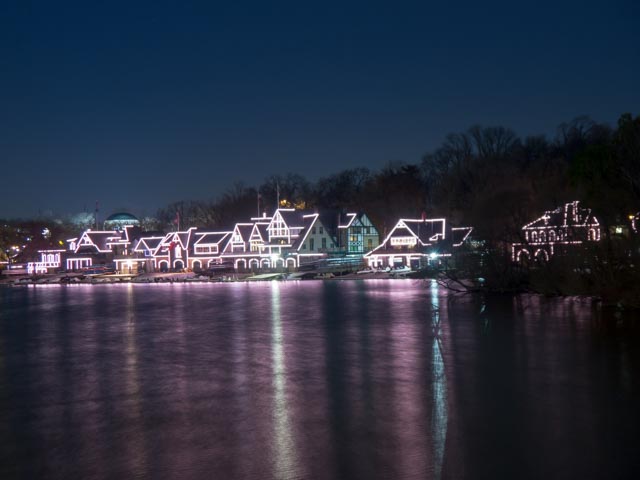
Meh.

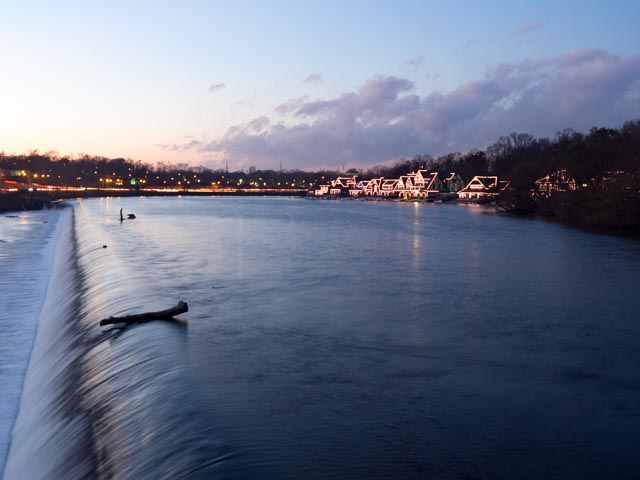
Better? But I still don’t love it.

Here’s a panorama of the Water Works:

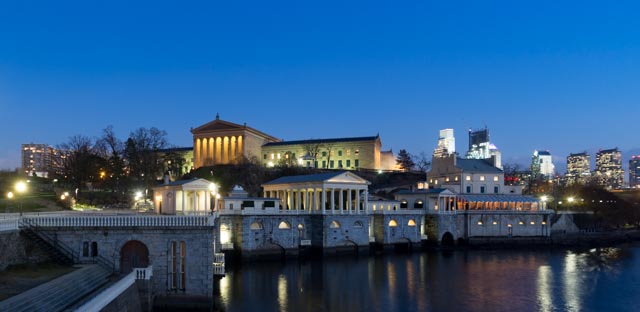
There’s a lot going on here with no real focal point though.


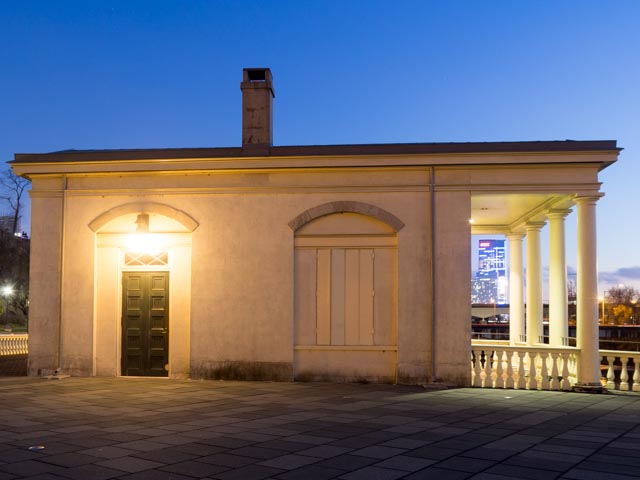
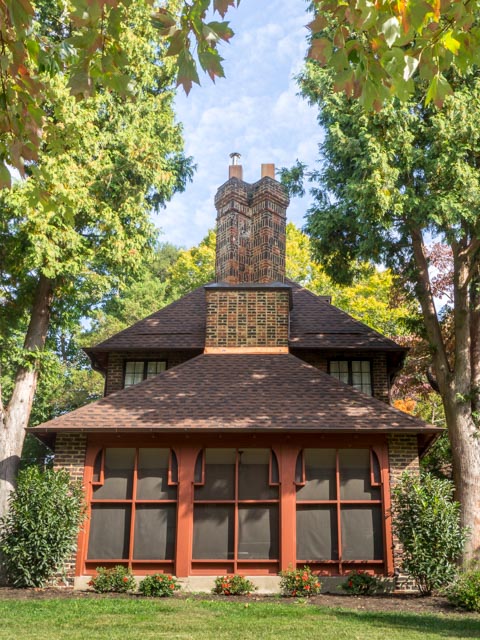
A cute little building with a glimpse of the FMC Tower.


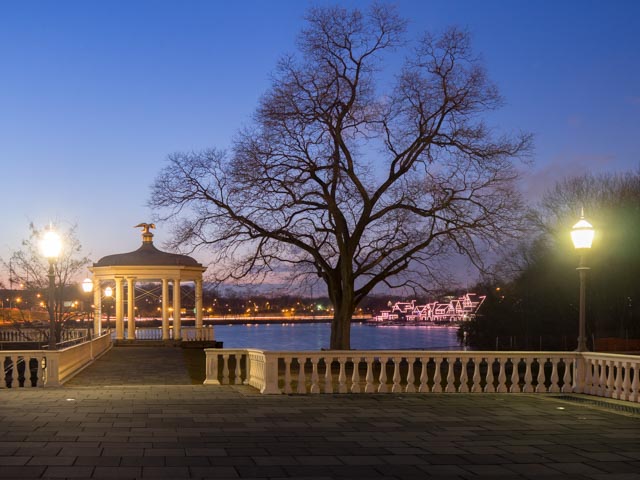
Gazebo, tree, boathouses.
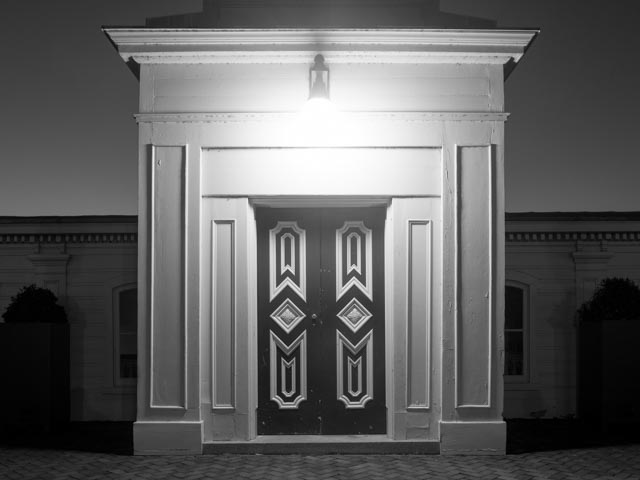
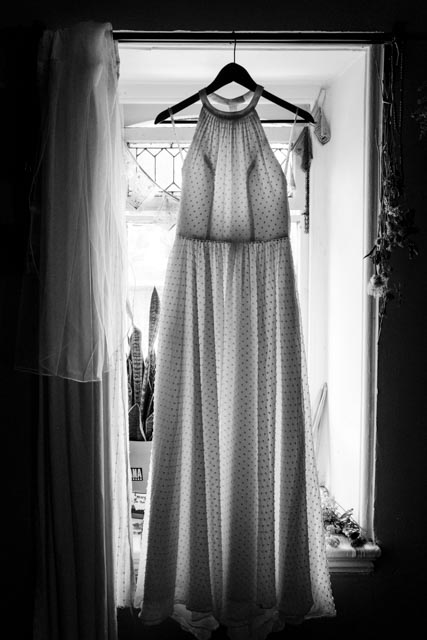
 

Doorway.


So that’s what I wound up with. I think my bridge shot was the most successful, which is a bit disappointing since it was literally in the first 10 shots I took. I really wanted to make Boathouse Row happen, but I just didn’t have a great angle on it. I think I still underexposed most of my shots which is unfortunate. I didn’t rely on my histogram like Tony suggested (always listen to Tony)! But how’d I do? 

I can’t wait to see all your shots during the live show this week with our special guest, Kyle Wolfe!

Posted on

Beginner Photography: Multiple Exposures

Hey y’all! As you may know, Tony and Chelsea are away for a few weeks, leading a photo trip in Thailand. We don’t have a live show this week, so I decided to try a photography project: multiple exposures. If you’ve never done it before, or just need a refresher, watch this great video Chelsea made on two different methods:

I decided I would try both ways and see which worked better. I’m using an Olympus E-M10, which has the capability to do the process in-camera. So this is what you need to do in preparation:

  • choose a subject and a relevant overlay image
  • have your subject backlit to make a silhouette
  • photograph your subject, then photograph your overlay image to show through the dark parts of your silhouette

I tend to shoot opportunistically. I spotted my cat sitting in the window and thought he’d make the perfect subject. An easily recognizable shape and ready-made backlighting. Unfortunately cats aren’t the most obliging models. The window he was in front of was a bit busy, which complicated the image. I decided to shoot his food as the overlaying image. Here’s how it turned out:


I like how it fades to all food at the bottom, but the window frame, yard, and food bowls made the shot more complicated than I’d like.

I got a few more shots like that, none particularly successful. Franklin D. Catsevelt needs some coaching. So next I followed him around and shot him while in front of a different window. I used Chelsea’s method in the above video to make a multiple exposure in Photoshop. This time the background was still a bit busy, so I used the magnetic lasso tool to select him and add him onto a blank, white background before completing the process. 

The edges could use some cleaning up, but that far exceeds my Photoshop skills.

And finally, I got a shot of my beloved dog, Hungry Hungry Hippo. He was sitting nicely on the radiator cover in our front window. The blinds were closed behind him, give a cleaner backdrop than the images of the cat. I did some work to clean up the lines of the blinds before overlaying the food shot.

I think this is my most successful of the three.


And there you have it! My first attempts at multiple exposures. This was a really fun project, I think I’ll try it again with more reasonable models so I can control the background better.

Posted on

Beginner Photography: Actual Wildlife

Hey guys! This past week I was in Connecticut to see my family for Thanksgiving and I got to go out shooting with Tony, Chelsea, Madelyn and Justin. We made a video on shooting wildlife, so keep an eye out for that. We also made it into the local paper!

So I got to do some bird photography with some serious equipment. I borrowed T&C’s Nikon D500 with a 200-500mm f/5.6, and that thing is intense. Shooting with a lens that big is a real adjustment. 

Tony and Chelsea know their wildlife spots, so we went out to Harkness Memorial Park and down to a little inlet surrounded by tall grasses. There weren’t a whole lot of birds out, just some gulls for a while. I practiced tracking them through a bird blind. One of the hardest parts was just getting a bird in the frame while looking through that insane lens. I would zoom all the way out to 200mm just to get the bird in frame before zooming in to 500mm to try and capture it. Holding it still in blustering winds was hard enough just shooting a still subject. I didn’t get anywhere close to getting a moving subject in focus. Thankfully we had an obliging mockingbird who modeled for us as soon as we got there.

Here’s a great video on shooting songbirds:

And another on shooting flying birds:

Half of us had our batteries freeze up or die towards the end of our session, and of course a whole flock of turkey vultures and black vultures came swooping overhead as we were packing up. It was a rare and beautiful sight that I was completely unprepared to capture! Always have a spare battery, kids.

So here’s what I gleaned from my one trip out with our talented teachers:

Research your location

    • There are local bird-watching groups you can join who can tell you where specific species nest.
    • Choose a clear day, hard light is good for widlife.
    • If shooting songbirds, choose your setting, set up your gear and wait.

Bring the right gear

    • Dress for the weather! Gloves, boots, hats and coats were a must for us going out that early on a windy day.
    • Camouflage, netting, and bird blinds all help you get closer without the need for a huge lens.
    • A telephoto lens is the best if you cannot get close. Watch this video for some suggestions.
    • Spare battery!

Camera settings

    • Put your camera in shutter priority so you can adjust for still subjects to moving subjects.
    • Autofocus for moving subjects.
    • Keep your f/stop higher to increase your chances of getting the nearest eye in focus.
    • Use continuous shutter to fire off multiple shots in a row.

 Great model, nice setting, and some pleasing depth of field.


Another angle.


I just love the texture of this little guy’s feathers.


This is the closest I got to getting a moving subject in focus before my battery died.


I had a lot of fun out there. I can’t imagine wildlife will ever be my particular focus, but it was a really interesting practice and I truly appreciate how difficult it is to do now that I’ve attempted it. I did a bit of post processing on all of these shots, mostly cropping in tight (the Tony Northrup way) and checking my white and black points. I could use to do some noise reduction on the background of that vulture shot as well.

So how’d I do for my first time? 

And a final tip, don’t be annoying:

Posted on

Beginner Photography: Not Wildlife

Soooo, this weeks’ live show topic is wildlife. Thing is, we did wildlife a month ago and I wrote a blog post on my attempt then.

Wildlife is a near-impossible task if you are not a dedicated wildlife photographer. It takes time, patience, and the proper gear. None of which I have! I went on a hike with my family this weekend and did not come across any wildlife besides an errant squirrel or a far-away bird. There were a lot of dogs on the trail, mine included, so what little wildlife may inhabit the area avoided us. So I took photos of what I had, which is my family and a beautiful setting.

For whatever reason, every shot I liked I wound up converting to black and white. My family was wearing bright colors which were distracting, and even though there were some nice fall colors in the trees, the sky and water both looked murky. 

I focused on the backlighting of the sun behind the kids when we were at the stream, which cast some interesting shadows. I think I was able to capture some of the joy of a warm late-fall day, moments of peace in a tumultuous time.

Trail shadows 


I cannot figure out how to separate my black dog from the background


I love the ripple in the water and the motion of her hand


A pause in motion


Soft glow


Girl in flight


I’m gonna be honest, this did not feel like a successful shoot. But I had a hell of a week and this was a moment of brightness. Please let me know what you would have done differently with these shots. 

Also, I’ll be in CT starting tomorrow, and I’m be going out to shoot some real wildlife with Chelsea, Tony, and Justin! So I’ll have some actual wildlife work to show for myself. Keep an eye out!

Posted on

Beginner Photography: Wedding

You guys! This is a big one. A few months ago I got the honor of being a second shooter for my friend’s wedding, assisting my very talented friend and wedding photographer, Carina of Love Me Do Photography. Our friends, Rick and Nicole, got married in the backyard of their huge community house in Germantown, Philadelphia. The wedding was quirky and fun and I wanted to do my best to capture their unique personalities. 

So the second shooter for a wedding has different responsibilities from the primary shooter. If you have Stunning Digital Photography, there’s a whole chapter on wedding photography which includes a very helpful checklist for what you need to prepare for before shooting a wedding. I used it and I highly recommend it. As the secondary shooter I was responsible for shooting details of the space, the groom and groomsmen preparing for the ceremony, candid shots of the wedding party and guests, and the all-important reaction shots of the groom, family and guests. I’ll show you examples of all of these below.

I can’t speak too much on the preparation before the shoot as I was not part of that, but it is integral to meet with your couple before hand and make a list of what shots they need, posed and otherwise, and what events will happen throughout the day that you need to be prepared for.

For this shoot, Carina lent me her Canon 5D Mark III with a 24-70 lens and a Canon 600 external flash. After the wedding, she gave me .jpgs of the best shots I took, so I did some editing on them, but they aren’t as intricate edits as I would have attempted with raw files.

Details:

It is important to capture parts of the wedding that make it special. Keep your eye out for the little details and decorations that the family put so much effort into.

The bride’s bouquet


These adorable pins of the bride and groom were the wedding favors

A glimpse of the groom’s socks

Getting Ready:

The primary shooter will most likely shoot the bride getting ready. She’ll get shots of the wedding dress, shoes, rings, etc. 

Requisite tie-in-the-mirror shot


Waiting for photos

Posed Photos/Candids of Posed Photos

The primary will do the majority of posed shots, but you can get the moments in between where you can catch some great moments of joy and nervousness.


Fun family photo

Goofy groom

Ceremony

The ceremony is the time to get shots of as many of the guests and family members as possible. It is important to capture the important people in the couple’s life and their moments of shared joy. Make sure to be present for the important reaction shots like the guests seeing the bride for the first time, the wedding kiss, and the reactions of the guests to those moments. 

Waiting to enter the ceremony

Here comes the bride

Guest reactions to the bride

Husband and wife

Celebration

Reception

The reactions of the parents of the couple are very important to capture, as well as the dance of the mother of the groom and the father of the bride. Not all weddings will follow these traditions, but find out in advance which of these will appear so you can be prepared to shoot them.

Surprise guest

Reaction shots to the toast

Bride and groom dance

Father of the bride dance

Mother of the groom dance

This was such a great experience. I would highly recommend offering your services to a professional photographer if you aren’t one yet yourself. I took thousands of photos and got a handful that I am really proud of. It was a long and physically strenuous day (I didn’t consider how much I’d be crouching and running around!) and the experience was invaluable. 

Posted on

Beginner Photography: Candid Family

Hey there! This week the topic for the live show is “candid family photos” which is right up my alley. So, this isn’t really a formal genre, but it certainly follows the rules of some other more established topics like street photography. It’s all about capturing the mood and expression of your subjects, giving the viewer a “slice of life” view.

You’ll notice most of my photos in this post are black and white. That’s because I’m photographing children, who tend to wear bright colors, and I’m shooting in my house and outside which have distracting elements. Converting photos to black and white helps to focus the viewers attention and eliminates distractions.

While most of my family moments would realistically include the TV or cell phones, I managed to capture my daughter goofing around on the couch, and her and my stepson outside playing with my neighbor’s grandkids. It’s hard for me to objectively know which of these images are successful. This topic is more sentimental than many, and I can’t help but judge these images on my feeling towards them and the emotions they elicit more than the technical aspects. These certainly don’t have the sharpest focus, but I tried to capture movement and expression above all else. I used low f/stops (which aren’t actually that low since I’m using a micro 4/3 camera) and auto ISO and shutter speeds.


My regular weekend view.


This is pretty much the essence of Eloise; pretending to be a cat.


I love this one. The expressions, the movement. The car and post make an unfortunate background though.


Gleefully collecting leaves to throw in the air


Rule negotiation.

So how’d I do? What could I have done better? I wish I’d gotten some sharper images of the kids throwing leaves (I didn’t post any here because they weren’t great) but I still have trouble balancing my shutter speed and exposure. Time to revisit the basics!

Can’t wait to see what you all come up with this week!

Posted on

Beginner Photography: Spooky

Guys! This was a fun one. I paid my daughter, Eloise, in candy to come out with me and take some photos, because kids are creepy as heck. Styling, setting, and mood are very important for setting a spooky scene. I put her in a vintage dress and hair bow and put brown eye shadow around her eyes and on her cheek bones to make her look emaciated. I also put cover-up on her lips to make her look paler. She wound up looking quite ghostly.

I had a place in mind to shoot, a condemned church in our neighborhood that would fit the old-timey vibe of her costume. We went out around sunset so that it would be a bit darker out to suit the mood. I would have shot later, but I don’t have an external flash and my camera isn’t the best in low light situations. You’ll see that the images came out pretty noisy, luckily it didn’t much matter with the mood of the images. 

The one thing I regret is not putting her in different shoes. The shoes she wore are really modern and I had intended on having her take them off, but then didn’t want her standing in sticks with her bare feet. The styling is so important though! Something modern looking in a photo that is meant to look antique will take the viewer out of it. Pay attention to detail! Eloise is not great at smiling for the camera, so she was kind of perfect for this shoot. There are so many old buildings in the area that served for great settings. Here’s what I came up with:

I positioned her with the date of the building to add context. I also used a radial filter to blur the area around her for mood. I converted all the images to black and white and pulled down the reds and oranges to lighten her skin. The dress wound up far brighter than the rest of the scene, so I pulled down the highlights.

pa301253

I loved the little chair sitting by the building, along with the slope of the ground. I positioned Eloise coming towards the camera and nearest the right of the frame to have her uncomfortably entering the viewers space.

pa301265

I wanted a shot of her in front of the Danger sign, although it messes up the timelessness of the scene a bit, the signs are obviously current. But look at that vacant stare!

pa301270

This is probably my favorite. The leading lines up to her, the darkness in the trees behind and her creepy stance.


How’d I do? Did I successfully creep you out? 

Posted on

Beginner Photography: The Right Light

Hey folks. This weeks topic is “the right light”, which is pretty open to interpretation. What makes the perfect light is different for every subject. The perfect light for a portrait is different than the perfect light for landscapes which is different than the perfect light for a still life, etc. What I focused on was the perfect light to make a shot worth capturing. The right light can transform everyday subjects into something that captures your attention and draws the eye. Obviously, photography doesn’t exist without light and being able to manipulate light to properly expose an image. But sometimes light itself can be your focal point, be it a well-placed sun or backlighting used to create interesting shadows. I went out shooting yesterday with some ideas in mind, but some of the images below are older shots where the light just made it.

Capturing the perfect light can take planning; setting up lights for a portrait shoot or waiting for the golden hour for landscapes. The Photographer’s Ephemeris is a great resource to plan your shots around natural light. Often times, though, it’s just being in the right place at the right time and paying attention.

I took this shot almost exactly a year ago, and when looking through my photos it caught my eye. Tony is backlit and the light is perfectly illuminating the snow globe, which is reflected in Tony’s glasses.

Peep that “Stay Focused” shirt

This shot was taken at a wedding I was second-shooter for a few weeks back. The wedding dress was hung in front of a window, backlit to illuminate the shape and texture of the dress.

Note that so far, all of these are black and white shots. Black and white helps to focus your gaze, highlighting the shape and texture of your subject and making the light and shadow the focus. 

I took this of the shadows on our front porch. I’d taken shots of it before, but without the right light I could only capture the heart cut-outs and the vines, not the repetitive shadows on the ground. 


This I took yesterday when I went out looking. I knew that in our local park there were a few trees with yellow leaves still clinging on. I positioned the sun behind it so that the leaves would light up.


And this one I’ve posted before, but it is easily one of my best images. And captured with my cell phone! The light is breaking through the trees, perfectly illuminating a lone trunk and casting it’s shadow off-frame.

Those are my picks for the week, I can’t wait to see all of yours tomorrow. What are your tricks for capturing the best light?

Posted on

Beginner Photography: Architecture

Hey folks! This week we’re tackling architectural photography. I have to admit, I wasn’t sure the difference between architectural photography and real estate photography. For our purposes here, there really isn’t much of one. The difference between the two mostly has to do with its purpose and marketability. While real estate photography is meant to be temporary (it is only intended to sell real estate and must be up-to-date,) architectural photography can be timeless. It is meant to capture the essence and aesthetic sensibilities of a structure and show them in it’s best light (often literally.) You can see one of Tony’s videos on shooting architecture here, which I watched before going out shooting.

I certainly didn’t have any light set-up while I walked around my neighborhood, and I didn’t have any fancy gear like tilt-shift lenses. But I had the late-day sun and bracketing, so I worked with that. I use an Olympus E-M10 with a Lumix 14-42mm 3.5-5.6 lens, not the ideal set up for architecture, but it’s what I’ve got. I shot with a high f/stop and bracketed my shots. I then merged them in Lightroom (you’ll for sure see some chromatic aberrations in the trees from the process. I’m not that advanced yet!) Tony suggests using Photomatix if you can, it makes the HDR process pretty seamless.

Alright, enough talk, here’s what I wound up with:

Look! HDR doesn’t have to be gaudy!

I used a graduated filter to bring up the exposure on the house but leave the sky untouched

There seems to be a lot of chromatic aberration in this one, unfortunately.

Black and white was the way to go for the beautiful light and shape of these posts

Ah, this one I want to like, but I can’t seem to get the crop right. What would you do?

I’m in love with my neighborhood and had been meaning to photograph it for a while, so I have a feeling I’ll try more architectural photography over time. I want to capture the beauty that I see here every day.

So those are just a few of literal dozens I took this week. What do you think? Where was I successful and where did they fall flat? 

A reminder that this week our show is on Wednesday at 1pm EST! See you there.


Posted on

Beginner Photography: Wildlife

Hahahahhaha oh man you guys, wildlife photography is not something you can just take up for a day. This stuff is serious. If you want actual, helpful wildlife tips, please visit this page of our site and learn from a real photographer, because what will follow here is just tomfoolery. 

I do not blame myself for my failure this week. Wildlife photography takes the proper gear, knowledge, and lots of time and patience. I have literally none of those things. Not to mention, it’s Autumn in a city. All we’ve got are squirrels.

To take proper wildlife shots, it helps to have a lens with reach, so you can take close shots without actually getting close. You also need a spot where you can sit still and let animals get acclimated to your presence, camouflage and a bird blind would help you blend in and get closer. If shooting birds, choose a background and wait for them to come to you. Keep shooting the same spot until a bird comes into the space. A flowering tree and direct sunlight makes for a great setting.

So here’s what I attempted (and failed) to do:

  • lure wildlife into my backyard with bread (my dog ate most of it)
  • go to a park and stalk squirrels
  • walk around my neighborhood hitting up all the best gardens hoping to catch birds

So birds, smartly, avoid my yard. I have a big dumb dog. If I go out back and let him out, he scares everything away. If I don’t let him out, he whines and barks at the door, scaring everything away. So my baiting was a bust.

Next I went to the closest park. There were plenty of squirrels running around, but the adjective “squirrelly” exists for a reason. I generally shoot in aperture priority, but that seemed like a bad call with this fast of a target, so I switched over to shutter priority. That… didn’t work either. I wound up with VERY dark pictures of squirrels in trees. So then I just shot in automatic. Here’s the result:

Sigh. A blurry head and a sharp tail.

You guys. That is actually the best photo I got out of, I dunno, 50? I went home dejected, scanning gardens on the way. 

Right by the steps up to our porch we have a butterfly bush, which two weeks ago might have gotten me shots of a monarch butterfly or two before they migrated. As it was, though, I was left with some bees.

Not great, it’s not facing me so I didn’t get the eye in focus

Once again. Got that butt though.

I like that I got it cleaning it’s antenna, but I seem to have focused on the back leg

So all in all, the bees were my most successful attempt, and those probably count as macro. I certainly don’t have the equipment for that either, but they made a far better subject than the squirrels. I also had a great backdrop in the butterfly bush and direct overhead lighting.

Bonus: here’s a picture of my cat, indoor wildlife.

Hi Frank!