Posted on

Beginner Photography: Street

Hey y’all. Here’s the second of my two-parter of my trip to San Francisco. I went knowing that the topic of street photography would be covered a few weeks later, so I made it a point to take some shots I wouldn’t normally. I’ve been shooting with the Olympus E-M10 and a Lumix 14-42mm 3.5-5.6 which is a good, discreet little set up for street shots. The screen in the back flips out, so you can take shots without looking like you are.

Street photography is a very loose concept. All it needs to entail is a person and the space they exist in. It is often candid, but street portraits are also a subset of street photography. (Street portraits take a boldness I don’t quite have yet, but maybe I’ll tackle that another time.) Now, the fact that street photography is vague doesn’t mean it’s easy. It takes a lot of consideration to bring a photo of people from a snapshot to an image of interest. Here are a few ways to do that.
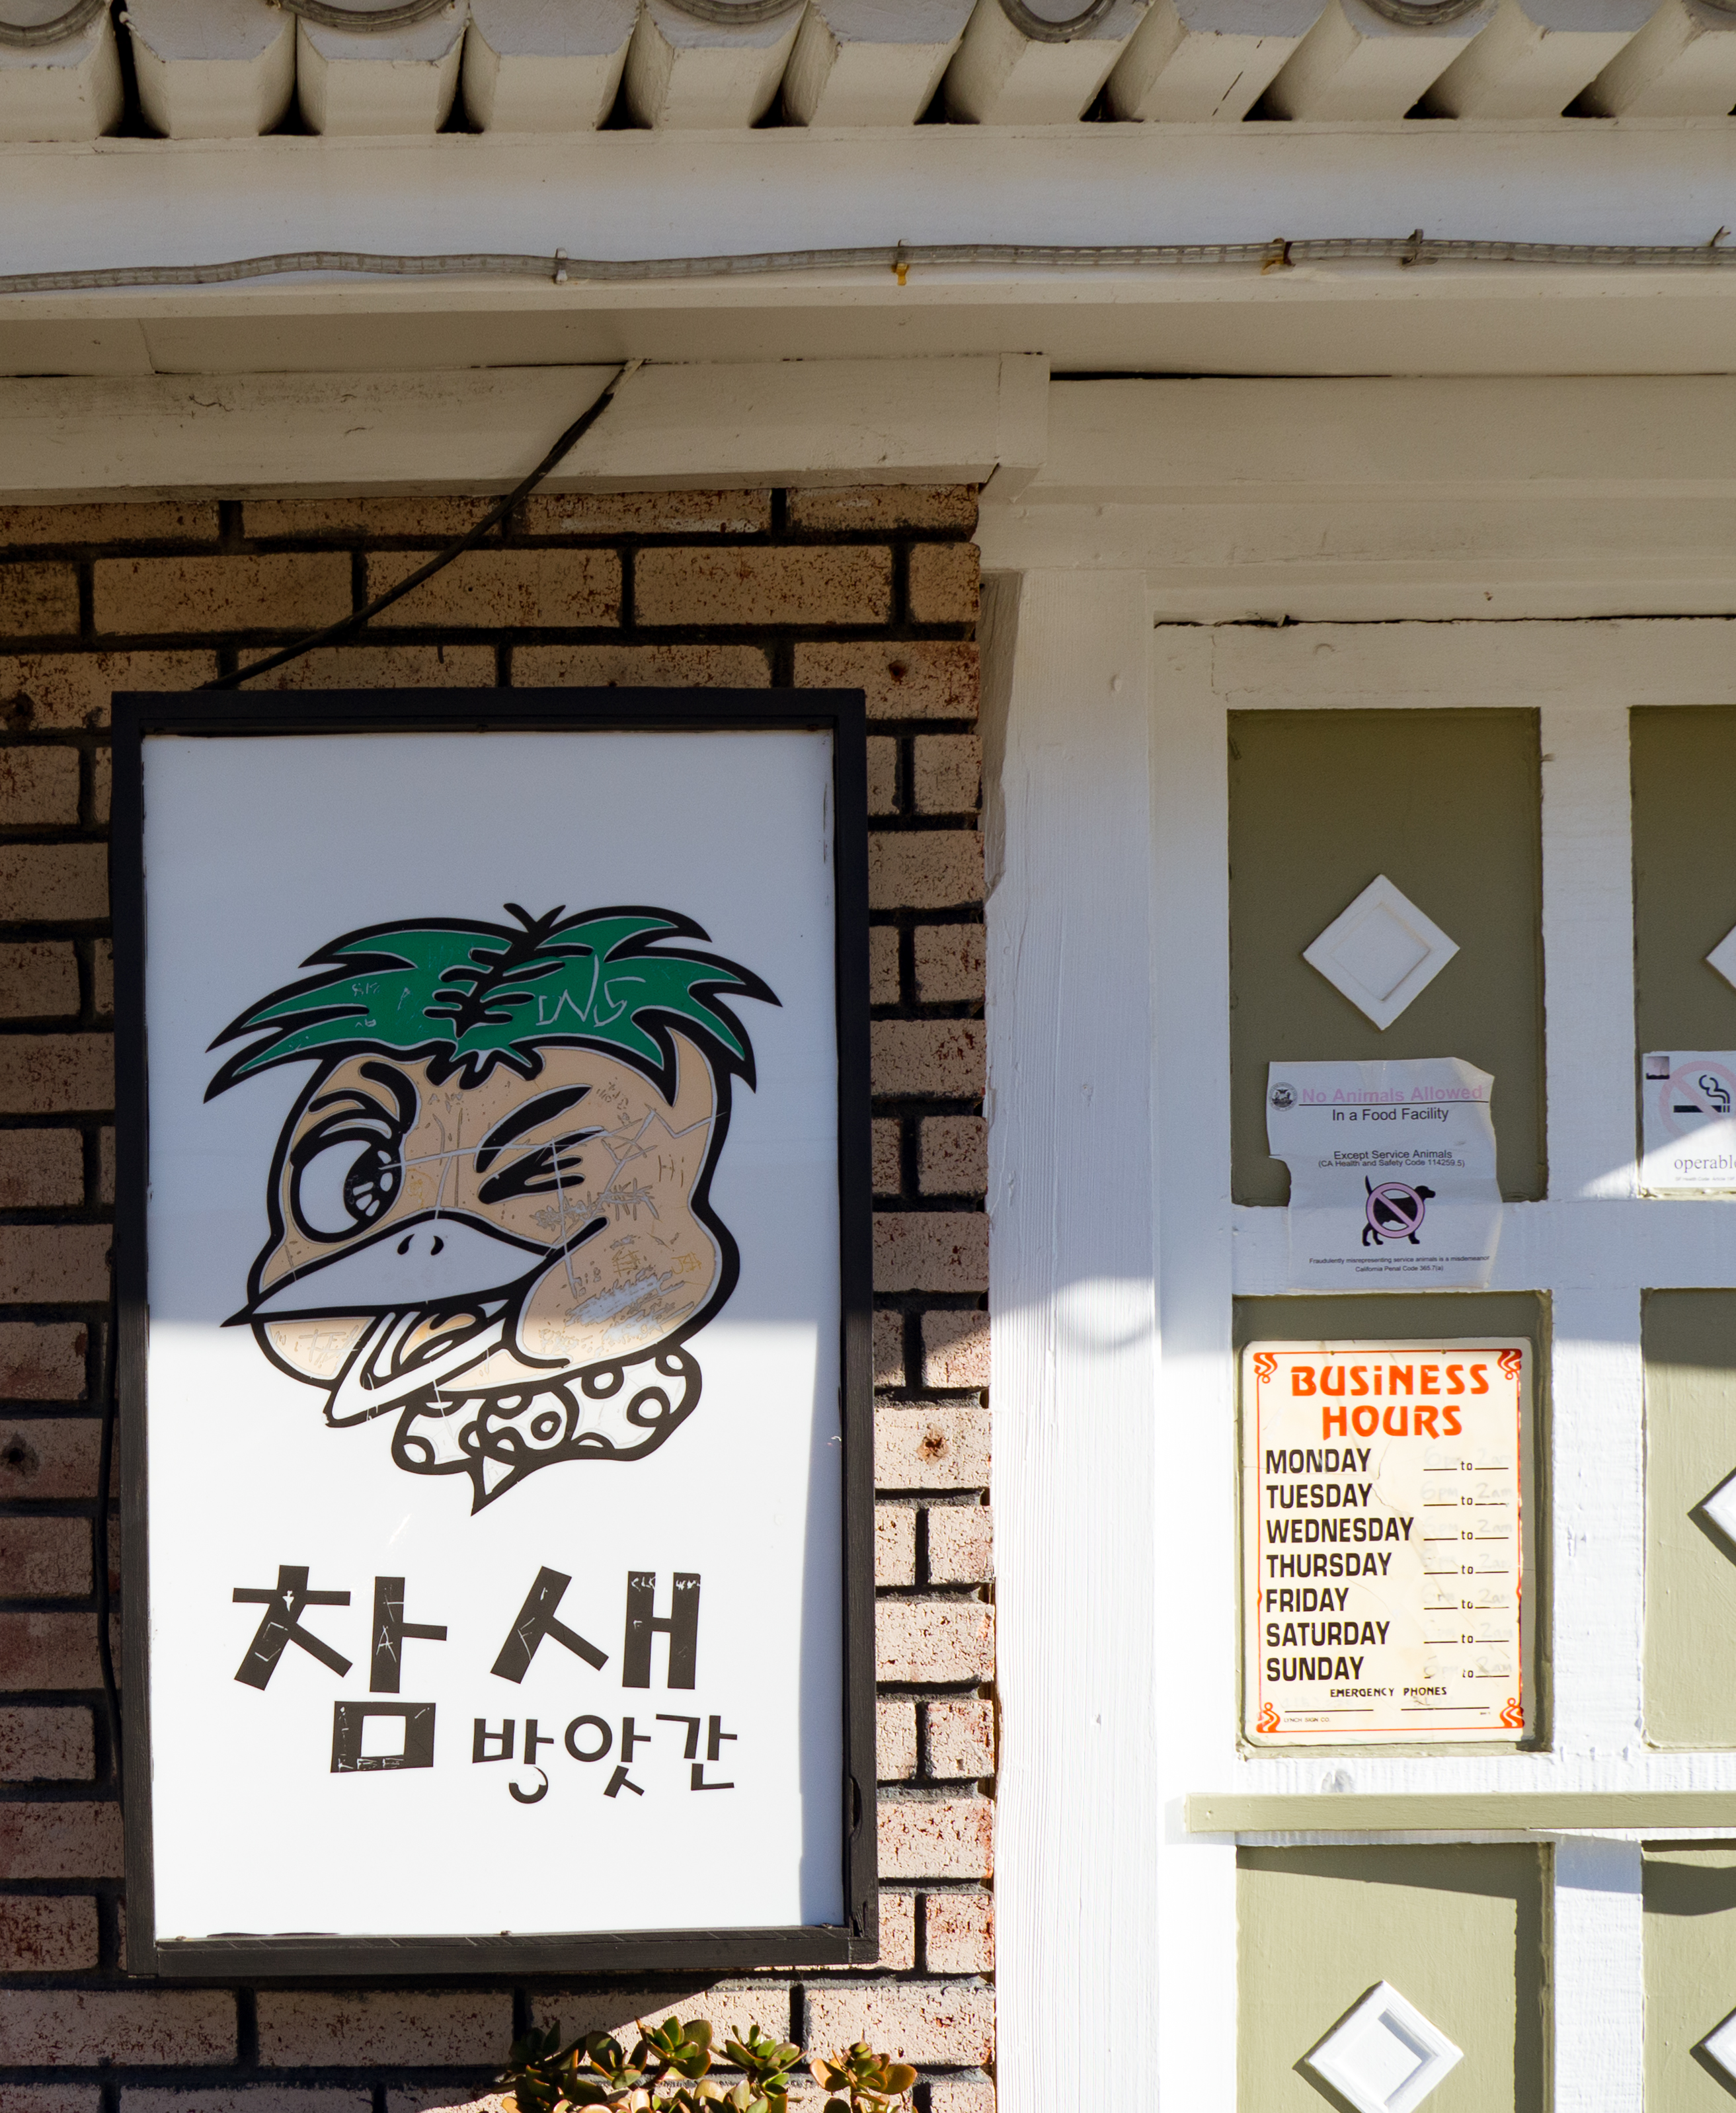
First: Backdrop

I found that scouting out a good backdrop and sitting at an outdoor cafe was a good way to stealthily get shots of passers-by, like this one:

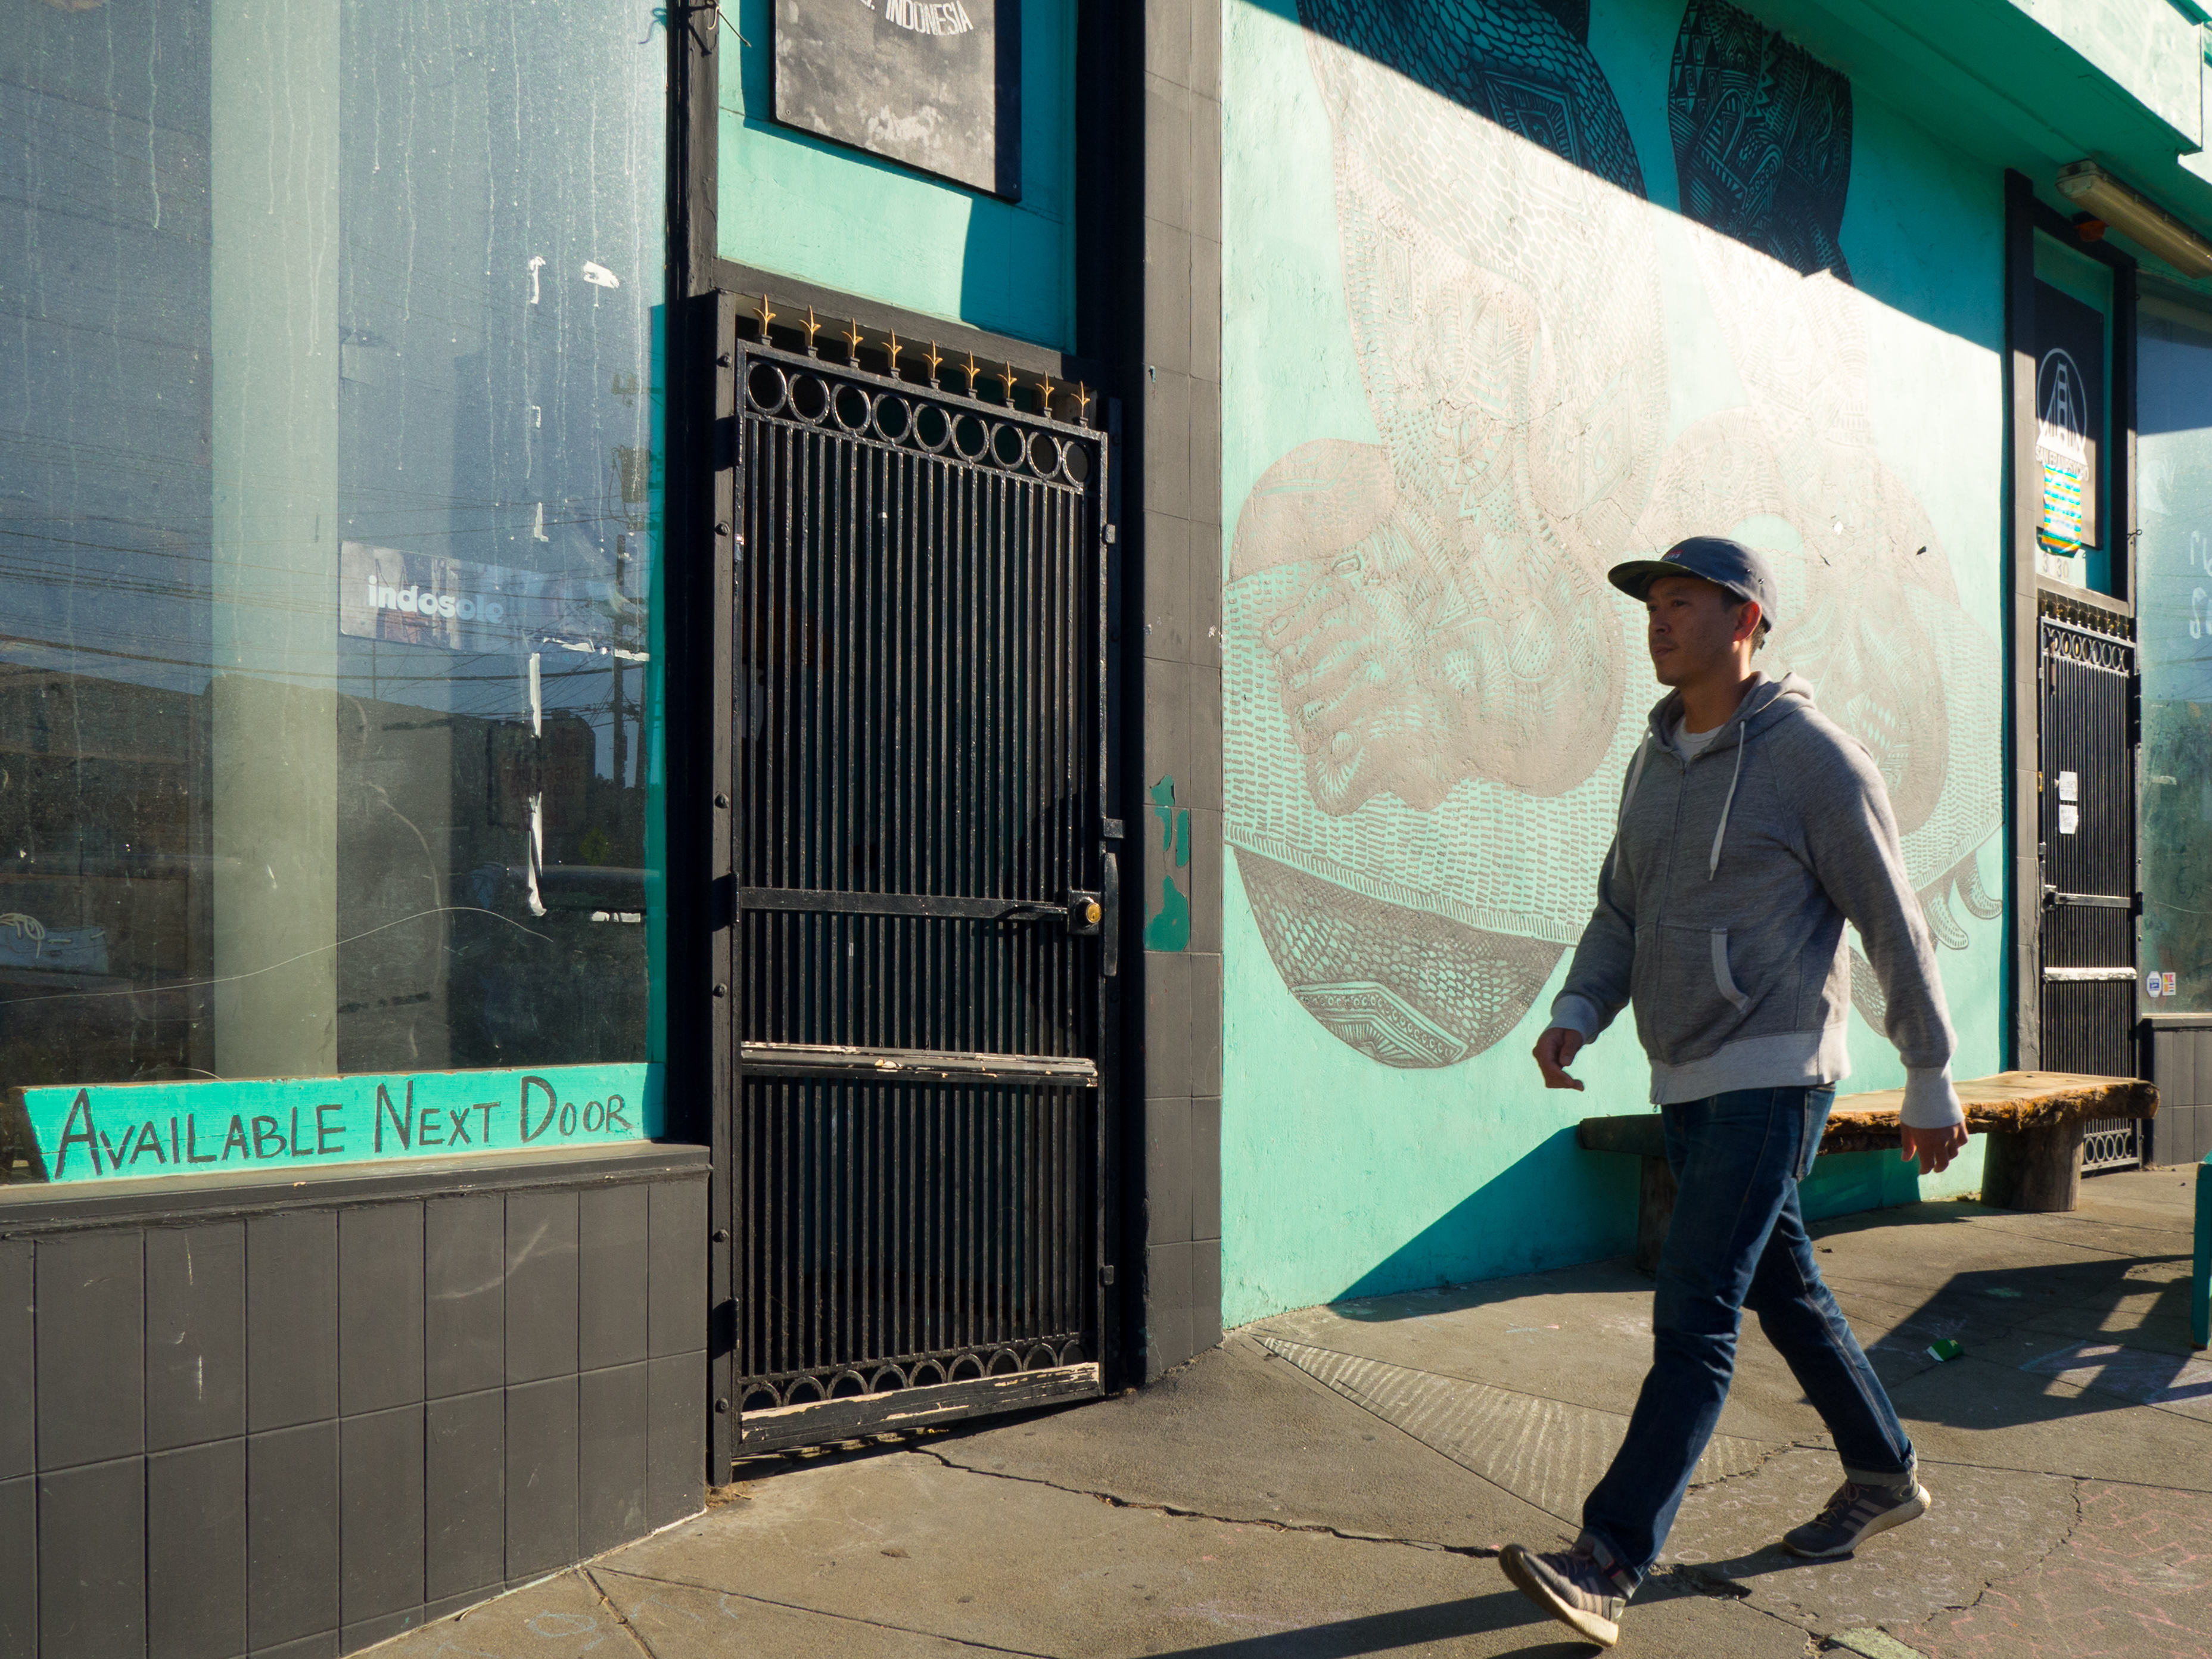
I had a hard time getting people’s faces in focus. I was more concerned about not getting spotted when I started out, but got more bold as I went.

You can take photos of your backdrop before a person walks into frame, and then just keep shooting once they walk past. Most of the time they won’t notice you’re shooting at all, or if they do and pause to not walk into their shot, you can just wave them through. 
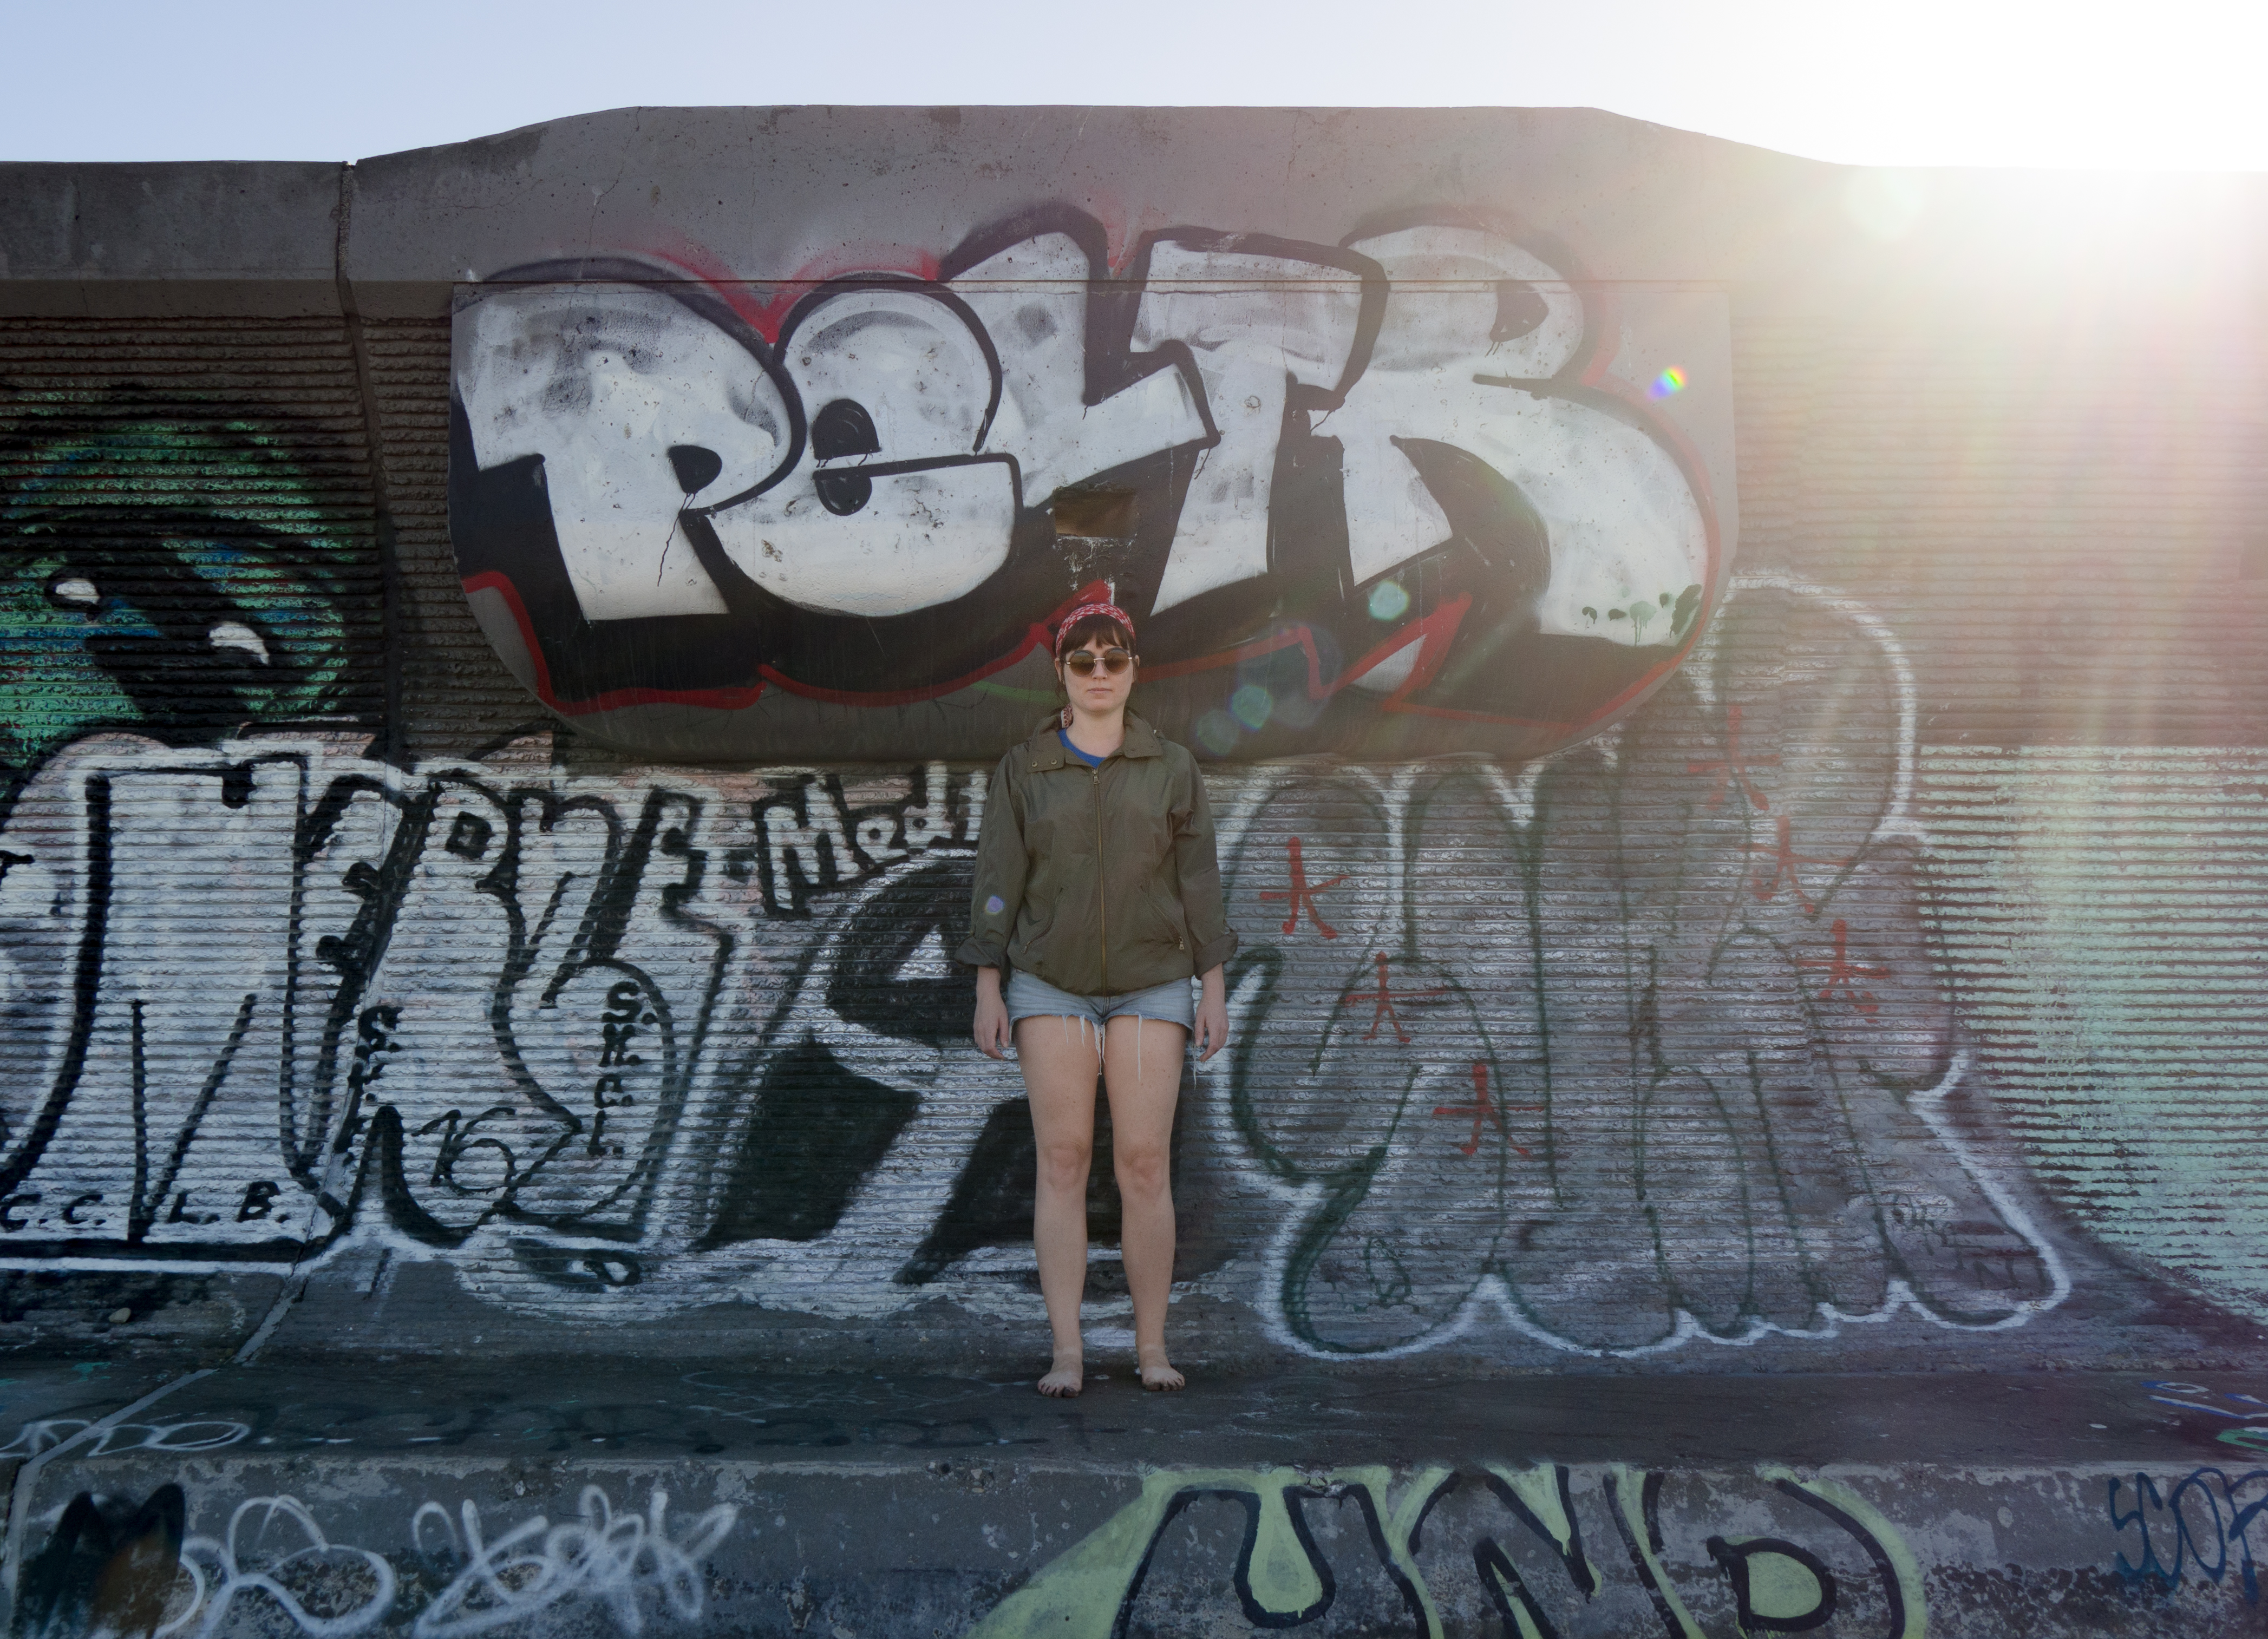
Second: Interaction 

One thing that makes people an interesting subject is their interactions with each other. Try to capture a moment between people, be it a simple conversation or a touch.

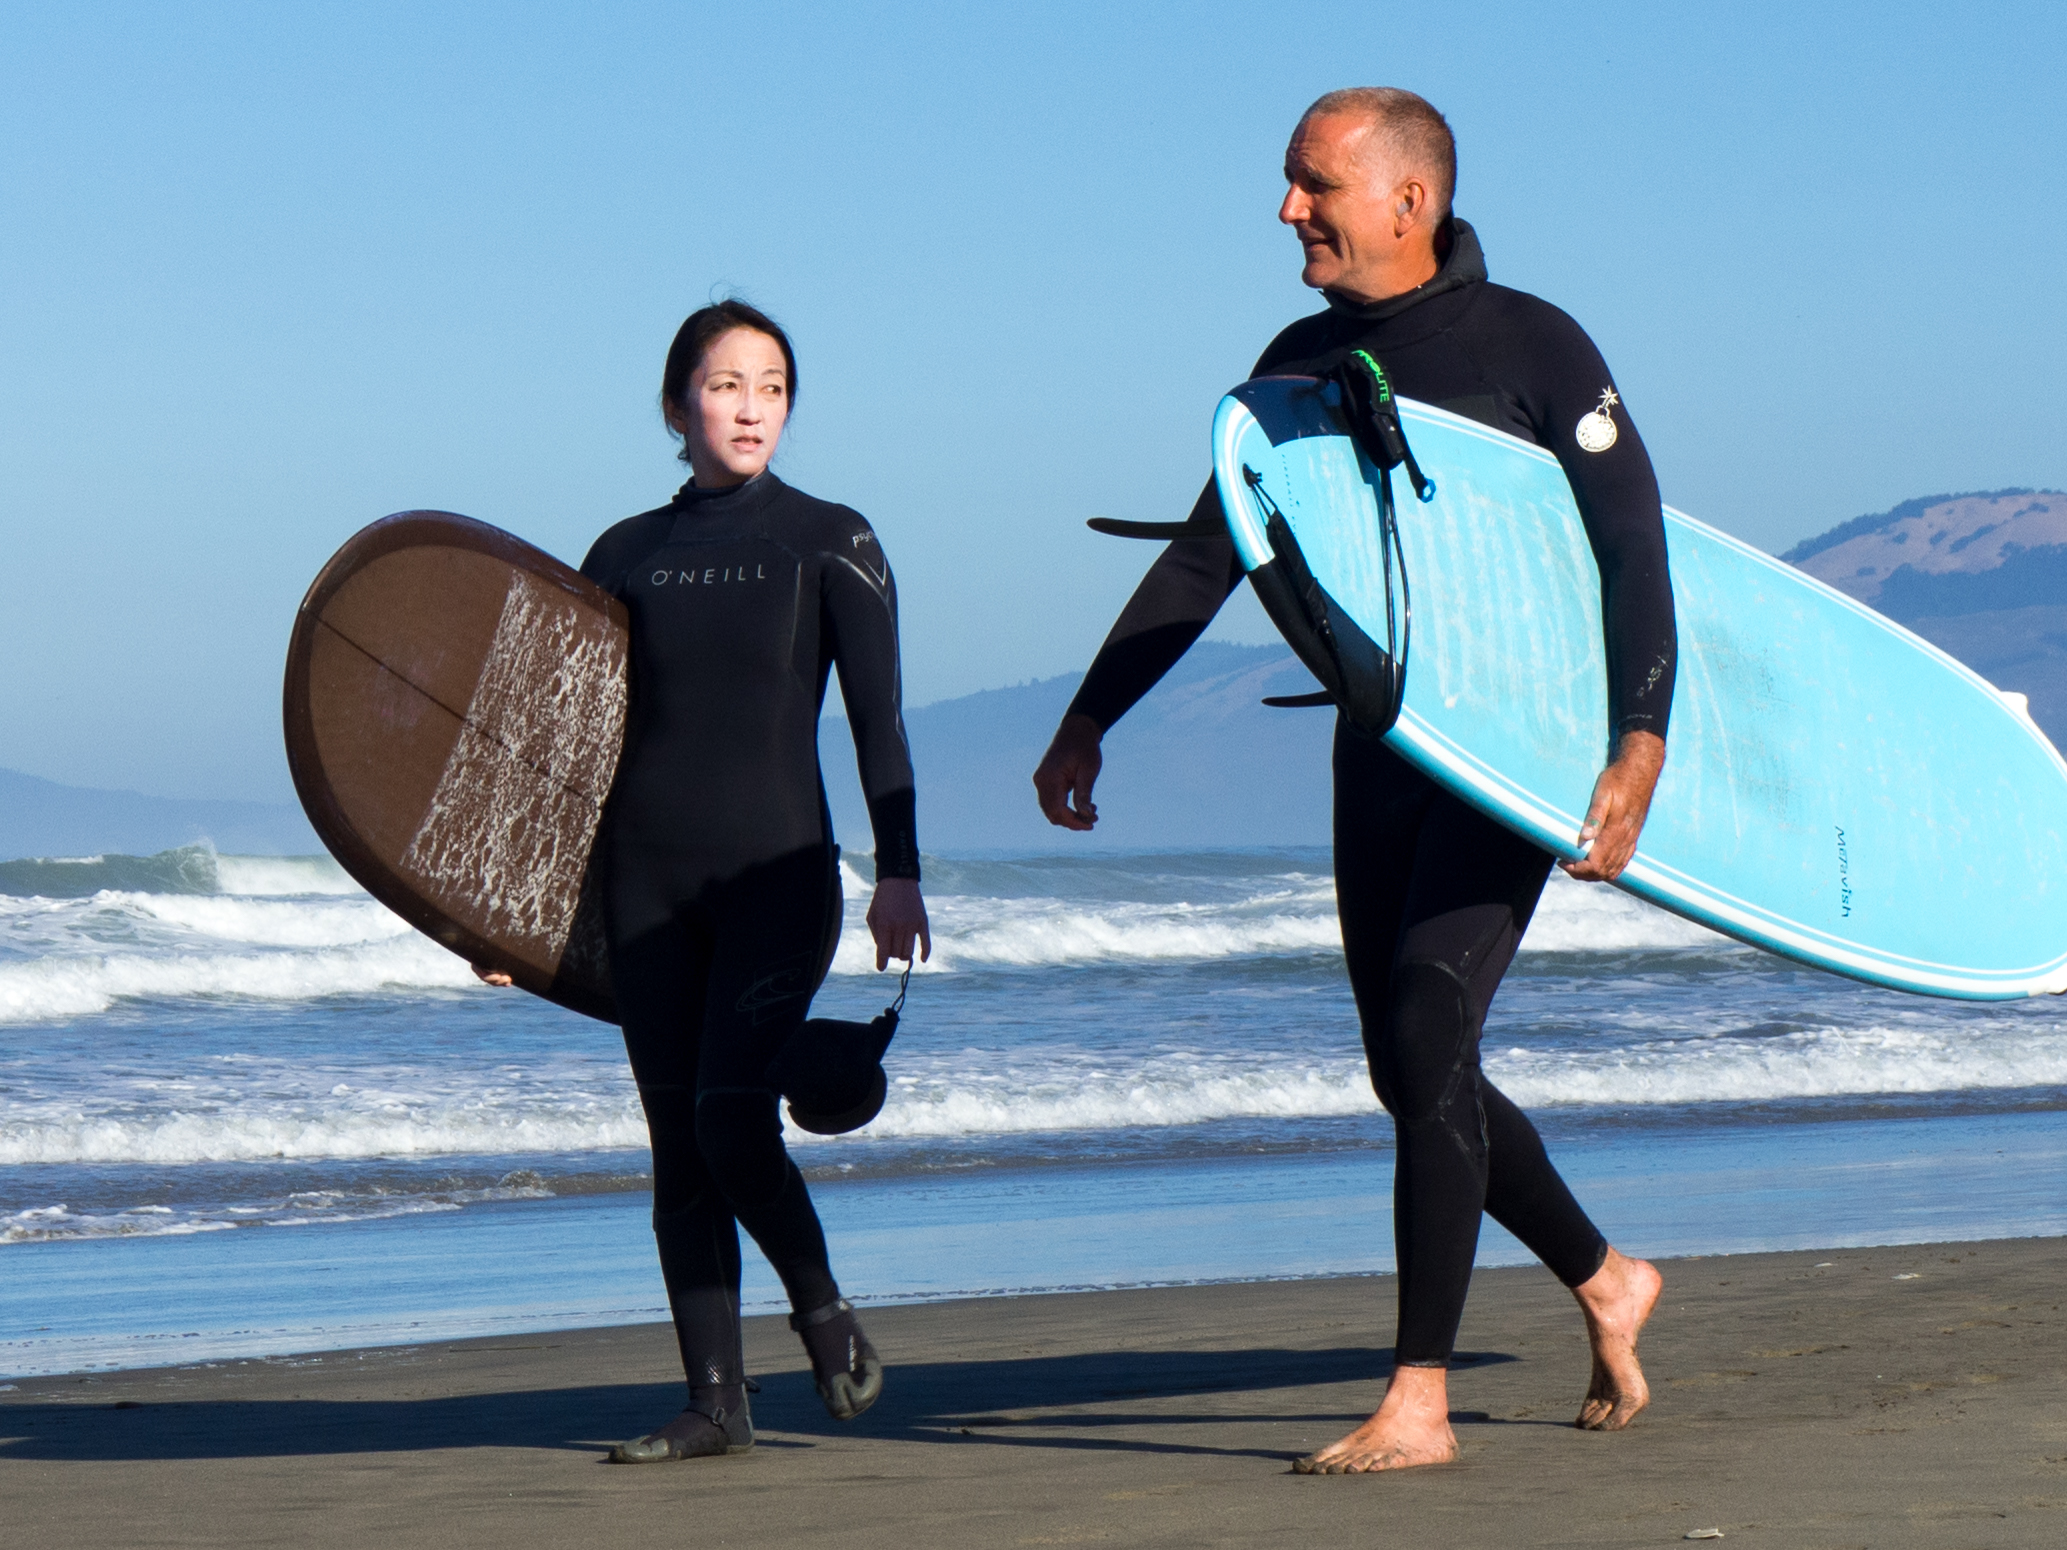
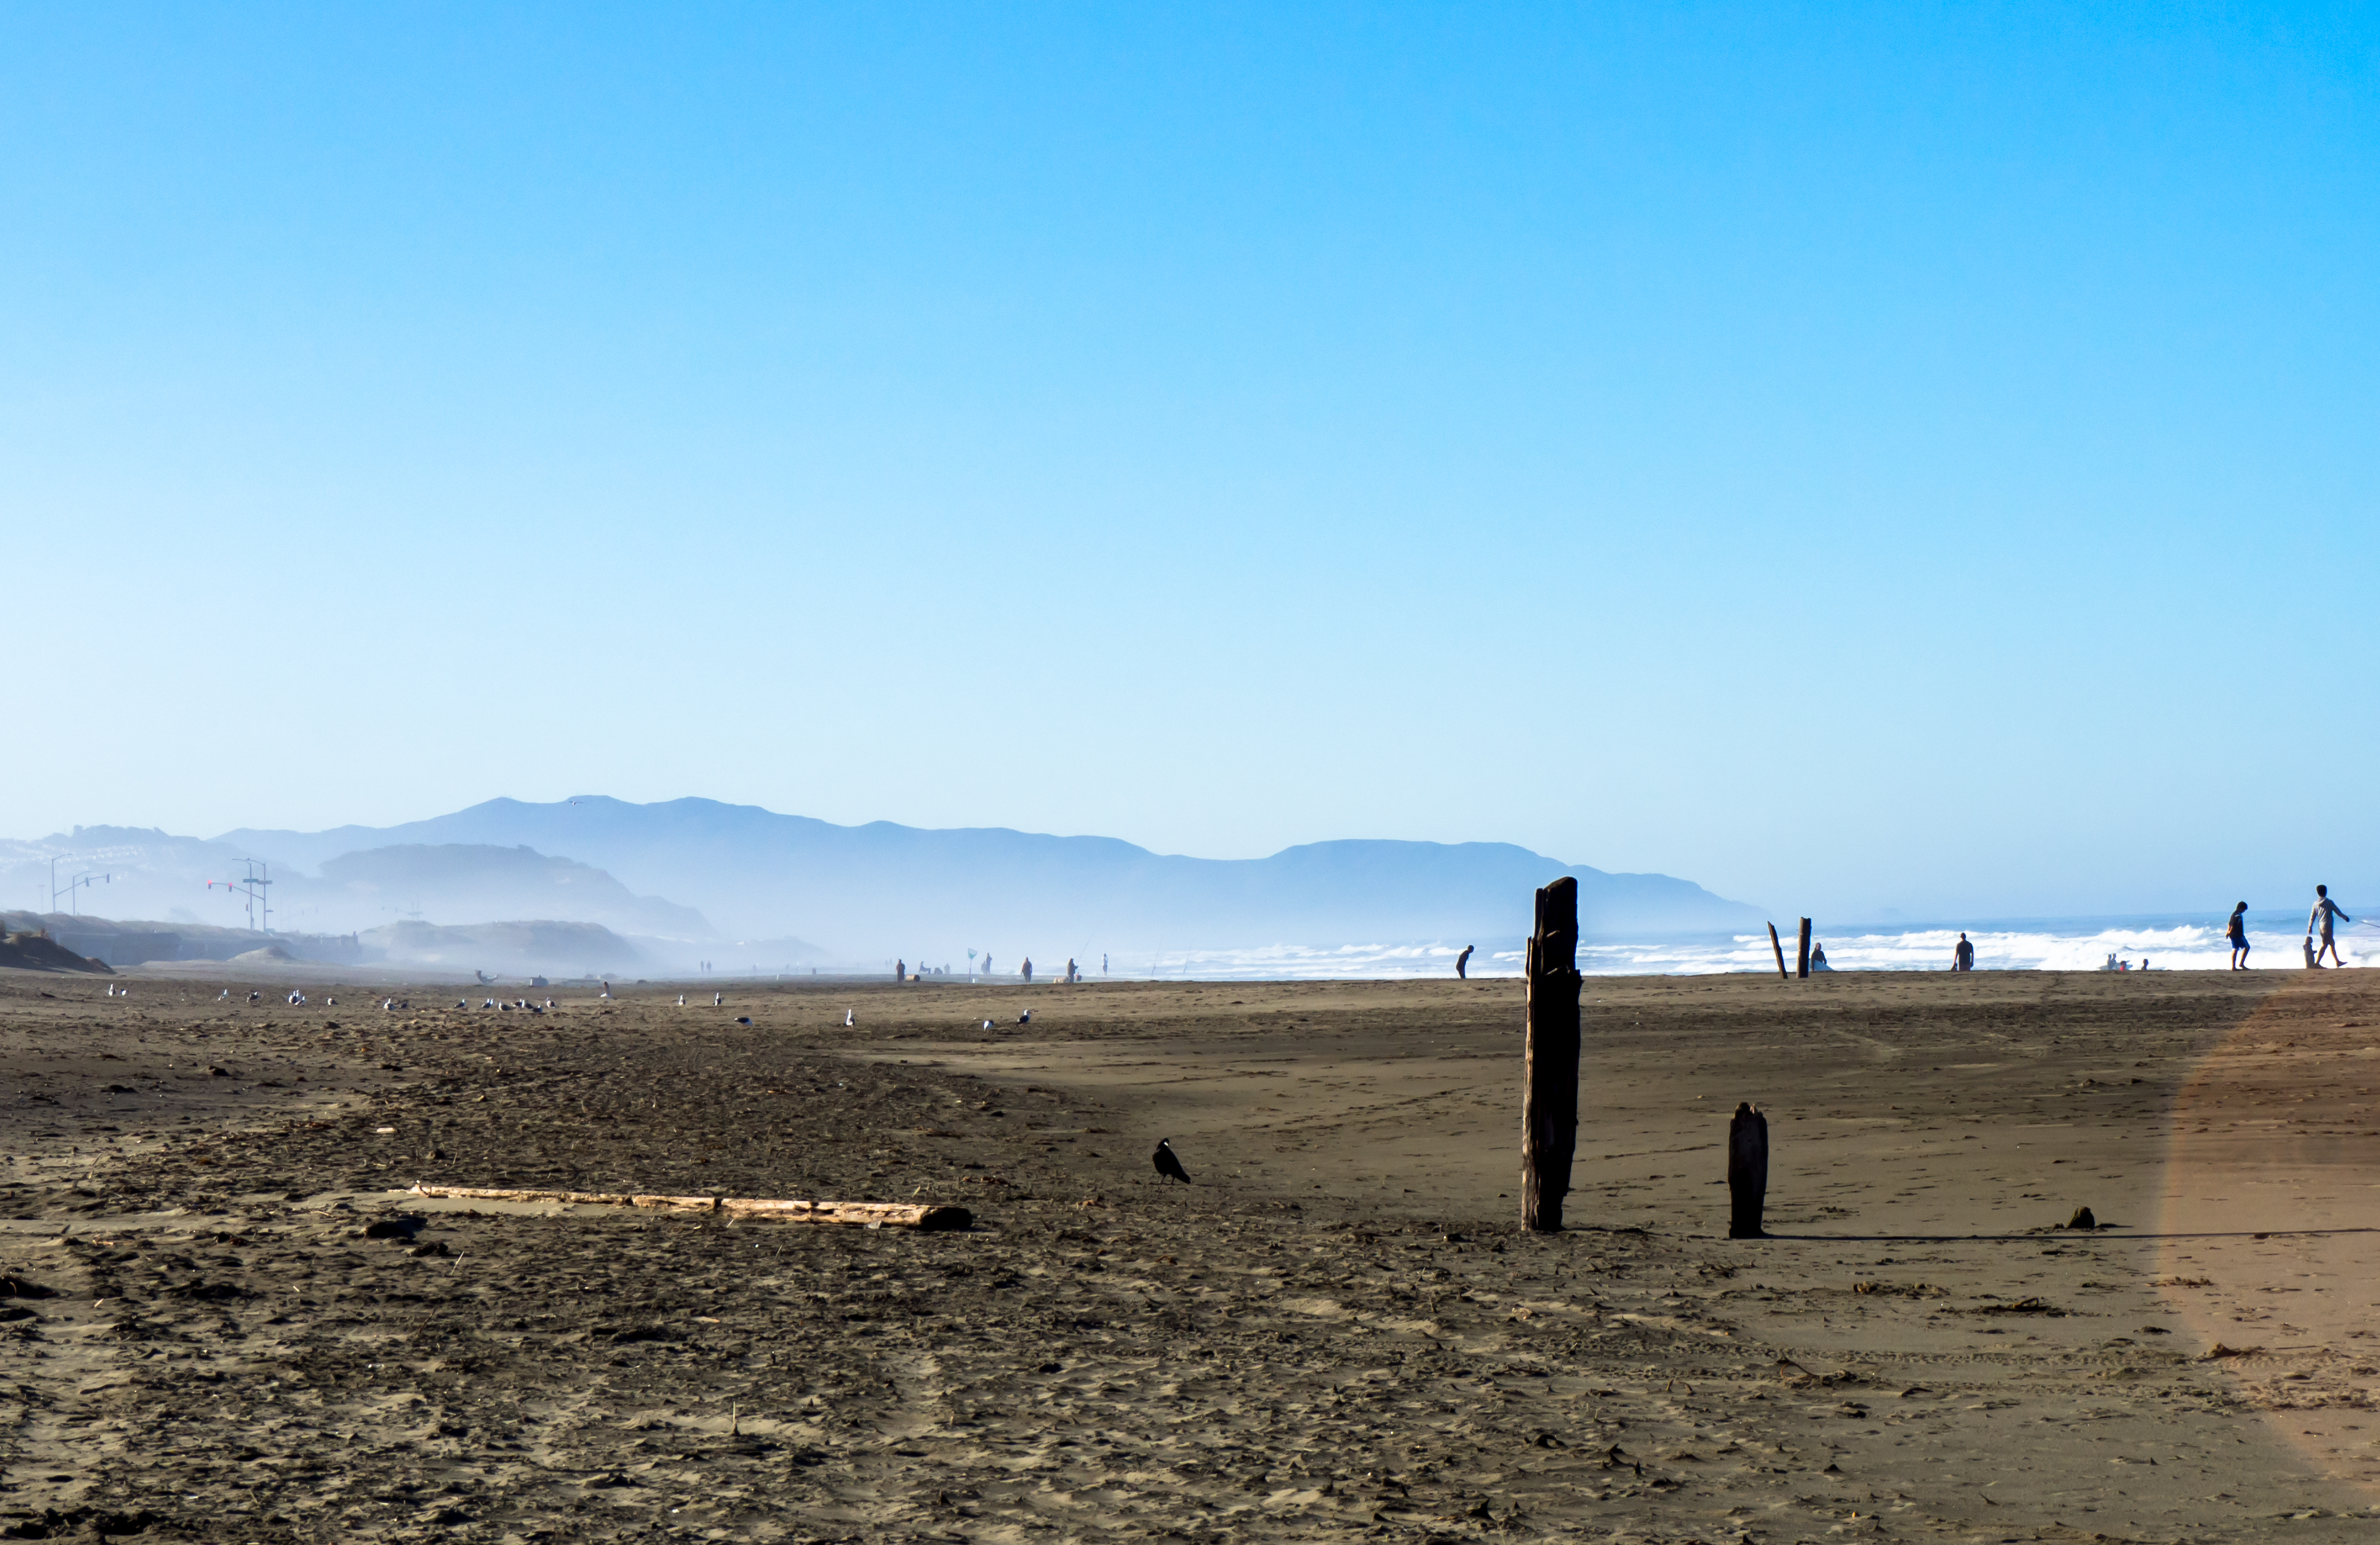
My next spot was at the beach. Everyone takes pictures at the beach! And I was so obviously a tourist, wearing a leather jacket and jeans, carrying a camera. This time I took a ton of shots, and did better with my focusing.

So many great looking surfers

That can also mean interaction with you, the photographer. If your subject notices you shooting and you still feel comfortable doing so, keep shooting! That connection can make your photo.

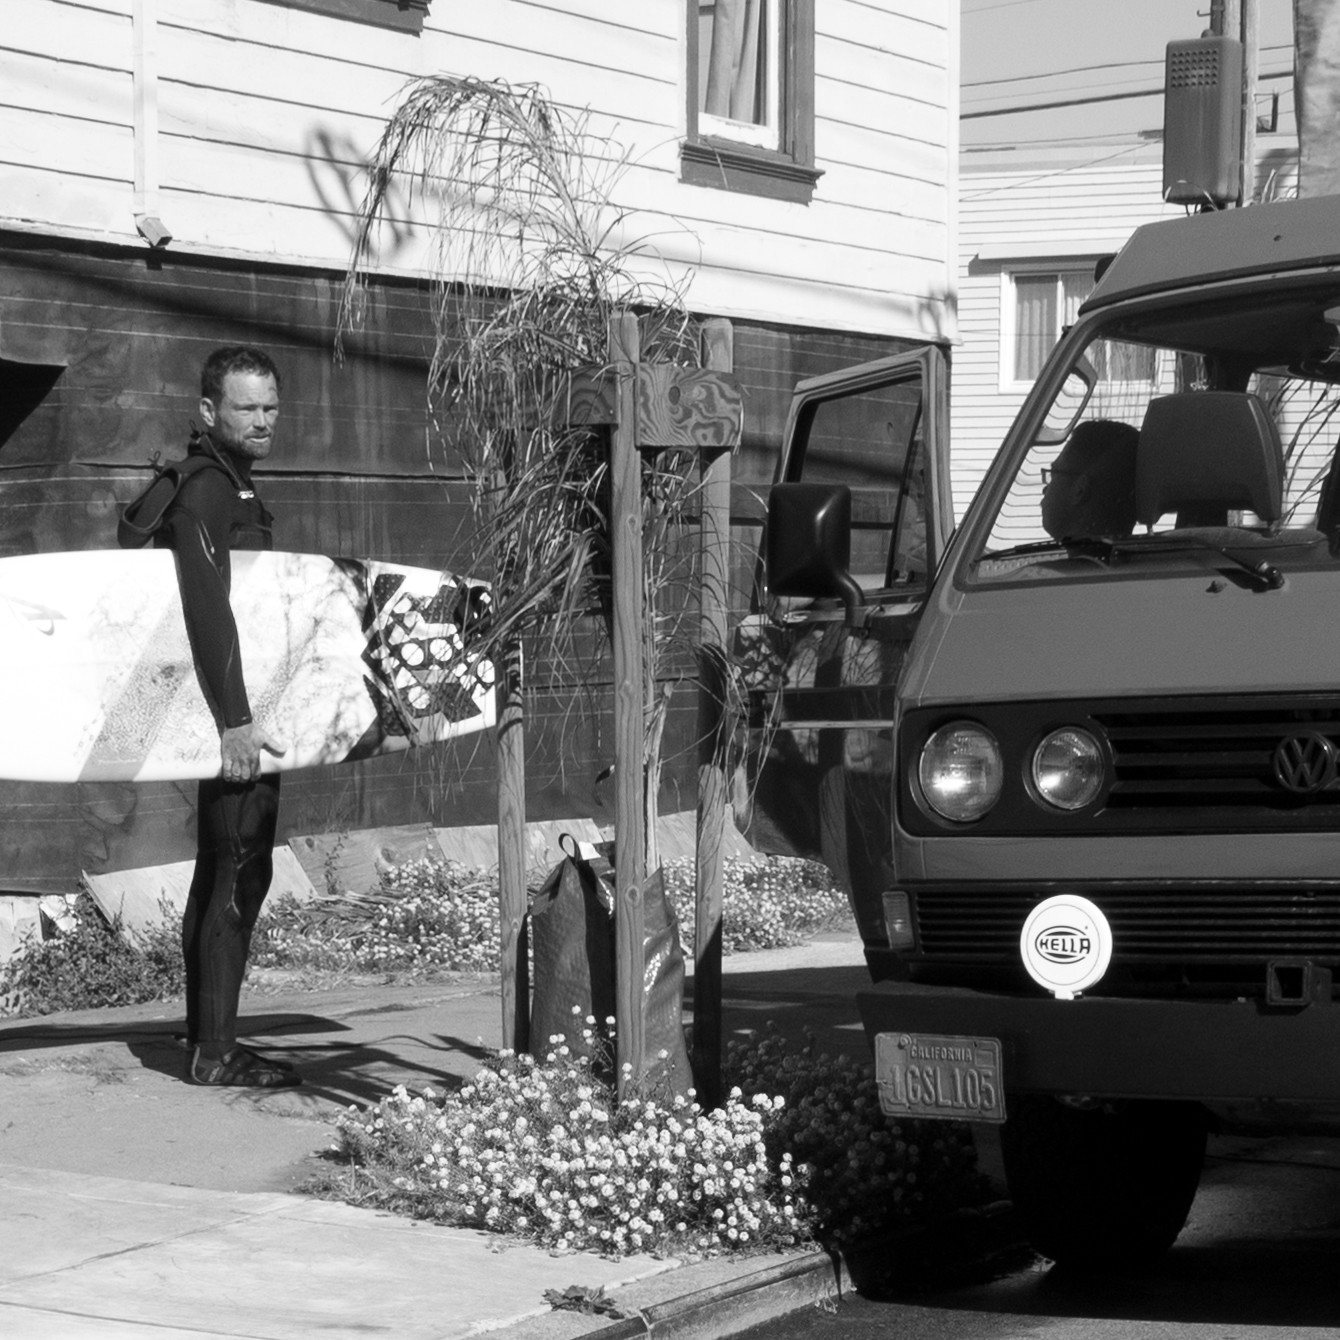
I wanted a picture of the van, but got these guys instead

This was shot with my phone, but I loved her expression and the fact that the man she’s interacting with doesn’t seem to notice.

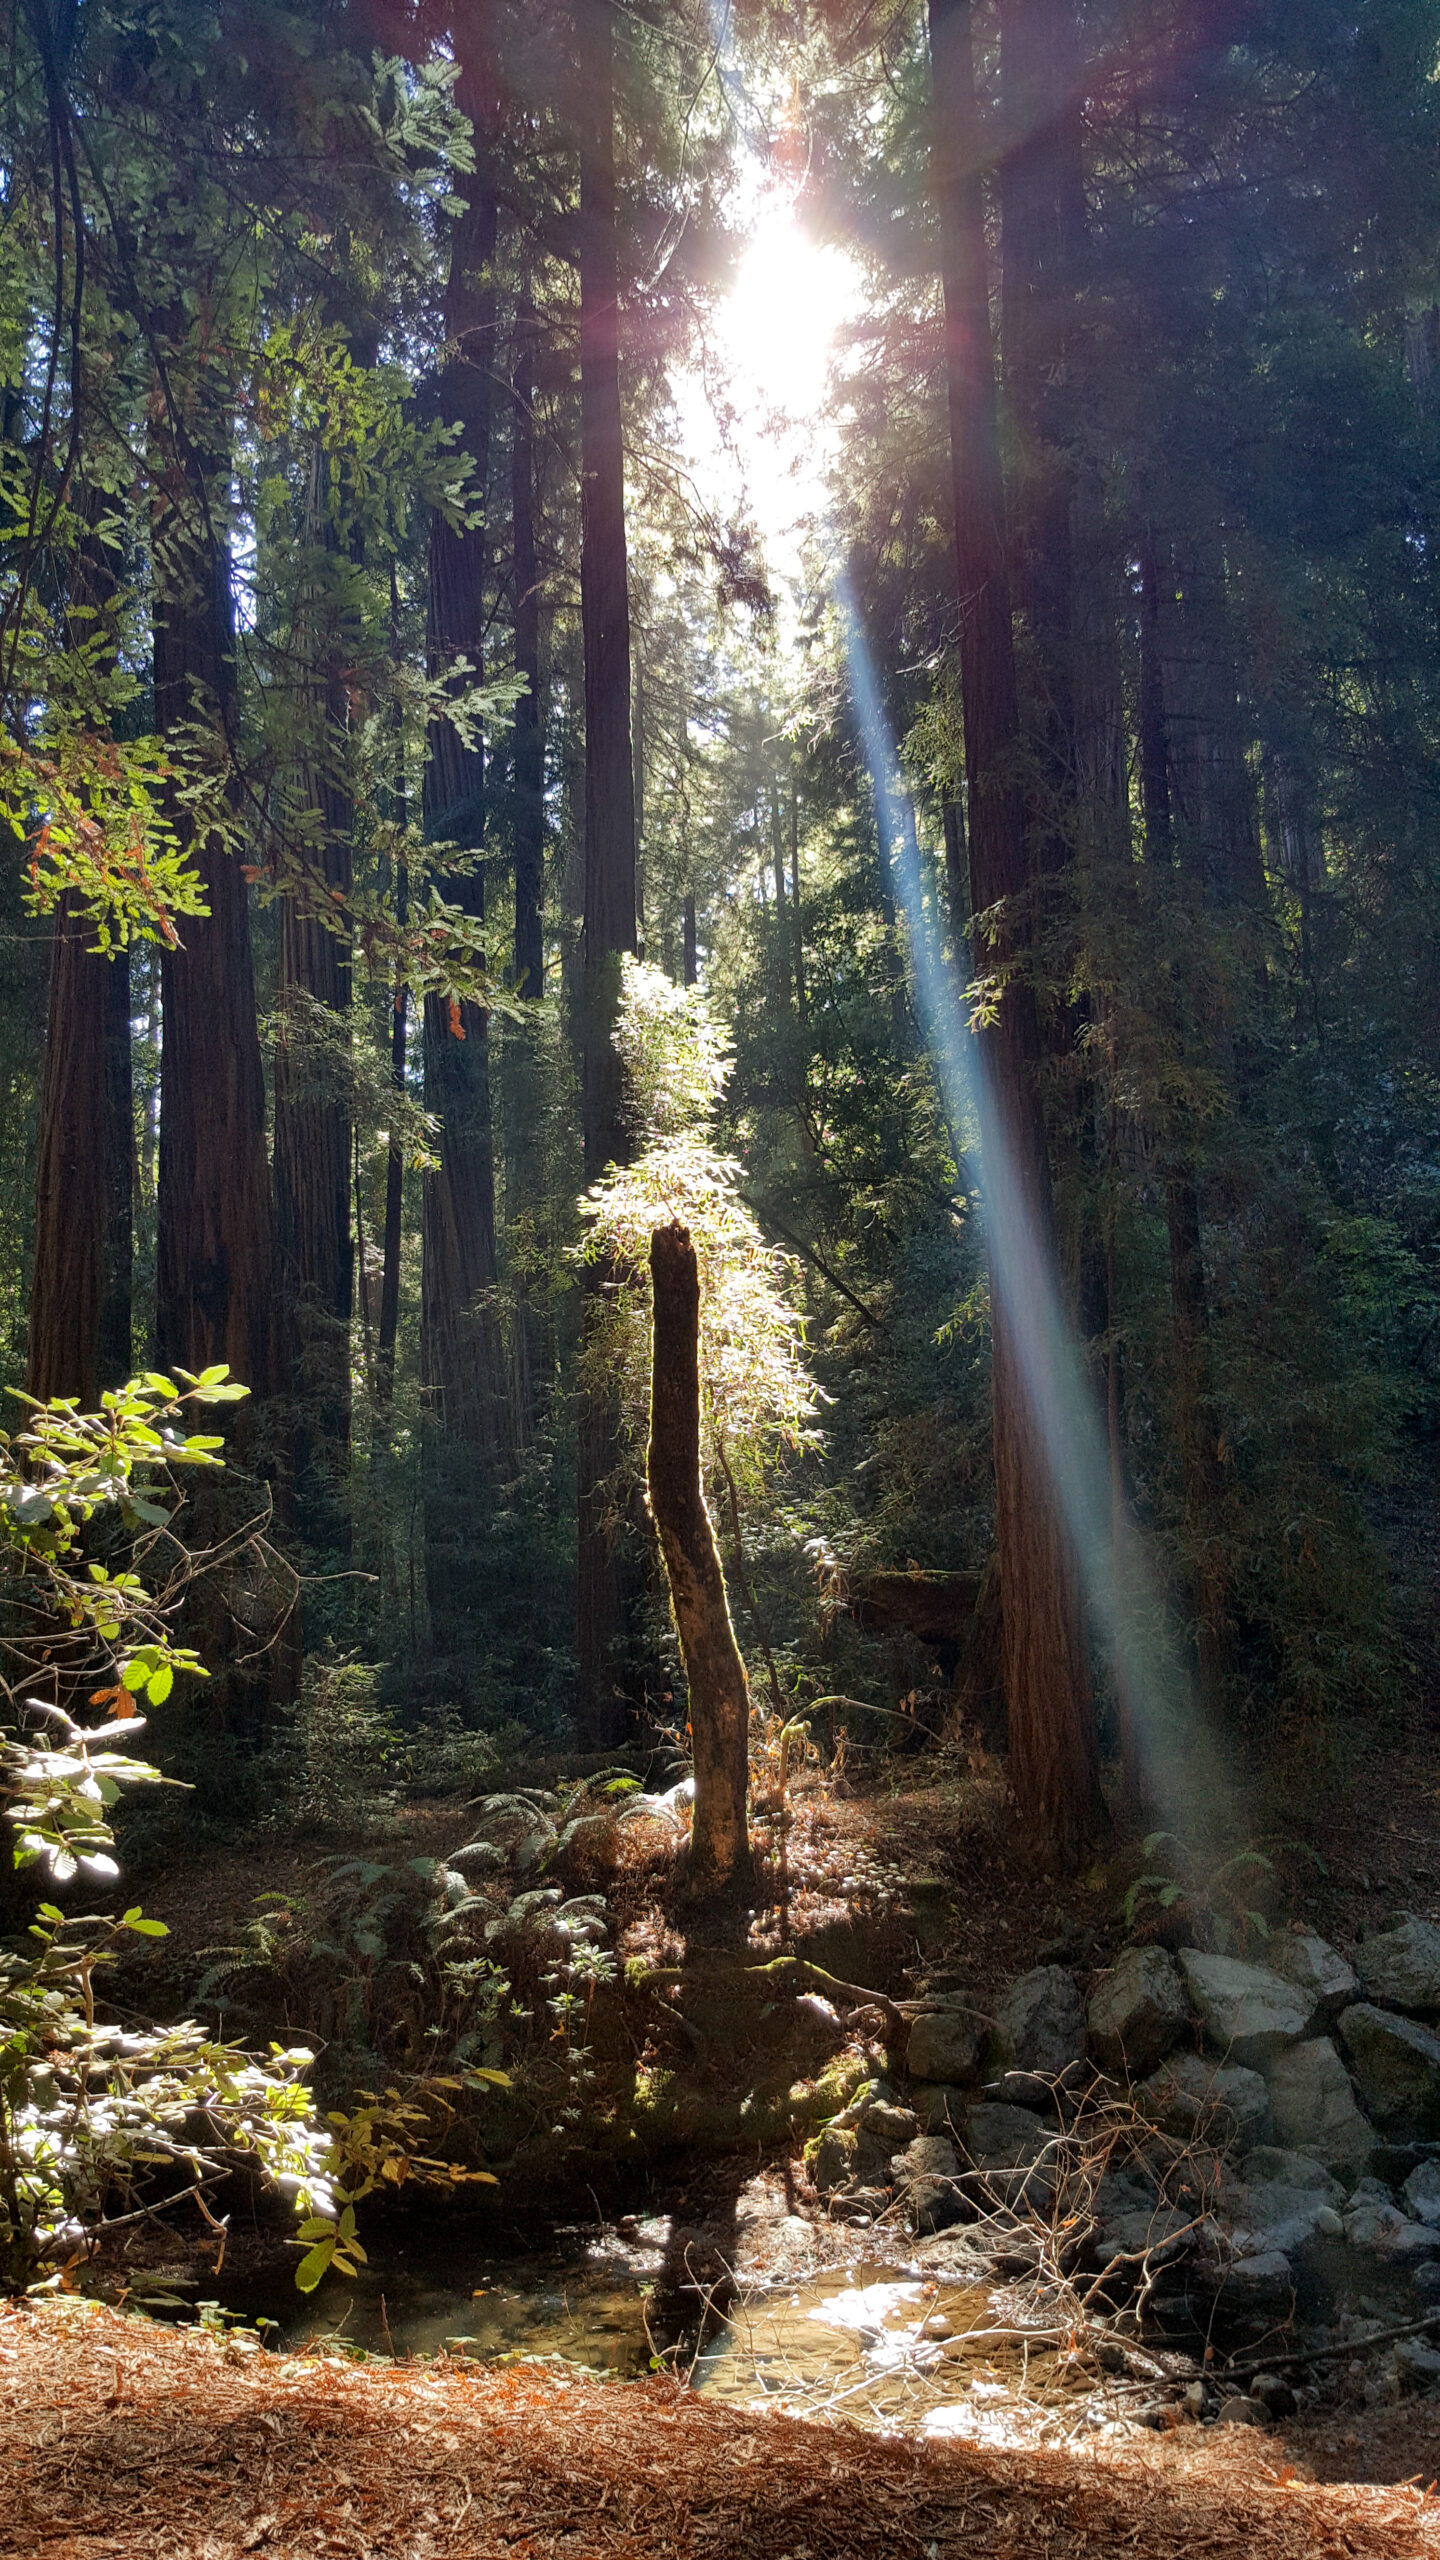
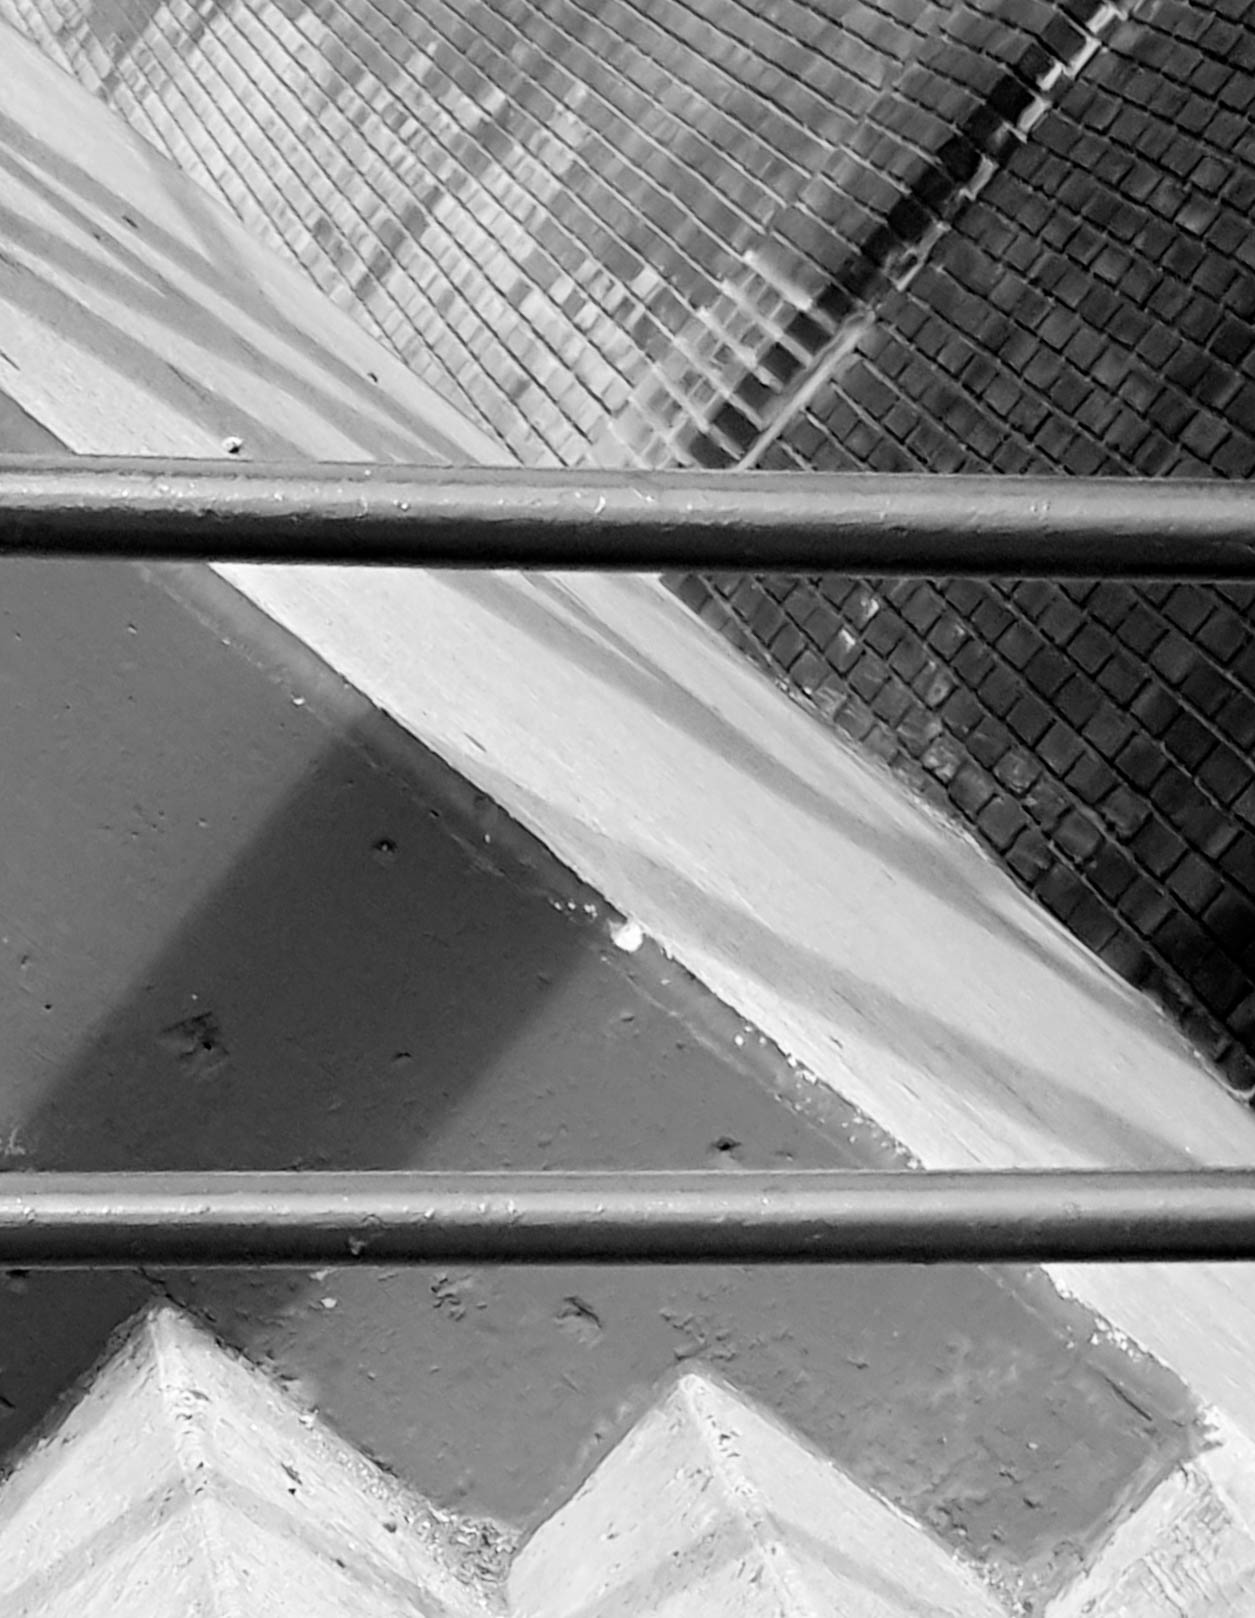
Third: Light, Shadow, Shape

These are what make compelling images in any genre. Interesting light, the play of shadows and leading lines draw the eye where you want it to go in the frame.

It wasn’t until going through my photos afterwards that I realized how many were facing the sun, which means I got a lot of silhouettes and shadows

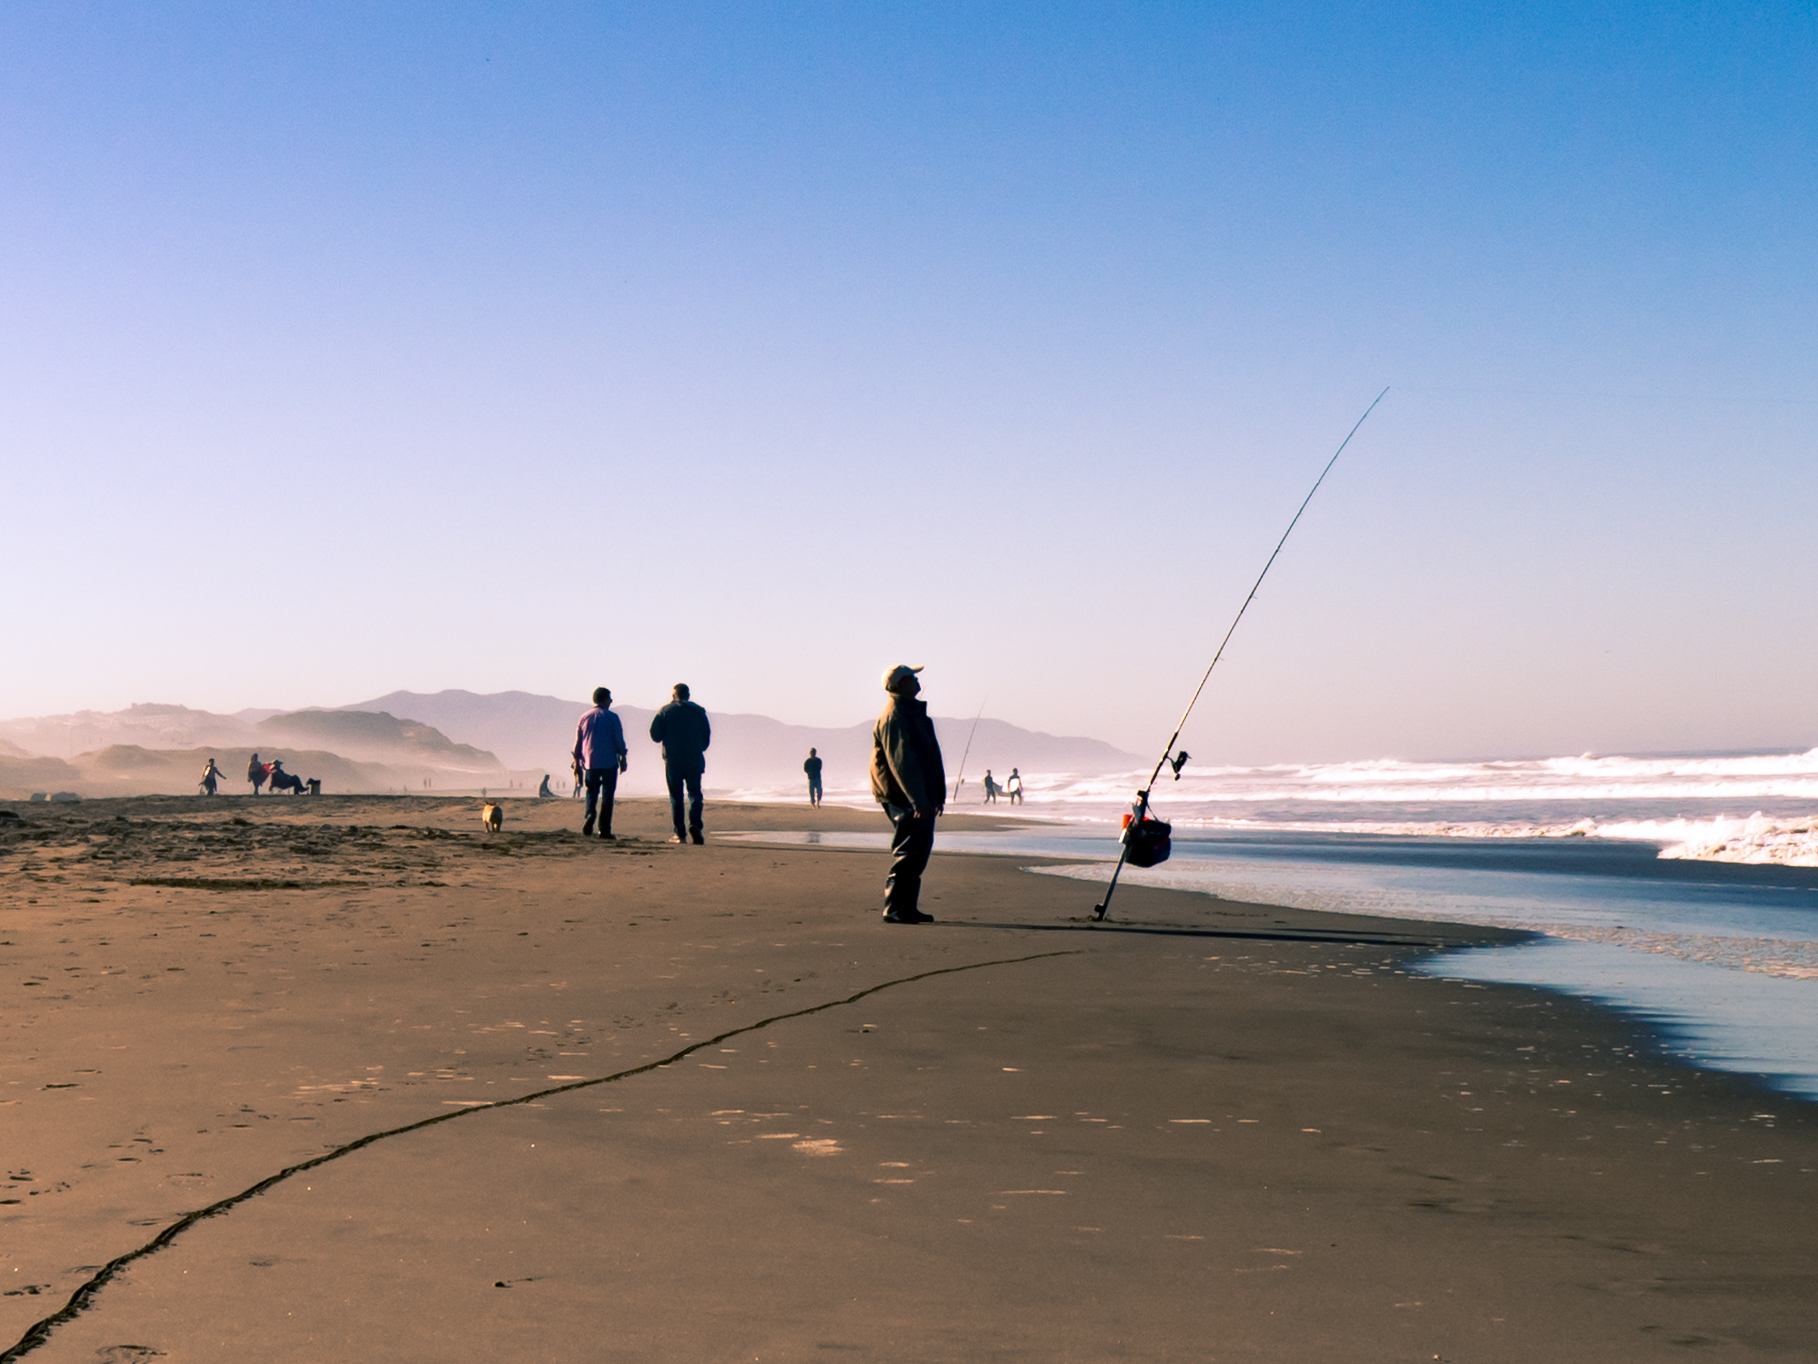
I loved the line in the sand bringing you to the fisherman and his fishing rod leading off frame


I feel pretty good about this. Some feel a bit more landscape than street, because I took a lot of distance shots instead of getting in their space, but I think I’ll do better with that the more I practice. I had a lot of fun shooting street shots, I wasn’t sure I would. I need to practice on nailing focus and getting in closer, but I think this is a good start. 

What other tips do you have for shooting street shots? What makes a street shot compelling to you?

Our live show this week will be with street photographer Andy Shields, whose work I love. He does amazing things with street photography. You can read his beginner blog post here and make sure to tune into the show on Thursday at sdp.io/live.

Posted on

Beginner Photography: Travel

Hey friends! This weekend I got to do a whirlwind weekend in San Francisco for my friends wedding. This will essentially be a two-part post, since next week’s topic is street photography and I did quite a bit of that while I was there (get ready to see some surfers)!

This was my first time on the west coast, so there was a lot to capture. We stayed by the beach in a great, diverse little neighborhood. I also got to go out to the Muir Woods and hike among the redwoods. I hope I can do them some justice! I pulled a total rookie move and forgot to bring my Olympus battery charger. My camera made it through to the last day, halfway through my hike. Luckily I had my phone with me still, and wound up getting some of my better pictures with that.

I wish I’d taken some more time to just go out and shoot, but it was an action-packed weekend and I wasn’t about to take time away from friends and events to take pictures. I hope I can go back and spend some more time in the future, there’s a lot more I wanted to capture.

There was a lot of great street art and signage in the neighborhood


There’s that distant SF fog


This needs some editing, the exposure on her doesn’t seem right

The water was so cold, these men are insane


I got this shot with my phone after my camera died

So those are some of my faves! I did minimal editing to them all to adjust exposure and make sure I had black and white points in each photo, as well as some cropping and straightening. I hope I captured the feel of the area (let me know, Kyle Wolfe)!

Help me out here, how’d I do? What would you change/add/leave out from these shots?


Posted on

Beginner Photography- Dogs!

Hello friends! As you know we don’t have a live show this week since T&C will be in Germany for Photokina! So I spent the week getting used to my little Olympus E-M10. I’m really enjoying this thing. I just shot whatever caught my eye around the house and tried to get used to all the buttons and dials. 

Yesterday was hazy and grey, but it made for some good light, so I followed my dog into the back yard to get some shots. He is not the most patient model. I did my best with a fast shutter speed and a liberal sprinkling of dog treats and “sit” commands to get what I could. And most of all, I took lots of shots. Here’s what I came up with.

f/3.5, 1/80th of a second, ISO 200

Meet Hungry! Shot at 1/80th of a second, f/3.5, ISO 200.


Same settings, handsomest boy.


Can you spot all my sloppy cloning and patching? 


I’m pretty proud of these, but I might be biased. He’s definitely a one-note model, we really need to work on his expression. 

Black dogs are hard to photography because they just seem to swallow light, luckily he has some brown mixed in, so I think I was able to show some detail in his fur. The yard is a bit distracting, so I had to clone out some random things, and went black and white on a few of my edits to simplify. I did basic edits in Lightroom, adjusting the exposure based on my histogram to make sure I had some white points and black points. Then I brought them into Photoshop and used the content-aware-fill tool to get rid of some distracting twigs and backyard clutter. 

We did a live show on dog photography with our wonderfully talented friend Erkki Alvenmod a few months back that I found helpful, you might too! Have you photographed pets? What are your tips? 


Posted on

Beginner Photography: Cars

Hey guys! I don’t know anything about cars, but I know that my Honda Accord wouldn’t cut it for a compelling photo. So I did what every socially anxious lady in a city wants to do, walked around my neighborhood looking for aesthetically pleasing cars and hoping no one thought I was a stalker.

Oh! And I have a real camera to use. T&C sent me an Olympus E-M10 with a little Lumix 14-42mm lens. It is such a cute, manageable little camera, I look forward to shooting with it more.

Thankfully T&C have a video on shooting at a car show, which was helpful for shooting in the busy environment of a city street. You can watch that tutorial here. I used a low aperture to focus close and blur my background, focused on interesting shapes and forms, and went black and white when I needed to declutter the background. Here’s what I came up with!

p9110009final

I did some basic edits to adjust the exposure and converted it to B&W to keep focus on the car and not on the background


Something about this shot doesn’t quite do it for me. The shapes are nice, I like the shadows on the hood, but it’s not quite compelling enough.


This one strikes me a little better, but maybe I just don’t like cars?


I missed focus on the Mustang logo, but I liked this license plate repping my neighborhood


I wish I had a bit more subject matter to work with, I would have loved to find a car with interesting colors, or to be able to shoot an interior. I think I did okay with what I had though. Next time I’ll have to try out some HDR or bone up on my post processing skills to really make these pop.

I could try to shoot in harder light to get more shine off the cars, I went out at the golden hour, which is good for most things, but not cars! You want that gleam. I could have also taken a bit more risk, getting lower and closer to shoot at better angles, and from the street to get different backgrounds. I was a little tentative about looking like a weirdo in my neighborhood. But do what you can to get the best shot!

I’m going to watch the tutorial for my camera again to master my settings. I used touch to focus on the live view screen, but I wish I’d been able to focus more accurately.

How’d I do? What could I have done differently? Let me know in the comments below. See you for the live show on cars this week!

Posted on

Beginner Photography: Still Life

YOU GUYS, photography is hard. This subject broke me. We don’t have a live show this week to base my blog off of, so I decided to do something “easy”, still life. Here’s a great video Chelsea made to teach you the basics:

I was sick this weekend and leaving the house was an impossibility, so I thought “hey, I have stuff! I can just do a still life!” But no. I think this project broke me.

We have no shortage of interesting looking objects in my house, and a ton that are meaningful, so that part didn’t seem so hard. What was hard was finding a backdrop and lighting. First I tried putting everything on a leather chair. But nope! Everything was slanted and cramped. 

SAM_0020

Dark! Cramped!


Then I put everything on my dining room table, but that’s just silly because the background is a wall or my kid’s toys or the kitchen.

SAM_0036

No, Siobhan. Why? So dark. Such hard overhead light.


Then, in a last ditch effort I used by bedroom rug, with a duvet as the backdrop. The lighting was better, natural light off to the left, dim lamp to the right, but the backdrop became the bane of my existence. It was so wrinkly. SO WRINKLY. I swapped out some of my original objects to a few that wouldn’t swallow the light (that dark wood and dark metal weren’t doing me any favors) and added some flowers and feathers to add a leading line back to the globe. But then I spent well over an hour trying to blur/smooth/blend the background so that it wouldn’t look so distractingly wrinkled. To no avail. So here, friends, is me giving up:

SAM_0057FINAL

I just… ugh. I can’t even.

So there you have it: some old dirty stuff that represents my family? I’m sorry guys. Oof.

Posted on

Beginner Photography: Adventure

Hey guys! The topic for this weeks upcoming live show is “Adventure,” which is a pretty broad topic. I was trying to think of what I could shoot this week to fit the theme, as I don’t get a whole lot of adventure in my day-to-day life. It just so happened that we were headed to my brother-in-laws for a family party over the weekend and my focus changed. Instead of shooting something adventurous for me, I got to shoot the adventure of being children.

I am lucky to have an adorable child and equally adorable nieces and nephews. They spent the day splashing in kiddie pools, sliding down plastic slides and (my daughter’s favorite) jumping in a bouncy house.

While I did just borrow a cute little Samsung WB1100F from my stepdaughter, I hadn’t thought to bring it with me. So as always, these are shot on my Samsung Note 5 smartphone.

20160827_172958FINAL

The lighting and the color of this photo just screamed “summer” to me


20160827_175105FINAL

The movement and expressions make this one a favorite.


final-175039And another of this cool baby in B&W to focus the image on her and not the distracting, bright pool in the back. 


finalornage-2

The backlighting caused me to lose some detail in their faces, but I dodged them a bit to make up for it.


I spent some time with these images in Lightroom and Photoshop, adjusting the exposure, cropping and straightening. I feel good about these. While the detail isn’t there, the colors, lighting and action make up for it. I think I captured the mood and joy of the scenes, which is what I hope for!

What would you do differently? How can I improve? Comment down below!

Posted on

Beginner Photography: Landscapes

Phew. Guys, landscapes. I can tell you right now that this is not my bag, for a number of reasons. 1) I live in Philadelphia. There are very few landscapes that won’t include people, cars, or trash. 2) I find landscapes boring (not yours! Yours are great) and 3) my camera phone is not made for them. All that to say, this week feels like an epic failure.

To make compelling landscapes you should have most of these things: large depth of field, interesting foreground or background, a focal point, interesting light, and leading lines. Since I have no control of my camera settings with my phone, I couldn’t control my depth of field or shutter speed, so all I could really do was with my composition.


I walked my dog, Hungry, earlier in the week and got a decent shot of my favorite block in the city.

20160819_191008FINAL

Nice light and colors during sunset, leading lines.

A few days later I got my family to come out with me to Belmont Plateau, where you can see the city skyline. Turns out my camera phone doesn’t do too well with distance. Or detail. 

20160822_170829FINAL

This is indeed a cityscape, but man is it boring.

20160822_170941_003FINAL

I tried to add a bit more interest by capturing my running daughter in the foreground.

I would have been better off waiting for sunset so I could have gotten some better light and more interesting color to the photos. As they are they seem very flat and boring. Next time I think I’ll go shoot some abandoned buildings. This city has a lot of character which just isn’t captured from a distance.

I attempted to stack a bunch of the images using Tony’s method in this video, but even that couldn’t seem to pull enough data from my wimpy camera phone to make any difference.

Do yourselves a favor and learn from Tony and Chelsea here

And please, PLEASE tell me what I could have done to make these images interesting!

Posted on

Beginner Photography: Food

Hey guys! This week was a bit tough for me since we don’t have a live show coming up to base my project off of. But at the very last minute I got a suggestion from Chelsea to do food. We’ve done a few live shows on the topic, which you can see here and here as well as the awesome fast food challenge video with Toby and Christina here. So I used those as my basis for some quick food shots.

Remember, I’m using my Android phone for these shots, so I have no control over my settings. Luckily I’ll be getting a real camera soon, so I’ll eventually revisit these subjects to see how my technique and my gear have improved!

Luckily my husband is the cook in the house, so I just asked him to make dinner extra pretty. We were having kielbasa with french fries and salad. Not the most upscale of meals to capture, but colorful and delicious none the less.

First I decided to take a simple still life of a clementine on a plate. Our dishes are turquoise, so I thought it would be a nice complementary color scheme.

finalornage-2I used some hard natural light to get a dramatic shadow and some highlights on the skin.

Next up was dinner. 

20160815_final-Edit

The hard, overhead lighting was too hard. While the specular highlights are good, the reflections on the plate and the shadows are unappealing.

20160815_181755-Edit

The close-up works a bit better. The kielbasa is in focus, the specular highlights are appealing, and look at those grill marks!

Now for dessert. Yogurt, berries and a fresh sprig of mint from the garden.

20160815_195104-Edit

The setting wasn’t ideal, so I went for a closeup with a dutch tilt, filling the frame. The highlights and the color are pretty good, if I do say so myself.

Welp, I did my best and I ate well, that’s all you can ask for, really. Please, comment below and tell me what I could have done better. How would you have shot these dishes?

Posted on

Beginner Photography: Portraits

Hello friends, here goes my beginner photography training, week two. This week I’m working on portraits in preparation for our live show on Thursday with special guest Matt Granger!

So I should point out (for the sake of my vanity) that I am shooting with my phone. I have no other camera at this time, so I can pretend that I am limited by my gear and that is the reason I cannot create beautiful works of art. Really what it means is I can’t do the amount of editing I would like to do to my images to make them presentable.

I shot some pictures of my five year old daughter, Eloise, and of my husband Eric. I have to say, Eric’s came out better than Eloise’s, if only because he knows how to sit still. I chose our ivy-covered stone wall in the back yard as the backdrop, as that is really the only good option. Not to mention the natural light. So I shot them on two separate days, but both coming up on the golden hour of the evening. 

Eloise is hard to photograph. She wiggles a lot, has no concept of smiling normally in photos, and hunches her shoulders like Lurch. But she’s adorable, so I still got a few shots that I can live with. Unfortunately the focusing on my phone camera is not the best, so who knows what part of the image it focused on.

20160807_185006

So, not great. Her hair is a bit of a mess, her dress is wrinkly, and I for sure missed focus on the eyes.

20160807_185018

A bit better. I got a real smile, but the previous errors are still there.

20160807_185704_001

This one I like just because it captures her spirit well. She’s a wild child and an animal lover. But the background is crowded and her dress is a mess.

Eric was easier to shoot, although he is terribly uncomfortable in front of the camera. I did some editing on my favorite photo of him, following the directions on how to add background blur in this tutorial. If I had more time, I’d do it to all of the shots I took. I might do some of Eloise’s later today.  Here’s the before and after:


20160808_194423

Before

ericfinal

After


Isn’t he handsome? The differences are subtle, but I removed the yellow cord at the bottom left of the frame and added just a bit of background blur to make him stand out. I had tried to crop so that his face was in the right third of the frame, but it felt too cramped, I didn’t leave enough space to do it properly. 

So all in all I think the background and lighting worked well, they both have catch lights in their eyes, the light is soft and flattering. Unfortunately the focusing isn’t too precise and my tiniest model needs some styling and posing help. I have a feeling they are going to be forced to grow as models as I grow as a photographer. What tips would you give me that I can apply within my limited resources?

As always, feel free to learn along with me and share your progress. I post images on Instagram with the hashtag #stunnersoninsta as many of our viewers do!

To learn more about shooting portraits, here are some great free tutorials on shooting portraits and here are some on editing.

Posted on

Beginner Photography: Abstract

I’m back! For those of you who don’t know me (impossible!) I do customer support, video editing, and moderate the comments on TCLive for Northrup Photography. What I am not is a photographer. I’ve always loved photography, and all art, but haven’t had the drive to learn. You’d think working for Tony and Chelsea for the past year and a half would get me moving, but work can get in the way of art if you let it. Turns out I learn best with a task to complete, so I’m going to write this blog one day a week so that I can learn photography and hopefully some of you can learn along with me! I’ll be hashtagging some of my photos on Instagram (@SiobhanKyle) and using the hashtag #StunnersOnInsta to show my progress. I encourage you to do the same! There are tons of great photos on there already from our YouTube community.

This week I took inspiration from our live show and decided to work on some abstract shots in my house and on the street. I can’t say they were totally successful, but it was a fun challenge. Abstract art is actually one of my favorite genres. I love looking at things in a new way and finding the beauty in things that are often overlooked. A successful abstract can make everyday objects look otherworldly. It’s a method of capturing an object out of context or zooming in and framing an object in a way that makes it unrecognizable. You can do this in a few ways:

Zoom in

20160801_182319_002This view of an overhead light is not what you generally see when you walk into the dining room. But by getting directly underneath it and zooming in, cutting into the edges, you get an unusual take on a simple object.

Play with shapes


20160801_182422

Look for interesting angles, leading lines or patterns. This view of a skylight turned on its side made the image more interesting than if it were just square.


Use light and shadow

20160801_182726 Dramatic lighting adds visual interest by playing up contrast and texture.


 If all else fails, go black and white

20160802_084556

Black and white is always a great way to abstract your image and bring attention to shape and texture.


So those are my efforts. I know a lot can be done in post processing, but I’m not at that level yet. I did some color and saturation tweaks as well as some creative cropping and converting to black and white in Lightroom. What tips do you have for making abstract images?

 If you wan to learn more about making abstract photography, watch this video or check out our past live show on abstract photography here.