Posted on

Beginner Photography: Slice of Life

Happy 2017! I’ve been sick for all of it, plus a few days so far, so I didn’t go out shooting this week. But I have plenty of photos to choose from for this topic. “Slice of life” might be my favorite subject matter for photography. I’ve always preferred shooting people and especially candids. I like capturing a brief, fleeting moment in time; an expression, a movement, an interaction. Posed portraits just don’t give you that, they are people’s attempts at looking their best, at being still. 

I’m not sure there’s a way to teach this topic, really. Besides using whatever camera settings are appropriate for your setting, the only thing to do is to observe and wait. I covered street photography here, which gives you some tips on how to shoot unobtrusively. For all candid photography, I use live view mode, and flip out the screen on my E-M10 so that people can’t tell when I’m shooting. If you’re shooting strangers, they tend to think you’re not shooting them, but something else in the scene. If you’re taking photos before and after they appear in frame, they’ll assume they aren’t the subject. If you’re shooting your friends and family, or at an event, just shoot excessively. At first people will be stiff, knowing they’re being photographed, but they’ll loosen up once they get used to you there.

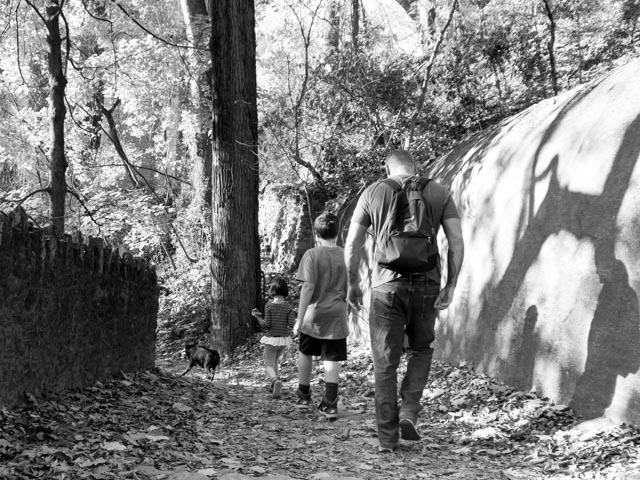
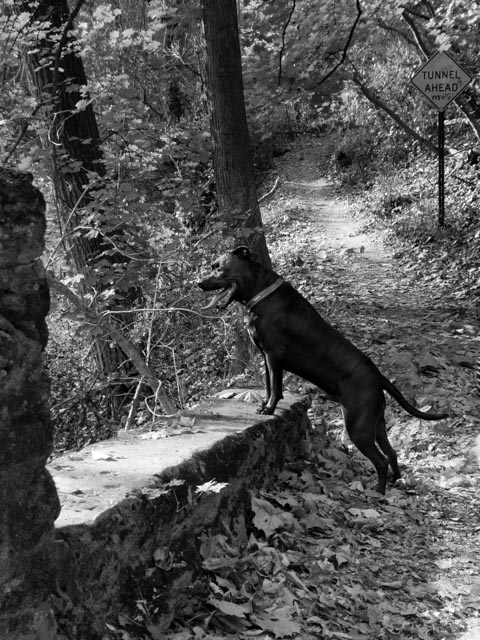
Here are some of my favorite “slice of life” shots from the past year:


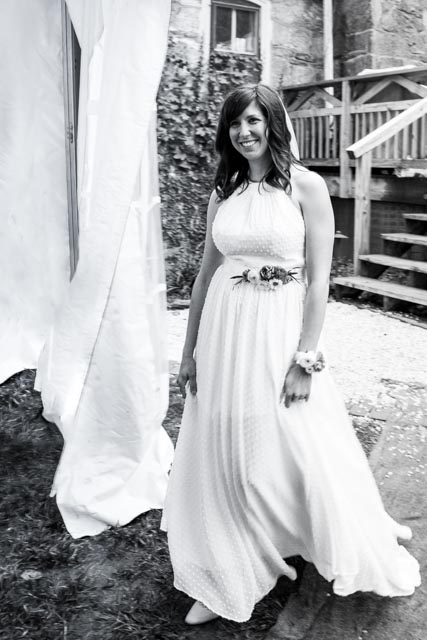
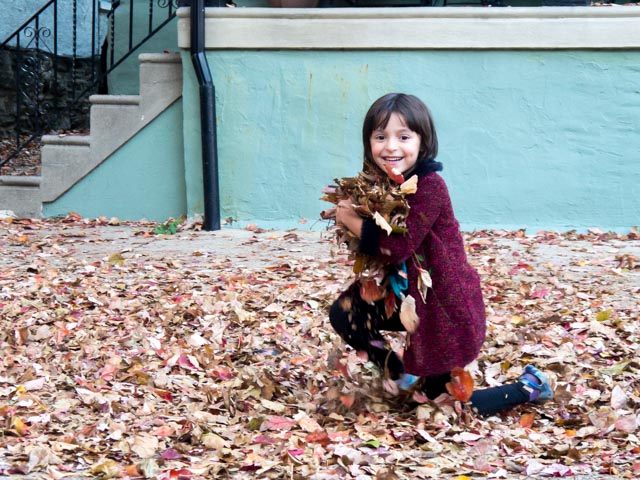
Shot on my Samsung smartphone, so the settings were automatic. 1/390th, f/1.9, ISO 40.

I love her expression and body language, her gaze bringing you to his, which leads you down. You even get some context of where we are by the pamphlet he’s holding.


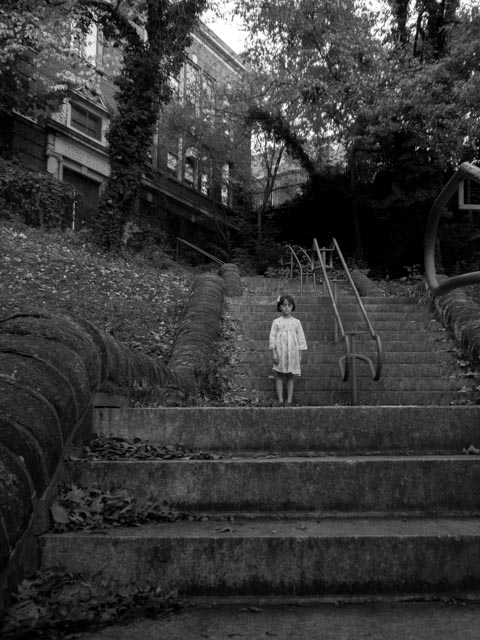
Shot with the Olympus E-M10 at 1/400th, f/11, ISO 200. Not sure what I was thinking for the settings on this one, my shutter speed and f/stop were higher than necessary.

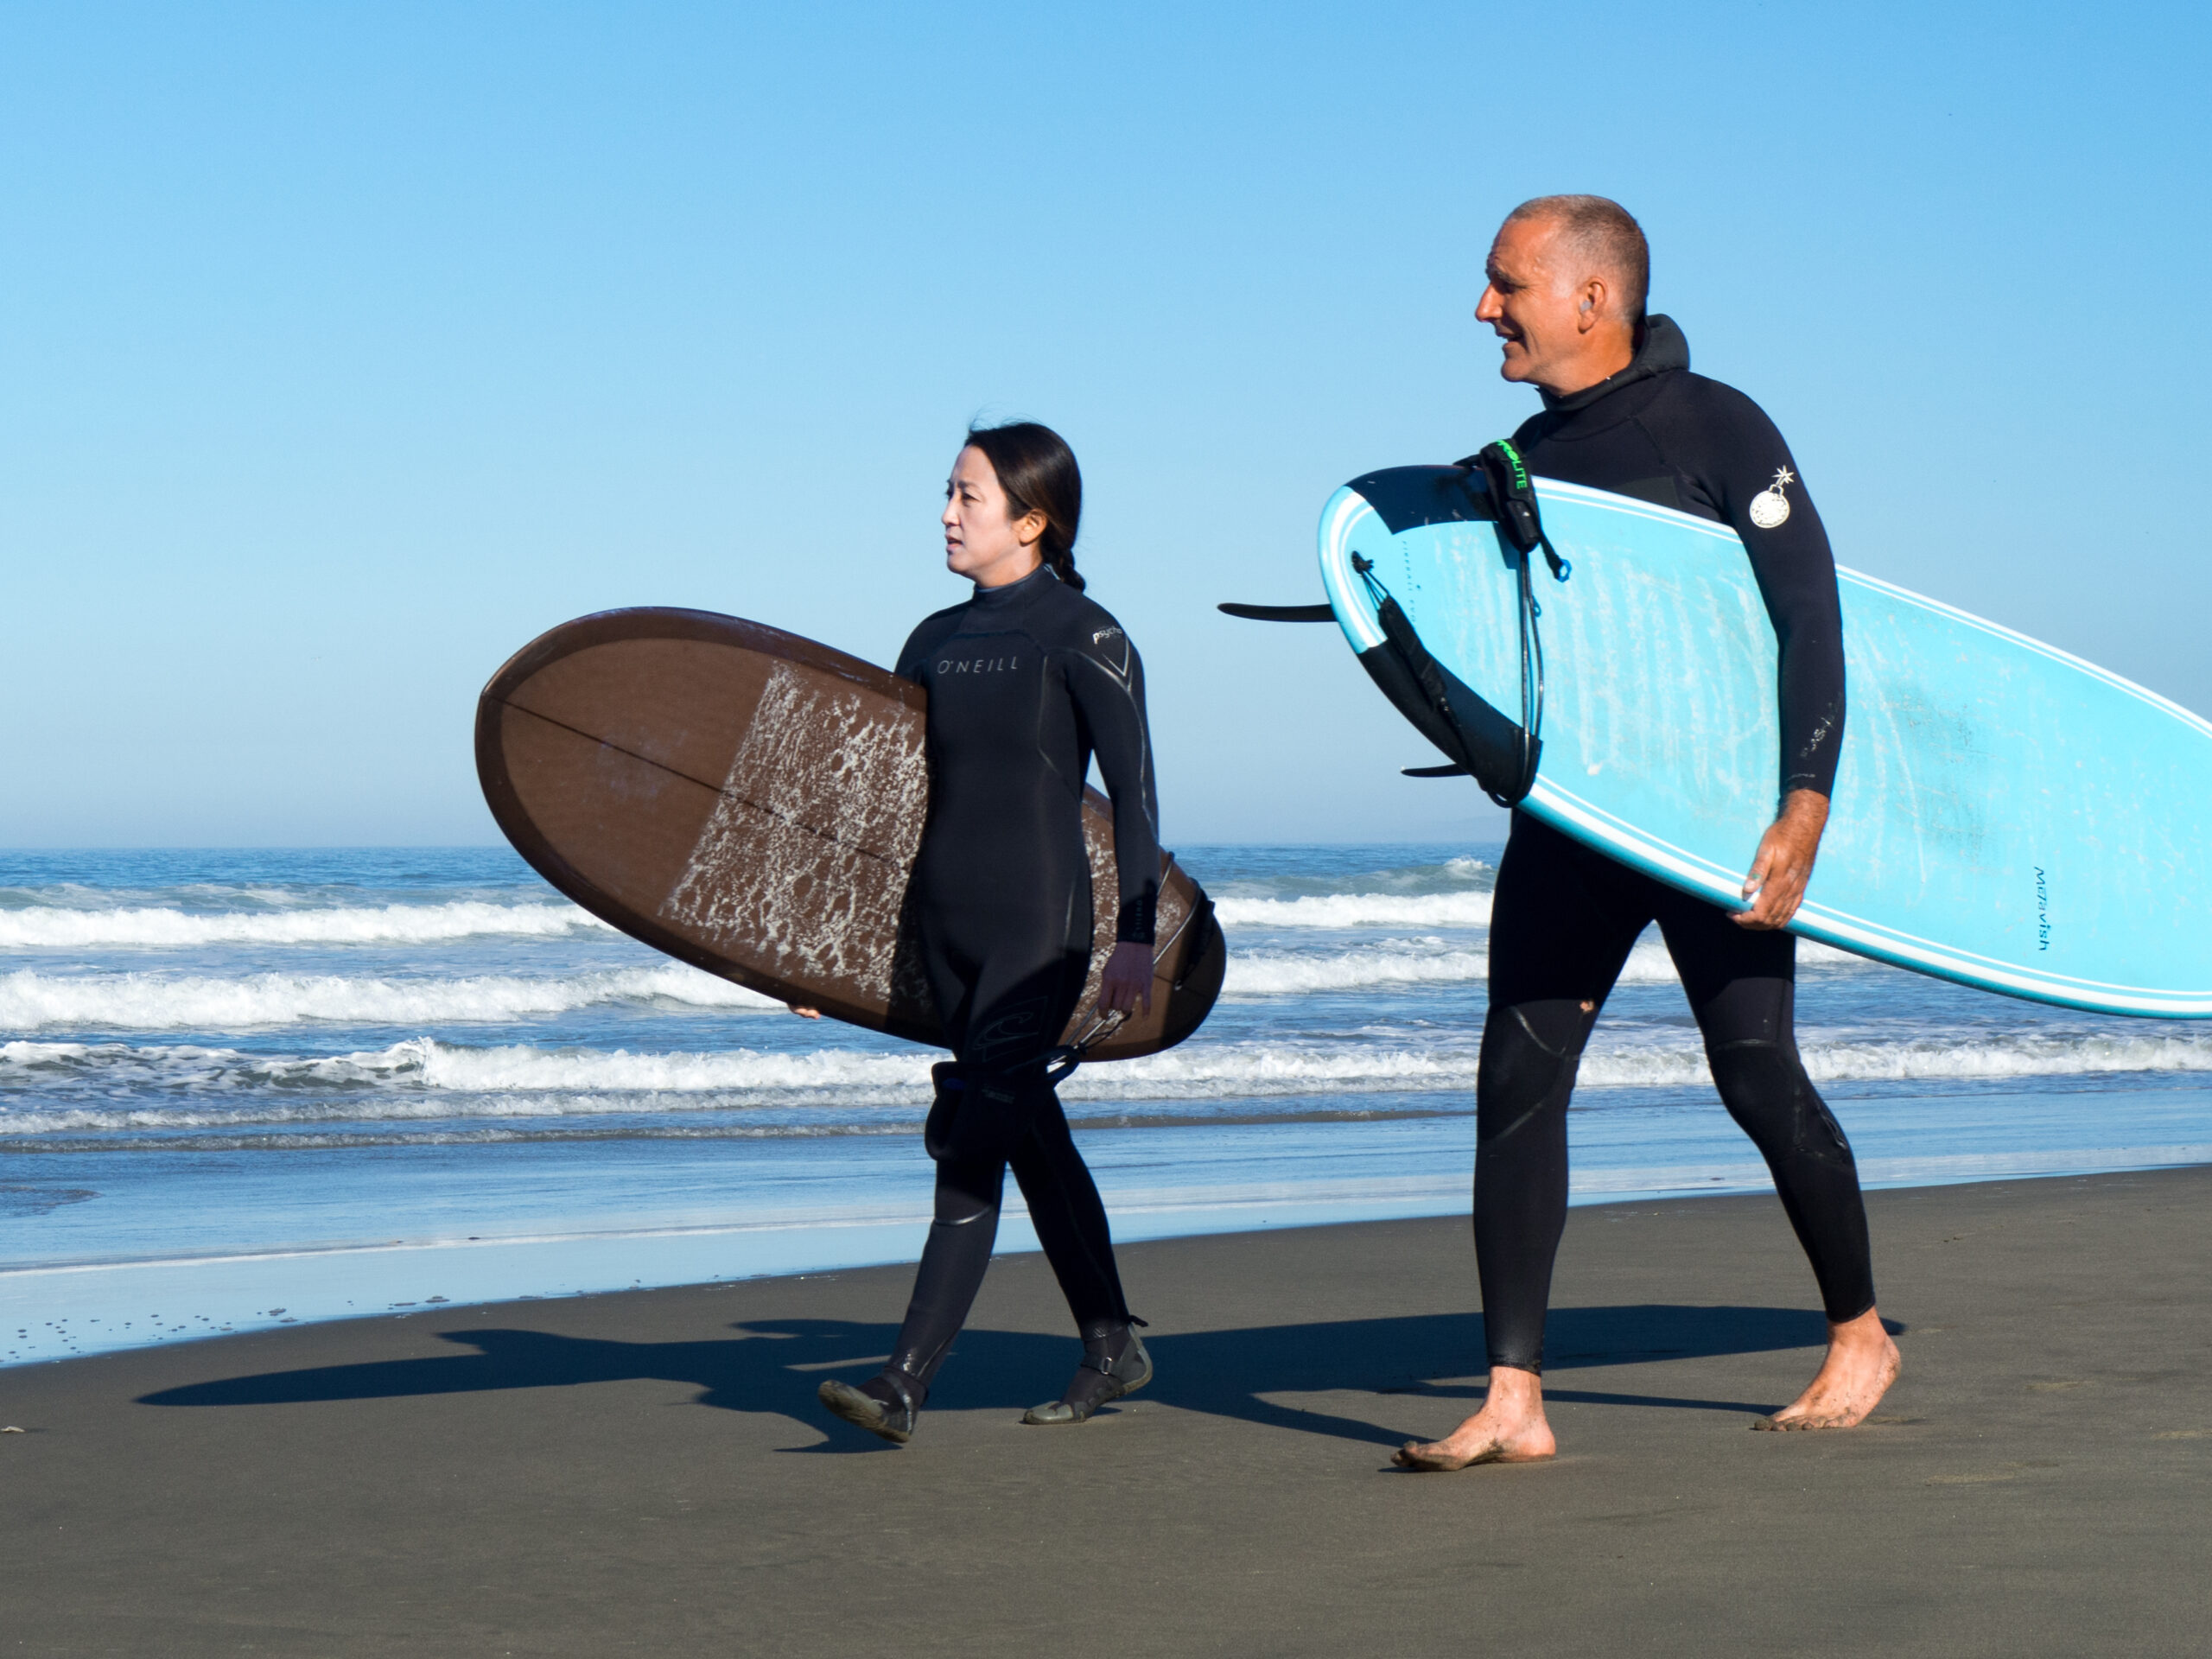
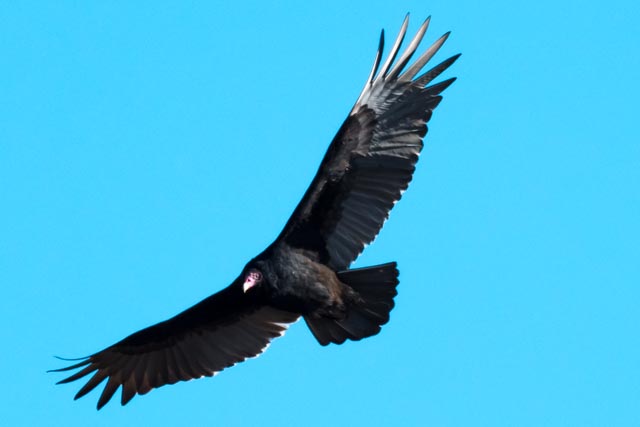
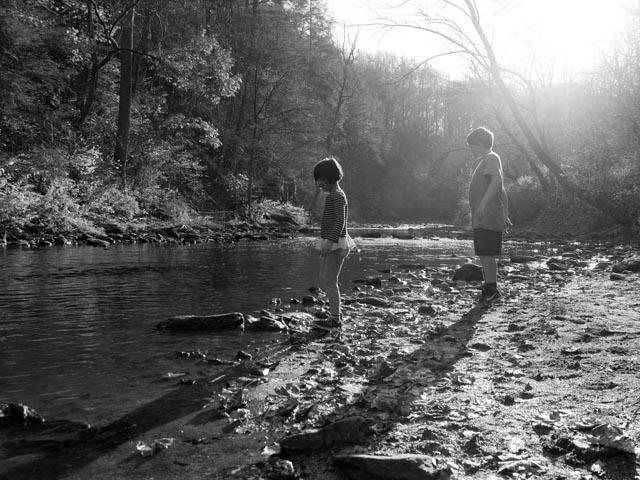
My first time shooting California surfers in the wild.


Shot with the E-M10 at 1/250th, f/3.5 at ISO 200. 

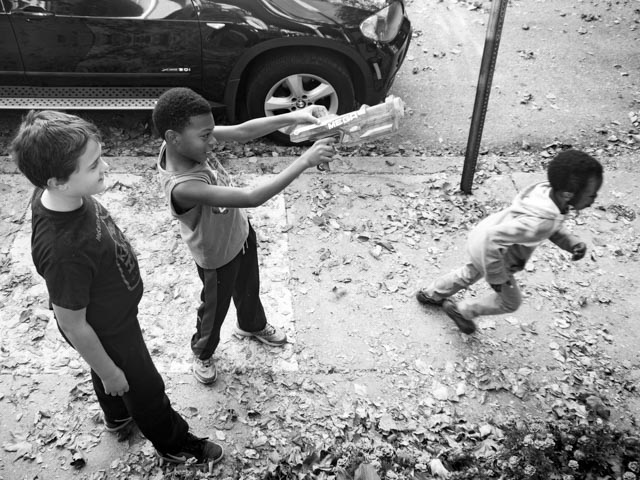
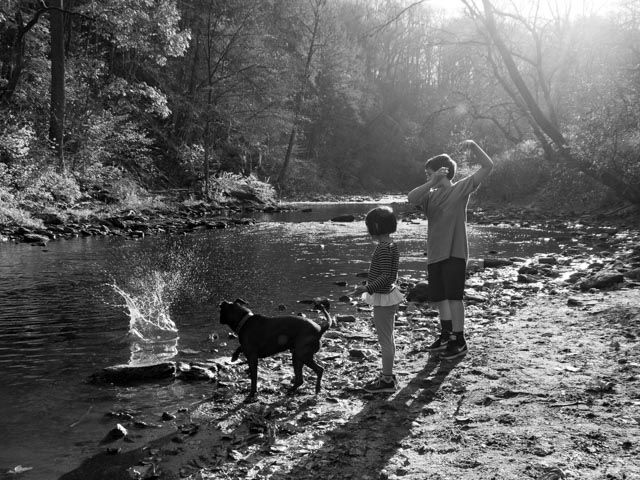
This feels like a perfect childhood moment to me. The expressions of anticipation, the motion of the boy in front. The car in the background is unfortunate, but that’s city living for you.


Shot with the E-M10 at 1/250th, f/4.5 at ISO 200. 

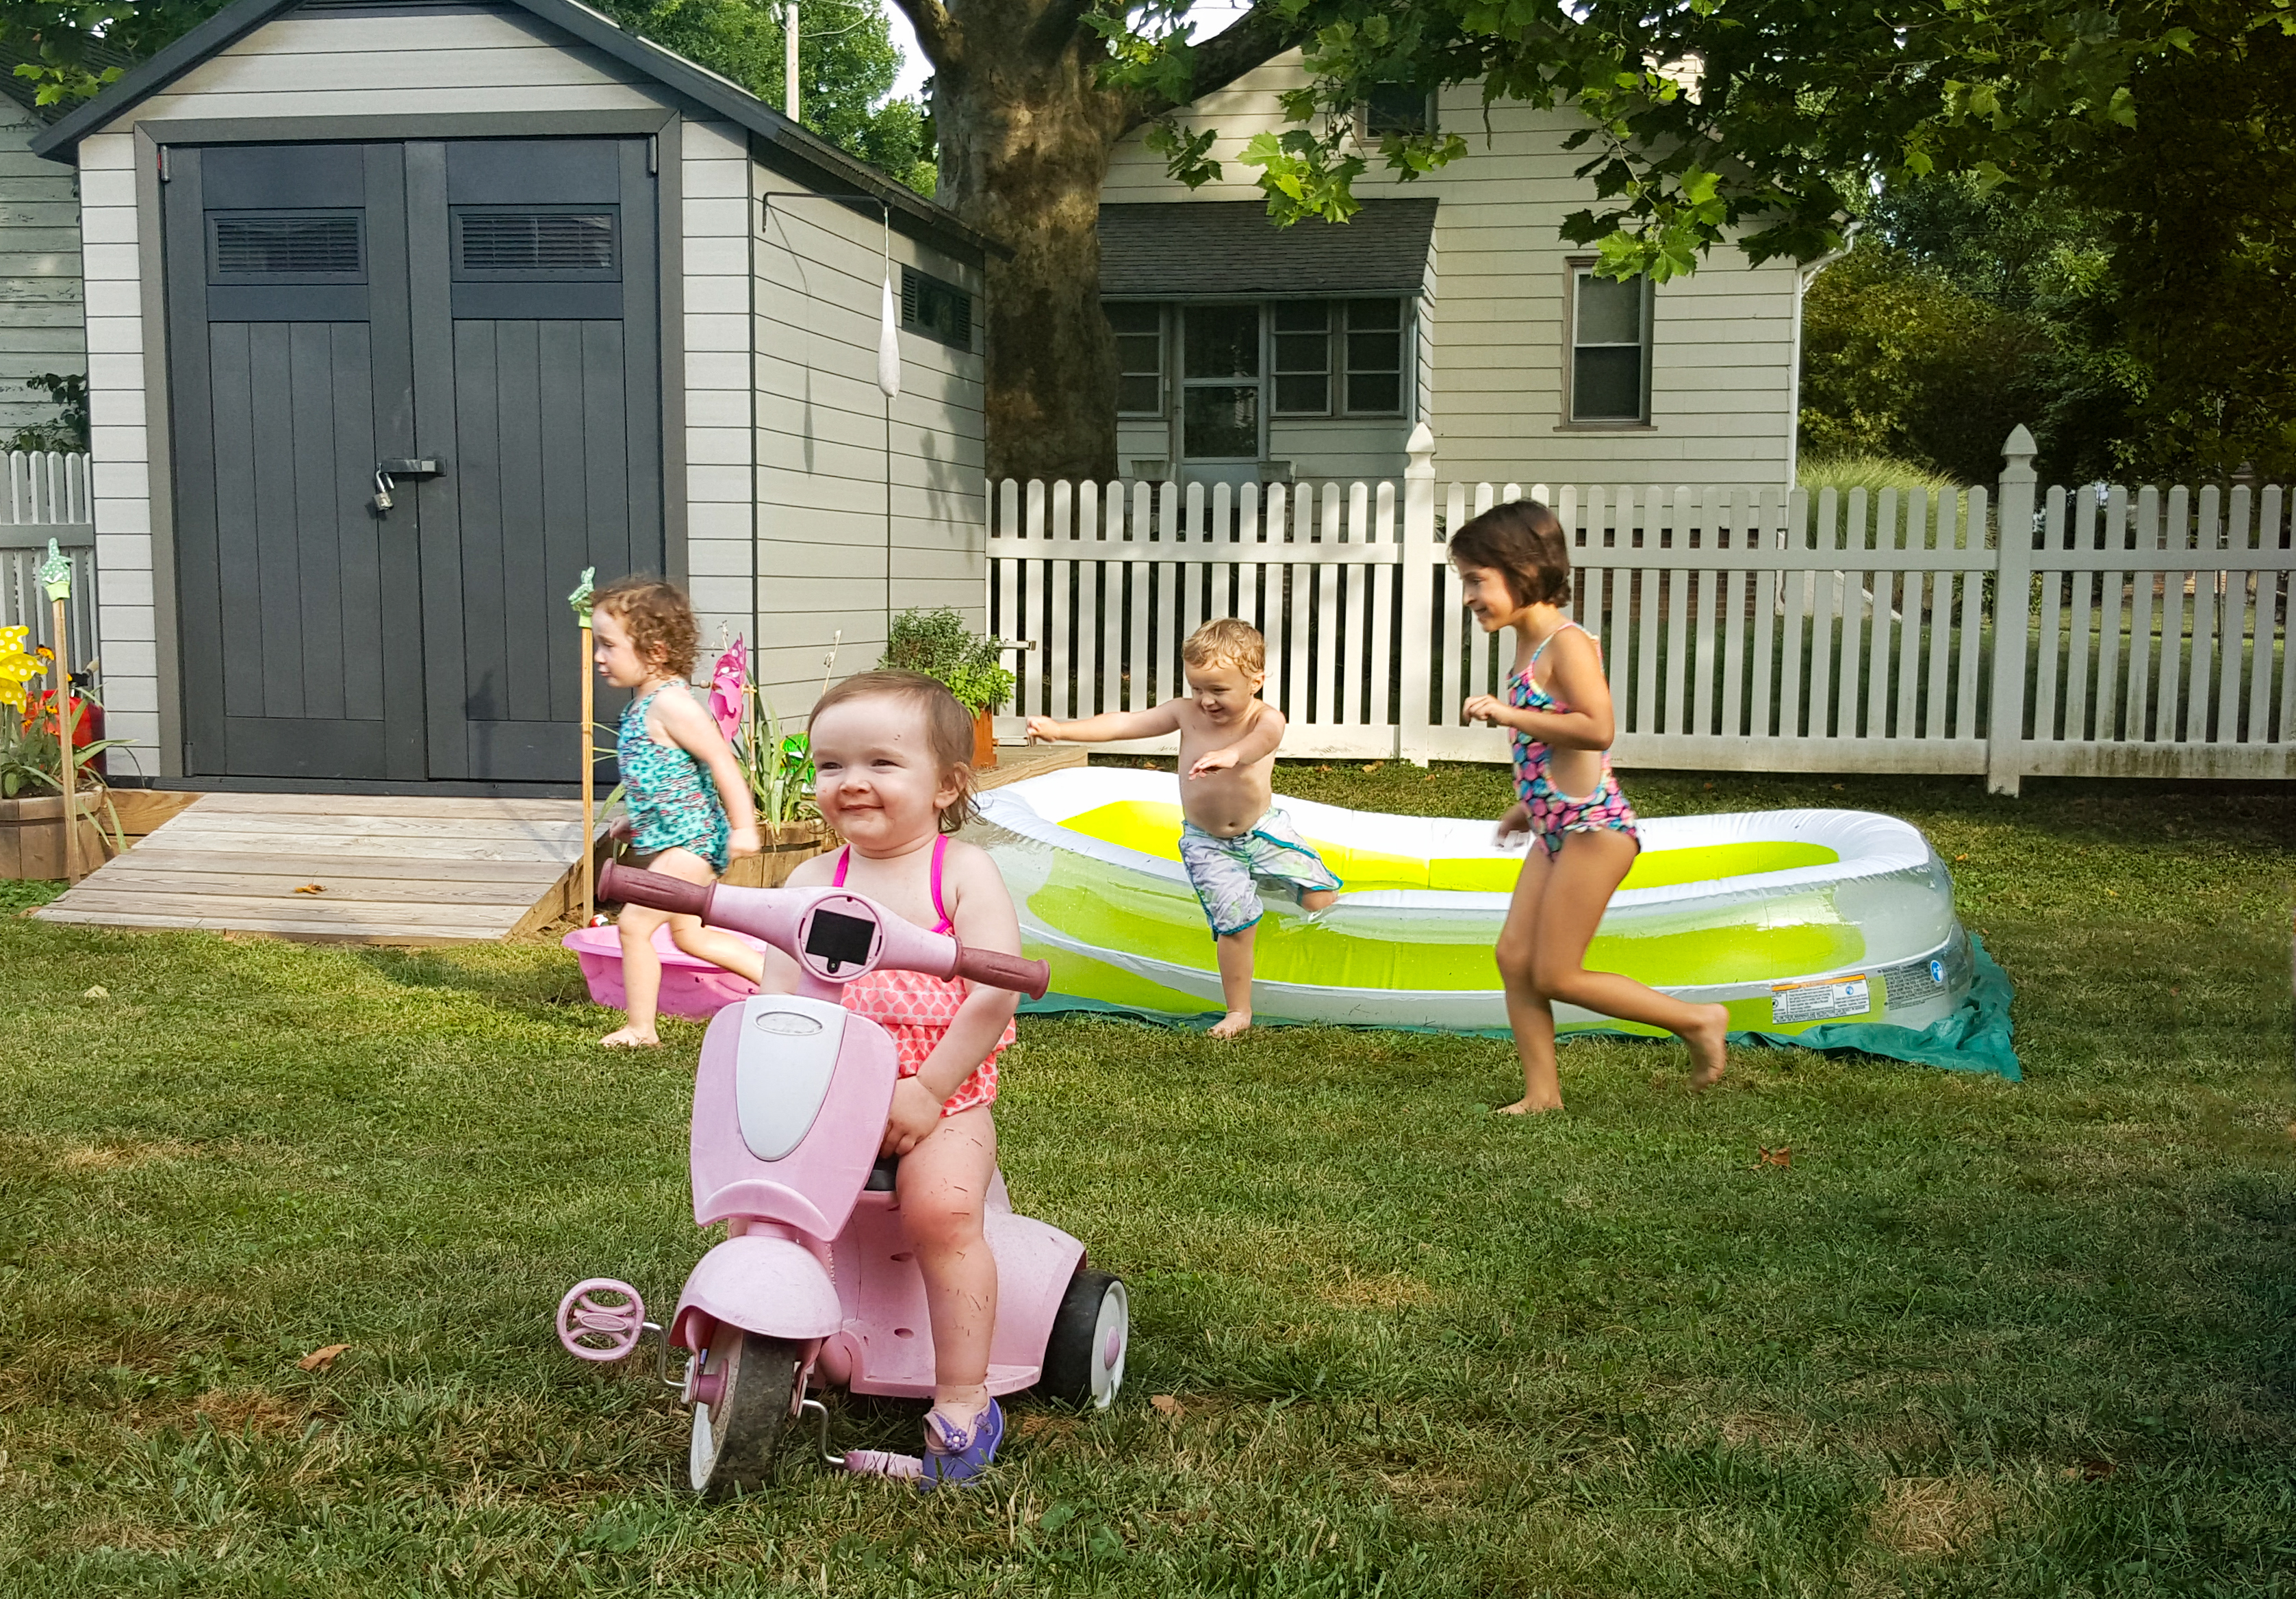
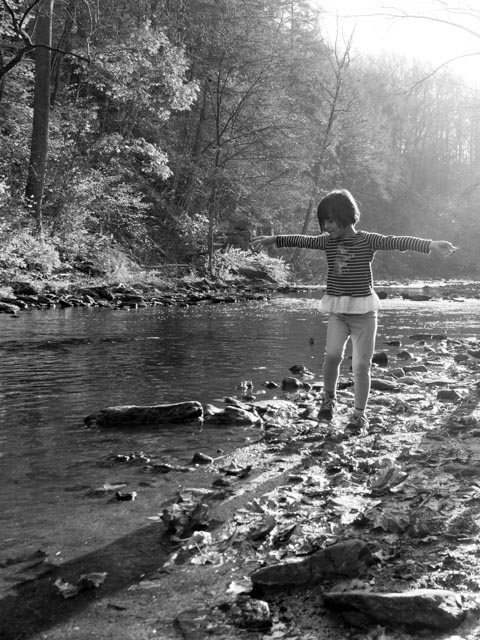
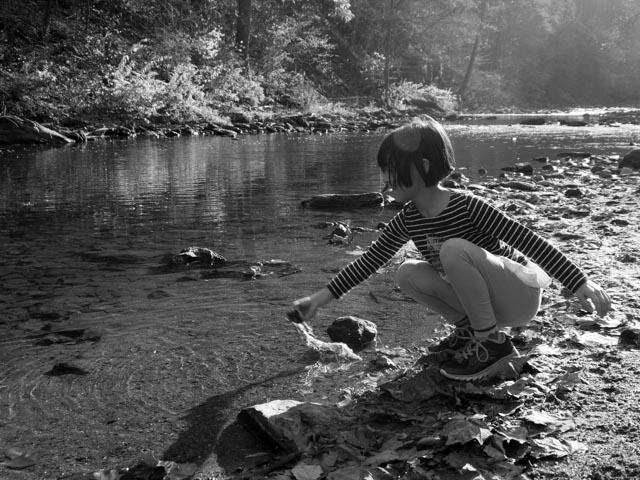
I shot with the sun behind her, with a shutter speed to freeze her but get the motion of her hand and the water.


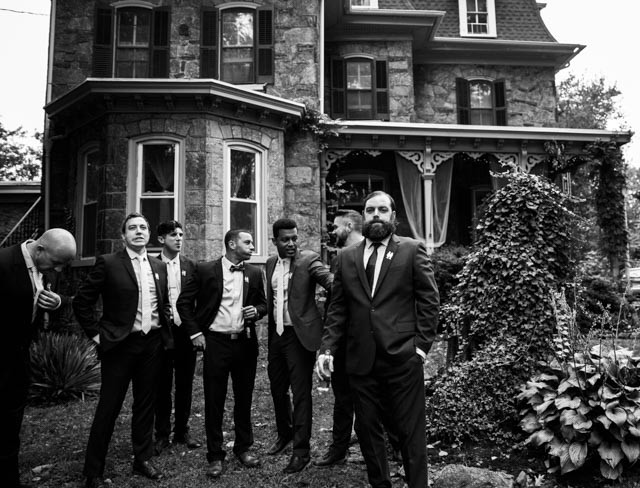
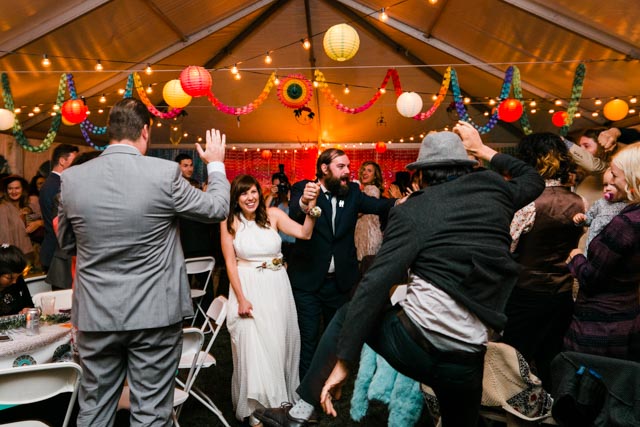
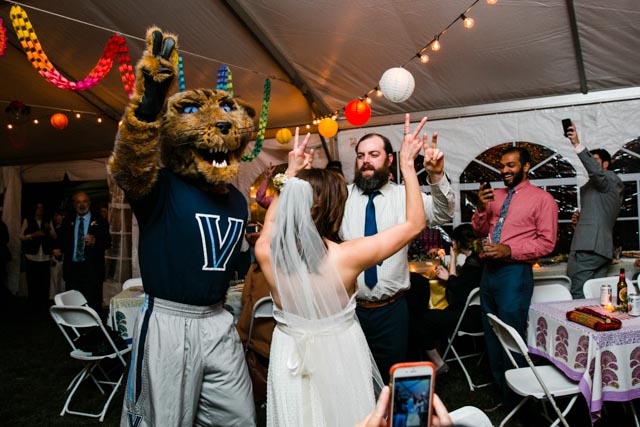
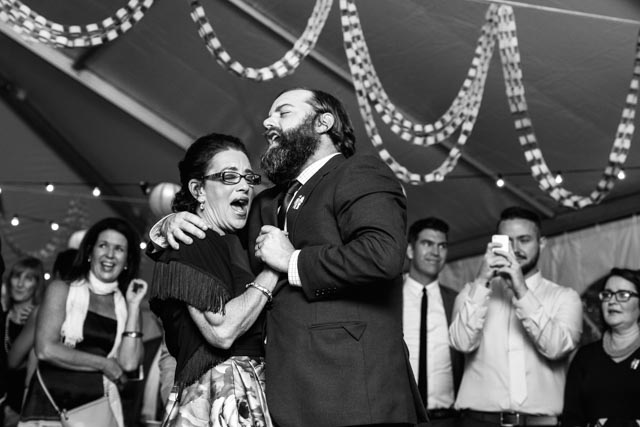
Shot with the 5D Mark III and a 24-70 f/2.8 at 1/60th, f/4 and ISO 1250.

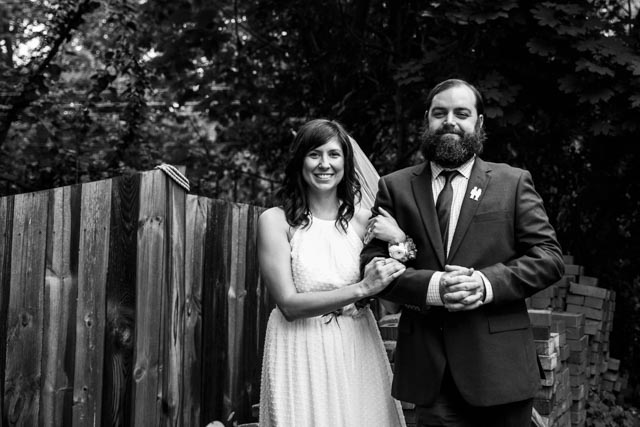
I love the joy and energy in this shot. The bride seeing her friend’s crazy dance, the groom shaking hands.


Do these shots work for you? It’s hard to objectively look at your own photos sometimes, especially if they’re of people you know and love.

Do you enjoy shooting candids? What do you do to capture a specific moment? Join us for the live show this Thursday to see more “slice of life” shots.

Posted on

Beginner Photography: Best of 2016

Happy holidays! This post is going to be a look back on my photography journey so far this year, as we’ll be reviewing your best of 2016 photos for the live show this week. 

So, this might not be much of a dramatic transformation as I only started this series 4 months ago, but I can certainly say I’ve tackled new projects and stretched myself. I mean, I was second shooter on a wedding! That’s crazy. I found out which genres I’m not great at (landscapes, still life) and some that I was surprisingly good at (spooky, wedding, street). I started shooting with a borrowed Olympus E-M10 with a Lumix 14-42mm lens, which felt like a revelation after using my Samsung smart phone for so long, but now I am feeling limited by my gear again.

I found that I need to work on mastering my camera settings. I still rely on automatic mode a bit too much, I don’t nail focus as often as I’d like. I’m better at finding my shots rather than creating them, I could use to plan more.

So I’m going to post my favorite images from these past few months below, in chronological order:

Adventure: 

This shot was taken with my phone, so the settings were out of my control. But the sun was high, so the shutter speed was fast and the ISO was low. I love the mood, the action, and the colors. I feel I successfully captured the joy of children in summer. 


Travel:

Another phone shot! I could not have planned something like this. Just a beautiful moment I happened upon in the Muir Woods. The light filtering through the trees, the backlighting of that lone stump.

Street:

I loved this bright turquoise wall, and I only had to sit for a few minutes to catch someone walking by it. I shot at 1/400th of a second at f/8 and ISO 200.


Spooky:

This is one of my most successful shoots to date, and one that I actually planned out instead of winging. I dressed up my daughter in a vintage dress and applied some makeup to appear dead. I shot behind an old school and an abandoned church at sundown for the mood. The leading lines bring you to her and then off into the darkness. 1/60th, f/4, ISO 800.


Wedding:

This shot is one of my favorites, and it may only be because I know the people in it. I cut off feet, but I love the mixed eye contact, the anxious energy and mood. I was second shooter for a friend who lent me her Canon 5D Mark III and 24-70 f/2.8. It was shot at 1/1000th, f/2.8, and ISO 1250 which is insane. I could have certainly shot at a lower ISO and shutter speed.


Bird:

Another example of the right gear making the shot. I was shooting with the D500 and a 200-500 f/5.6. This was shot at 1/800th, f/5.6 and ISO 100.


Night:

My first attempt at night photography was my most successful. Shot with the Olympus at a 6 second exposure, f/5 and ISO 200.


So those are my favorite shots I took this year. I got to play with cameras I will never own and shoot with really talented photographers. I got to do some travelling and force my family into modeling. I got to practice making art in a way I haven’t in years. I am really enjoying this, and I hope you are having fun watching me try and fail and try and sometimes succeed. You can see all my past posts here.

What do you think I could use to work on this year? What would you like to see me try? What have you learned shooting this year?

Posted on

Beginner Photography: Portraits


I feel like my photography is one step forward, two steps back. Once I feel the slightest bit confident, I have a shoot that I just cannot get right. This is one of those weeks. I’m starting to feel limited by my resources. I would have killed for an external flash for this week’s project. My Olympus does not seem to do well in low light, even though I didn’t feel like my setting was particularly dim!

So this week the subject is portraits, which we did a few months back (you can see my blog post on it here.) It is discouraging to see that my shots then were better than what I came up with this week, but the setting was certainly more conducive to shooting portraits.

So, since I took individual portraits last time, this week I decided to try and take some family shots of my husband Eric, my daughter Eloise and me. Here’s a super helpful video that Tony made on shooting groups:

Here are some tips from that video, some I followed, and some I didn’t:

  • Neutral clothing. You don’t want distracting logos or bright colors busying up the shot.
  • Clean background. If you don’t have a home studio, pick a clean background and get as much distance as you can between your subjects and the background so that you can get some background blur.
  • Use soft light. It’s very difficult to light everyone evenly, so if you can use a bounce flash or a softbox, do.
  • Shoot from the waist up. The face is the most important subject, you don’t need the whole body.
  • Camera Settings. Use a moderately fast shutter speed to freeze any movement, somewhere between 1/60th and 1/125th, depending on if children are involved. You’ll need a high f/stop as well to get multiple people in focus. Somewhere between f/8 up to f/16 depending on how many people you are shooting. Your ISO is going to have to go up accordingly.

So I wound up breaking a lot of these rules, and my shot suffered as a result. I don’t have a home studio, it was far too cold to shoot outside, so I though I’d try getting an environmental shoot of our family near the Christmas tree. That meant we were using indoor lighting, a mix of the tree lights, a regular lamp, and the small bit of outdoor light we had coming through. That made a pretty inhospitable environment. Here’s what I came up with:

 You can tell just by looking at it that my f/stop and shutter speed are too low (0.6 seconds? f/4.5?) I also didn’t realize I had my ISO set to 200 for the whole time. I’m not sure what’s in focus, but it’s not our faces.

And that was the best of those.


This is essentially a snapshot. Eloise wanted to pose with the cat, who is facing the opposite direction. 


So that night was a flop. The next night I thought I’d try shooting in another room that had slightly better light. But you’ll see the shadows cast by overhead lighting.

This actually came out a bit better. My ISO was jacked up this time, so it’s a bit noisy, but seem to have gotten more in focus.


My husband in the chair where he draws.


So these photos are fine. My mom will be glad to have them. But they are not good. Did I mention how hard it is to shoot a photo with yourself in it? Because oh man, what a focusing nightmare. 

Here’s a whole page of videos on how to shoot portraits. Seems I need to revisit them myself!

And just for fun, here’s an in-between shot, once our dog Hungry busted into the room:

Look at that guilty dog face.

Posted on

Beginner Photography: Night

Wow, you guys. Night photography is incredibly difficult and I love it. Between keeping your camera steady for long exposures, balancing mixed lighting, and simply finding a focal point, I really had my work cut out for me. 

First off, if you want to really get into night photography, read chapter 10 in Stunning Digital Photography. There are so many things that go into making a proper night shot, and so many different types of night photography depending on where you shoot and what your subject is. If you want to do star trails, start with this video:

And there’s a lot more free info on this page of our site.

I live in a city and don’t fancy staying out in the woods by myself to attempt star trails, so that was off my list. And as cool as light painting is, I wasn’t really interested in trying that yet either. So I went for what we have plenty of in the city: lights. As always, I was using my (borrowed) Olympus E-M10 and Lumix 14-42mm. I also borrowed a tripod from a dear and generous friend, as there was no way I was attempting night photography by hand. The first night I went out was a bit after sunset, and it got dark quick. I shot the Ben Franklin Bridge from a pier beneath it and amazingly captured some star constellations in the sky above it! Then I went down to the Philadelphia Water Works behind the art museum to try and get a shot of Boathouse Row, a lovely string of boathouses along the river decked out with Christmas lights. That shoot was… less successful. I didn’t have quite enough reach with my lens, the angle wasn’t great, and it was too dark out to make interesting light in the sky or on the water. Since it was so dark and we were so far from the houses, my shutter speed was crazy slow which made the water look smooth and glassy instead of freezing the motion. Because of this I went out again two nights later and tried again at the blue hour, when the sun had just set. I think this time was a bit more successful, but I still wasn’t thrilled with the results. The angle and distance from the houses just didn’t make a compelling shot.

So here’s what I picked up from my shoots:

  • Be prepared. Dress for the weather, bring a tripod for long exposures (you’ll need them!) and a spare battery (they die quicker in the cold). If you’re in a rural area, bring a flashlight! You don’t want to be messing with your camera in the dark. Also choose your time, setting, and weather wisely. A clear night makes for better shots than any inclement weather or haze.

  • Choose your camera settings in advance. I set my camera to aperture priority, chose a moderate aperture and low ISO to reduce the noise and let the camera set the shutter speed as necessary. The first night I went out I bracketed my shots to get a good range of exposures to work with. The next night I just adjusted my exposure compensation by hand when I felt I needed to. You’ll want your shots to be brighter than you’d think, because you can recover more details when you edit them.
  • Editing is key. Shooting in the city, you get lots of ambient light and your lighting is mixed from all the different light sources. Adjusting the white balance in post is a must. I needed to adjust the crop drastically for every shot (my tripod didn’t have a smooth pan and tilt.)

So my first shots were of the bridge, and here’s the one I liked the best:

Not sure if you can see in a jpg, but the big dipper is at the top! 

Now I’ll show you boathouse row on my first shoot vs. my second shoot:

Meh.

Better? But I still don’t love it.

Here’s a panorama of the Water Works:

There’s a lot going on here with no real focal point though.


A cute little building with a glimpse of the FMC Tower.


Gazebo, tree, boathouses.


Doorway.


So that’s what I wound up with. I think my bridge shot was the most successful, which is a bit disappointing since it was literally in the first 10 shots I took. I really wanted to make Boathouse Row happen, but I just didn’t have a great angle on it. I think I still underexposed most of my shots which is unfortunate. I didn’t rely on my histogram like Tony suggested (always listen to Tony)! But how’d I do? 

I can’t wait to see all your shots during the live show this week with our special guest, Kyle Wolfe!

Posted on

Beginner Photography: Multiple Exposures

Hey y’all! As you may know, Tony and Chelsea are away for a few weeks, leading a photo trip in Thailand. We don’t have a live show this week, so I decided to try a photography project: multiple exposures. If you’ve never done it before, or just need a refresher, watch this great video Chelsea made on two different methods:

I decided I would try both ways and see which worked better. I’m using an Olympus E-M10, which has the capability to do the process in-camera. So this is what you need to do in preparation:

  • choose a subject and a relevant overlay image
  • have your subject backlit to make a silhouette
  • photograph your subject, then photograph your overlay image to show through the dark parts of your silhouette

I tend to shoot opportunistically. I spotted my cat sitting in the window and thought he’d make the perfect subject. An easily recognizable shape and ready-made backlighting. Unfortunately cats aren’t the most obliging models. The window he was in front of was a bit busy, which complicated the image. I decided to shoot his food as the overlaying image. Here’s how it turned out:


I like how it fades to all food at the bottom, but the window frame, yard, and food bowls made the shot more complicated than I’d like.

I got a few more shots like that, none particularly successful. Franklin D. Catsevelt needs some coaching. So next I followed him around and shot him while in front of a different window. I used Chelsea’s method in the above video to make a multiple exposure in Photoshop. This time the background was still a bit busy, so I used the magnetic lasso tool to select him and add him onto a blank, white background before completing the process. 

The edges could use some cleaning up, but that far exceeds my Photoshop skills.

And finally, I got a shot of my beloved dog, Hungry Hungry Hippo. He was sitting nicely on the radiator cover in our front window. The blinds were closed behind him, give a cleaner backdrop than the images of the cat. I did some work to clean up the lines of the blinds before overlaying the food shot.

I think this is my most successful of the three.


And there you have it! My first attempts at multiple exposures. This was a really fun project, I think I’ll try it again with more reasonable models so I can control the background better.

Posted on

Beginner Photography: Actual Wildlife

Hey guys! This past week I was in Connecticut to see my family for Thanksgiving and I got to go out shooting with Tony, Chelsea, Madelyn and Justin. We made a video on shooting wildlife, so keep an eye out for that. We also made it into the local paper!

So I got to do some bird photography with some serious equipment. I borrowed T&C’s Nikon D500 with a 200-500mm f/5.6, and that thing is intense. Shooting with a lens that big is a real adjustment. 

Tony and Chelsea know their wildlife spots, so we went out to Harkness Memorial Park and down to a little inlet surrounded by tall grasses. There weren’t a whole lot of birds out, just some gulls for a while. I practiced tracking them through a bird blind. One of the hardest parts was just getting a bird in the frame while looking through that insane lens. I would zoom all the way out to 200mm just to get the bird in frame before zooming in to 500mm to try and capture it. Holding it still in blustering winds was hard enough just shooting a still subject. I didn’t get anywhere close to getting a moving subject in focus. Thankfully we had an obliging mockingbird who modeled for us as soon as we got there.

Here’s a great video on shooting songbirds:

And another on shooting flying birds:

Half of us had our batteries freeze up or die towards the end of our session, and of course a whole flock of turkey vultures and black vultures came swooping overhead as we were packing up. It was a rare and beautiful sight that I was completely unprepared to capture! Always have a spare battery, kids.

So here’s what I gleaned from my one trip out with our talented teachers:

Research your location

    • There are local bird-watching groups you can join who can tell you where specific species nest.
    • Choose a clear day, hard light is good for widlife.
    • If shooting songbirds, choose your setting, set up your gear and wait.

Bring the right gear

    • Dress for the weather! Gloves, boots, hats and coats were a must for us going out that early on a windy day.
    • Camouflage, netting, and bird blinds all help you get closer without the need for a huge lens.
    • A telephoto lens is the best if you cannot get close. Watch this video for some suggestions.
    • Spare battery!

Camera settings

    • Put your camera in shutter priority so you can adjust for still subjects to moving subjects.
    • Autofocus for moving subjects.
    • Keep your f/stop higher to increase your chances of getting the nearest eye in focus.
    • Use continuous shutter to fire off multiple shots in a row.

 Great model, nice setting, and some pleasing depth of field.


Another angle.


I just love the texture of this little guy’s feathers.


This is the closest I got to getting a moving subject in focus before my battery died.


I had a lot of fun out there. I can’t imagine wildlife will ever be my particular focus, but it was a really interesting practice and I truly appreciate how difficult it is to do now that I’ve attempted it. I did a bit of post processing on all of these shots, mostly cropping in tight (the Tony Northrup way) and checking my white and black points. I could use to do some noise reduction on the background of that vulture shot as well.

So how’d I do for my first time? 

And a final tip, don’t be annoying:

Posted on

Beginner Photography: Not Wildlife

Soooo, this weeks’ live show topic is wildlife. Thing is, we did wildlife a month ago and I wrote a blog post on my attempt then.

Wildlife is a near-impossible task if you are not a dedicated wildlife photographer. It takes time, patience, and the proper gear. None of which I have! I went on a hike with my family this weekend and did not come across any wildlife besides an errant squirrel or a far-away bird. There were a lot of dogs on the trail, mine included, so what little wildlife may inhabit the area avoided us. So I took photos of what I had, which is my family and a beautiful setting.

For whatever reason, every shot I liked I wound up converting to black and white. My family was wearing bright colors which were distracting, and even though there were some nice fall colors in the trees, the sky and water both looked murky. 

I focused on the backlighting of the sun behind the kids when we were at the stream, which cast some interesting shadows. I think I was able to capture some of the joy of a warm late-fall day, moments of peace in a tumultuous time.

Trail shadows 


I cannot figure out how to separate my black dog from the background


I love the ripple in the water and the motion of her hand


A pause in motion


Soft glow


Girl in flight


I’m gonna be honest, this did not feel like a successful shoot. But I had a hell of a week and this was a moment of brightness. Please let me know what you would have done differently with these shots. 

Also, I’ll be in CT starting tomorrow, and I’m be going out to shoot some real wildlife with Chelsea, Tony, and Justin! So I’ll have some actual wildlife work to show for myself. Keep an eye out!

Posted on

Beginner Photography: Wedding

You guys! This is a big one. A few months ago I got the honor of being a second shooter for my friend’s wedding, assisting my very talented friend and wedding photographer, Carina of Love Me Do Photography. Our friends, Rick and Nicole, got married in the backyard of their huge community house in Germantown, Philadelphia. The wedding was quirky and fun and I wanted to do my best to capture their unique personalities. 

So the second shooter for a wedding has different responsibilities from the primary shooter. If you have Stunning Digital Photography, there’s a whole chapter on wedding photography which includes a very helpful checklist for what you need to prepare for before shooting a wedding. I used it and I highly recommend it. As the secondary shooter I was responsible for shooting details of the space, the groom and groomsmen preparing for the ceremony, candid shots of the wedding party and guests, and the all-important reaction shots of the groom, family and guests. I’ll show you examples of all of these below.

I can’t speak too much on the preparation before the shoot as I was not part of that, but it is integral to meet with your couple before hand and make a list of what shots they need, posed and otherwise, and what events will happen throughout the day that you need to be prepared for.

For this shoot, Carina lent me her Canon 5D Mark III with a 24-70 lens and a Canon 600 external flash. After the wedding, she gave me .jpgs of the best shots I took, so I did some editing on them, but they aren’t as intricate edits as I would have attempted with raw files.

Details:

It is important to capture parts of the wedding that make it special. Keep your eye out for the little details and decorations that the family put so much effort into.

The bride’s bouquet


These adorable pins of the bride and groom were the wedding favors

A glimpse of the groom’s socks

Getting Ready:

The primary shooter will most likely shoot the bride getting ready. She’ll get shots of the wedding dress, shoes, rings, etc. 

Requisite tie-in-the-mirror shot


Waiting for photos

Posed Photos/Candids of Posed Photos

The primary will do the majority of posed shots, but you can get the moments in between where you can catch some great moments of joy and nervousness.


Fun family photo

Goofy groom

Ceremony

The ceremony is the time to get shots of as many of the guests and family members as possible. It is important to capture the important people in the couple’s life and their moments of shared joy. Make sure to be present for the important reaction shots like the guests seeing the bride for the first time, the wedding kiss, and the reactions of the guests to those moments. 

Waiting to enter the ceremony

Here comes the bride

Guest reactions to the bride

Husband and wife

Celebration

Reception

The reactions of the parents of the couple are very important to capture, as well as the dance of the mother of the groom and the father of the bride. Not all weddings will follow these traditions, but find out in advance which of these will appear so you can be prepared to shoot them.

Surprise guest

Reaction shots to the toast

Bride and groom dance

Father of the bride dance

Mother of the groom dance

This was such a great experience. I would highly recommend offering your services to a professional photographer if you aren’t one yet yourself. I took thousands of photos and got a handful that I am really proud of. It was a long and physically strenuous day (I didn’t consider how much I’d be crouching and running around!) and the experience was invaluable. 

Posted on

Beginner Photography: Candid Family

Hey there! This week the topic for the live show is “candid family photos” which is right up my alley. So, this isn’t really a formal genre, but it certainly follows the rules of some other more established topics like street photography. It’s all about capturing the mood and expression of your subjects, giving the viewer a “slice of life” view.

You’ll notice most of my photos in this post are black and white. That’s because I’m photographing children, who tend to wear bright colors, and I’m shooting in my house and outside which have distracting elements. Converting photos to black and white helps to focus the viewers attention and eliminates distractions.

While most of my family moments would realistically include the TV or cell phones, I managed to capture my daughter goofing around on the couch, and her and my stepson outside playing with my neighbor’s grandkids. It’s hard for me to objectively know which of these images are successful. This topic is more sentimental than many, and I can’t help but judge these images on my feeling towards them and the emotions they elicit more than the technical aspects. These certainly don’t have the sharpest focus, but I tried to capture movement and expression above all else. I used low f/stops (which aren’t actually that low since I’m using a micro 4/3 camera) and auto ISO and shutter speeds.


My regular weekend view.


This is pretty much the essence of Eloise; pretending to be a cat.


I love this one. The expressions, the movement. The car and post make an unfortunate background though.


Gleefully collecting leaves to throw in the air


Rule negotiation.

So how’d I do? What could I have done better? I wish I’d gotten some sharper images of the kids throwing leaves (I didn’t post any here because they weren’t great) but I still have trouble balancing my shutter speed and exposure. Time to revisit the basics!

Can’t wait to see what you all come up with this week!

Posted on

Beginner Photography: Spooky

Guys! This was a fun one. I paid my daughter, Eloise, in candy to come out with me and take some photos, because kids are creepy as heck. Styling, setting, and mood are very important for setting a spooky scene. I put her in a vintage dress and hair bow and put brown eye shadow around her eyes and on her cheek bones to make her look emaciated. I also put cover-up on her lips to make her look paler. She wound up looking quite ghostly.

I had a place in mind to shoot, a condemned church in our neighborhood that would fit the old-timey vibe of her costume. We went out around sunset so that it would be a bit darker out to suit the mood. I would have shot later, but I don’t have an external flash and my camera isn’t the best in low light situations. You’ll see that the images came out pretty noisy, luckily it didn’t much matter with the mood of the images. 

The one thing I regret is not putting her in different shoes. The shoes she wore are really modern and I had intended on having her take them off, but then didn’t want her standing in sticks with her bare feet. The styling is so important though! Something modern looking in a photo that is meant to look antique will take the viewer out of it. Pay attention to detail! Eloise is not great at smiling for the camera, so she was kind of perfect for this shoot. There are so many old buildings in the area that served for great settings. Here’s what I came up with:

I positioned her with the date of the building to add context. I also used a radial filter to blur the area around her for mood. I converted all the images to black and white and pulled down the reds and oranges to lighten her skin. The dress wound up far brighter than the rest of the scene, so I pulled down the highlights.

pa301253

I loved the little chair sitting by the building, along with the slope of the ground. I positioned Eloise coming towards the camera and nearest the right of the frame to have her uncomfortably entering the viewers space.

pa301265

I wanted a shot of her in front of the Danger sign, although it messes up the timelessness of the scene a bit, the signs are obviously current. But look at that vacant stare!

pa301270

This is probably my favorite. The leading lines up to her, the darkness in the trees behind and her creepy stance.


How’d I do? Did I successfully creep you out?