The thing that got me into sports photography is high school band. Before you chew too much on that non-sequitur, let me explain. See, I’m a marching band instructor with a small high school in Maryland. I wanted to make images of the kids performing and rehearsing for our various media outlets, and I wanted them to be dynamic and eye-catching, and I wanted them to look like the professional photos of sports and action that I saw in the magazines. I amassed all the camera gear I had (an iPhone) and literally all of my photographic knowledge (you point it at the thing you want to take a picture of and press the button, right?) and set out to make the perfect action shot.
I failed miserably.
I know- it’s shocking that the patented combination of no equipment and no knowledge didn’t yield professional-quality results. But I knew I could fix the lack of knowledge. Photography became my obsession, and I would read and watch every how-to, every tutorial, and every workshop I could get my hands on (including many of the ones on this site, thanks Chelsea and Tony!) I became very interested in shooting sports and action, but as I read about those fields I became more and more dismayed. Often I would hear how the type of photography I was most interested in was also the one that demanded the most from camera gear, and thus quickly became one of the most expensive.
Stubborn as I am, I thought that I could still approach the quality of pro action and sports shots without the crazy investment in gear. I spent about eight months doing just that. Here’s what I learned.
How Cheap is Cheap?
Let’s take a step back here. As far as hobbies go, photography is not the most cost-effective. Even cheap camera gear is expensive, and I of course had to make some level of investment in camera gear in order to do what I have to do. Basically, my goal was to get as far away from the price point of the Sports Illustrated shooter with the $6500 camera body and multiple $10,000 lenses while still being able to accomplish what I wanted to accomplish. So here’s what I used (by the way, although I’m a Nikon shooter, Canon, Sony, and other manufacturers have similar products.)
Camera Body-
Nikon D3300– The D3300 is the newest version (at the time of this writing, anyway) of Nikon’s entry-level DSLR. It’s a 24.1MP body, and is listed at around $650 for the body and an 18-55mm kit lens, although oftentimes you can find it on sale for less than $500.
Lenses-
18-55mm f/3.5-f/5.6– This is the kit lens that came with the D3300, it goes pretty wide angle to just a little bit past a “normal” focal length. If you have the option, get a kit lens that goes relatively wide as part of your camera purchase. This lens sells for $250 as a stand-alone, although again, it comes with the D3300 if you go that route.
50mm f/1.8– The “nifty fifty” is cheap, sharp, and fast. It’s not always the most useful focal length for action, but the other things that it does well make it extremely useful. You can get the Nikon version of this lens for about $200 new, or even cheaper refurbished, which is how I bought mine. If I recall, I spent about $165.
55-300 f/4-f/5.6– This is my workhorse telephoto lens for sports. It gets me that long focal length that I’m after and has vibration reduction. While it does not have the same sharpness as the 50mm f/1.8, or a professional level telephoto prime, it’s sharp enough for what I’m trying to accomplish. New, it sells for about $400, but I again went the refurbished route and got mine for about $230.
That’s my basic gear to go shoot sports and action. If you got each of these items new by my calculations you’d be out about $1300. If you check for refurbished equipment and shop smart you can get this price way down. I came in at just under $1000 for this gear.
Note: As you can see, I have no problem buying refurbished camera gear. Just be sure to do your research and buy from reputable sellers with lots of positive ratings. I think that it’s a very safe way to buy camera equipment.
Limitations
Now, obviously, if this equipment could do all of the stuff that the pro equipment could, then there’d be no reason to buy the pro stuff. There are some definite drawbacks when it comes to using this equipment that you have to be aware of if you want to overcome them.
Frame Rate
Firstly, the D3300 shoots 5 frames per second. This might seem pretty fast, but when you compare it to the 11 frames per second of the professional sports DSLRs, then you’re missing about every other shot. So you can’t just hold that shutter down and expect to get your peak moment. We’ll discuss this more in a bit.
Autofocus
The D3300 also does not have a particularly good autofocus system. This means that you need to be patient, vigilant, and almost neurotic about framing up your subjects and focusing before you take shots, and you need to accept the fact that you’re going to get some out of focus frames.
Noise
The D3300 is not a fantastic low-light camera. It’s an APS-C body, so the sensor is smaller than the full-frame cameras, and the noise can get pretty aggressive quickly as you raise your ISO. I would go as high as 1600, but any higher and things would become unusable for me.
Aperture
With the exception of the 50mm f/1.8, the lenses I’m using do not have a wide maximum aperture, especially zoomed all the way in. The 55-300, for example, has a maximum aperture of f/5.6 at it’s maximum focal length of 300mm. That means not a whole lot of light is getting to the camera.
There are other little inconveniences, such as the tiny buffer on the D3300, the lack of buttons that you’ll find on other, higher-end cameras, and a couple other little minor headaches, but all of these are minor in comparison to the ones listed above. I should also really point out that, for the money, you are getting a very capable set-up. You just have to learn how to shoot smart to minimize the drawbacks and accentuate the strengths of this camera and lens combo.
Shooting Strategies
The biggest reason that sports and action shooting is so demanding on your camera is because of light. In order to freeze action, we have to shoot with a really fast shutter speed. I always try to get to about 1/1000th of a second in order to feel good about freezing most action. That fast of a shutter speed really limits the amount of light getting to the camera. When you add the fact that the lens we’re using does not have a very wide maximum aperture and the images fall apart when you push the camera to a high ISO, the odds are kind of stacked against us here. So what can we do?
Always Shoot Wide Open
Whatever wide-open means on your lens, that’s where you want to put the aperture. This does two things for you. Number one, it lets as much light into the camera as possible, which we already know is hugely important with a fast shutter speed. Secondly, it’s going to give you the shallowest depth of field that your lens will give you. Assuming you’ve focused correctly, this will make your subject really pop off the page, and it’s one of the hallmarks of sports and action photography. Check the photos in ESPN or Sports Illustrated, and you’ll see what I mean. The subjects pop because the rest of the frame is very out of focus.

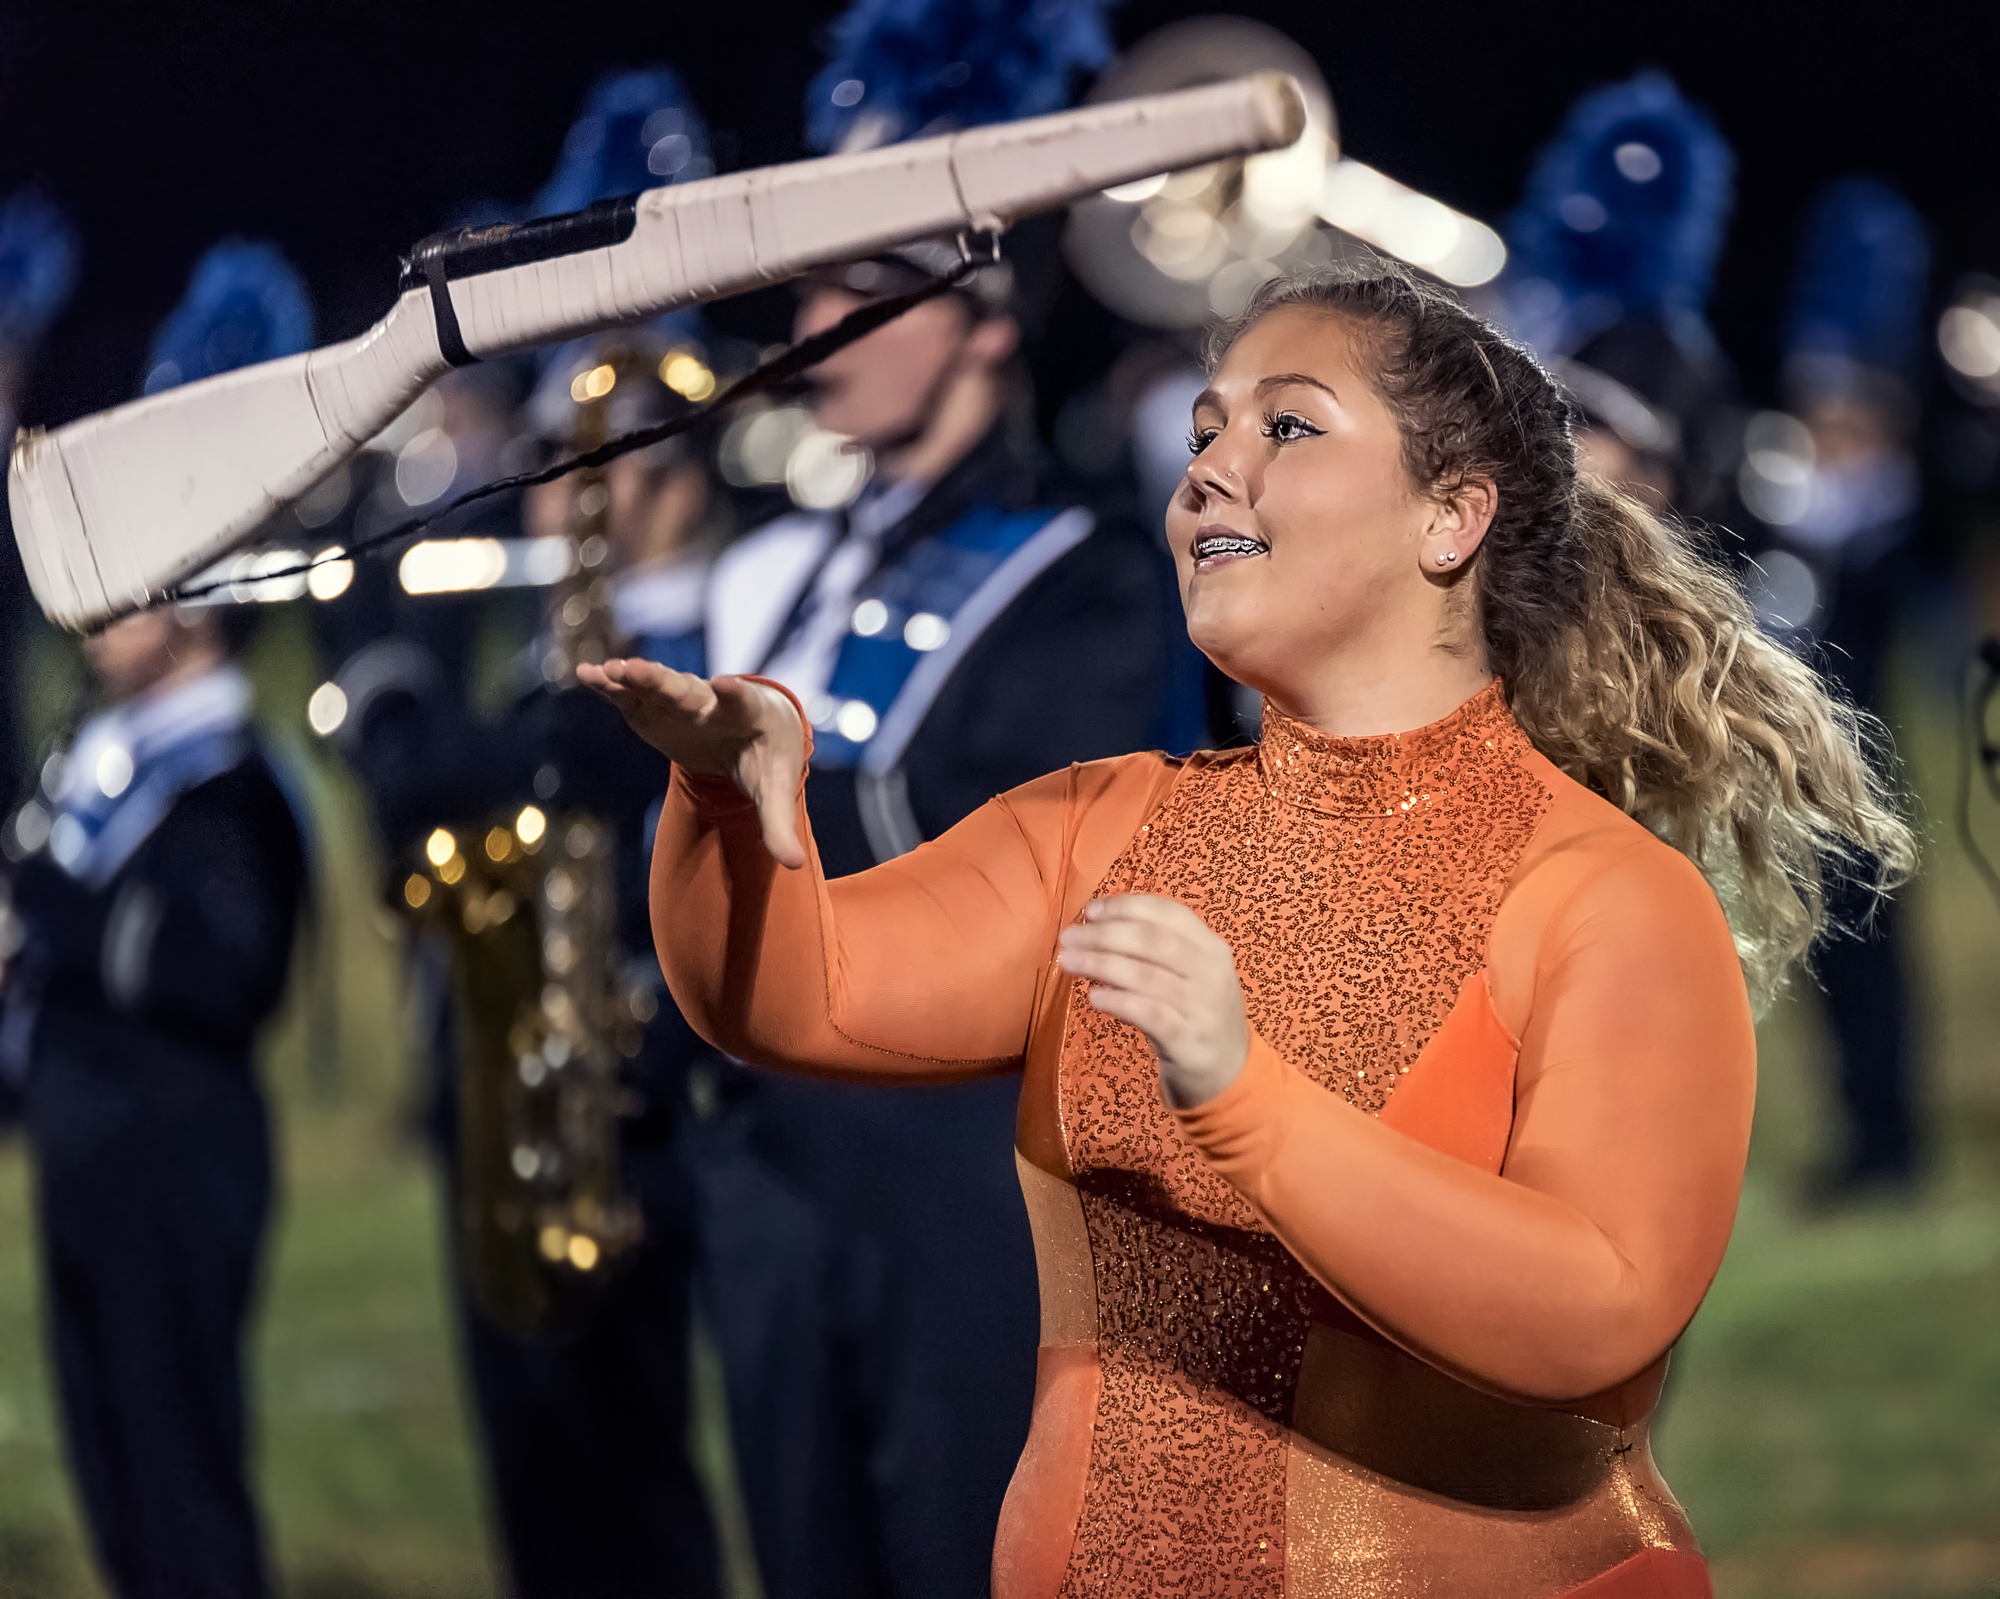
This is at f/5.6, which ordinarily is not thought of as an extremely shallow depth-of-field. Because I’m shooting very telephoto, at 280mm, and focusing on her, the background completely washes out. I couldn’t open up any more, because the maximum aperture for that lens is f/5.6 on the long end. It was still plenty shallow to knock out the background.
I’m cheating a little bit here. This was shot with a more professional lens, the Tamron 70-200 f/2.8, but it’s a great example of how a shallow depth of field can isolate the subject off even a very busy background. If you could get close enough, you could do the same thing with your 50mm f1/.8. The Tamron just happened to be on the camera at the time.
Day Games Are Your Friend
Bright sunshiny days make for easy sports shooting.

This photo was taken at about 3 in the afternoon in bright bright sunlight. My camera settings were 1/1250th of a second at f/5.6, ISO 200. The D3300 loves low ISOs, and will render a beautiful image at ISO 200, and with the prevalence of sunlight, I was able to get my shutter speed plenty high without having to push the ISO to places it doesn’t want to go.

Same thing here. Again, this was taken right around 3 in the afternoon, at ISO 200, f/5.0 (I was only zoomed to 160mm) 1/2500th of a second. We’re getting that critical shutter speed that we’re after without straining the camera with a high ISO, or needing to use a crazy fast lens. This is because we’re shooting in an environment with tons of light, so even the light-starving settings for action aren’t enough to stress the camera.
Raise the ISO When You Need To
Not all of our events happen in bright sunlight, and sometimes we’re going to have to raise the ISO out of the basement. Here’s where you can learn from my mistakes. For the longest time, I would be so terrified to bump that ISO up, and I would underexpose my images with the intention of brightening them later in Lightroom/Photoshop.
Stop. Don’t do that. Press the button, raise the ISO.
Noise loves dark areas of photos. When you intentionally underexpose to keep your ISO low, all you do is make the entire image a dark place where there can be tons of noise. Then, once you brighten the exposure in Lightroom, you have ugly noise everywhere, plus the weird contrast and color that comes from aggressively brightening an underexposed frame. Use the ISO that gets you the correct exposure. Then, you at least have a chance to wrestle that noise back down in post-production.

This shot of the Boston Crusaders Drum and Bugle Corps was taken at ISO 3200. It’s a little noisy, to be sure. I’m not sure how I’d feel about printing this one in extremely large sizes. But because it was properly exposed, it was easier to mitigate the noise in post-production and still be able to come up with a quality photo.
Look for Quiet Moments
In the peak of action we need fast shutter speeds or else everything is going to blur out, but not all sports, performing arts, or action is peak action. There are plenty of quieter, more reflective moments, and if you can spot them you can really make some amazing photos without straining your camera too much. This is especially useful in dark environments where you just can’t get that fast shutter speed without using an ISO you’re not comfortable using.
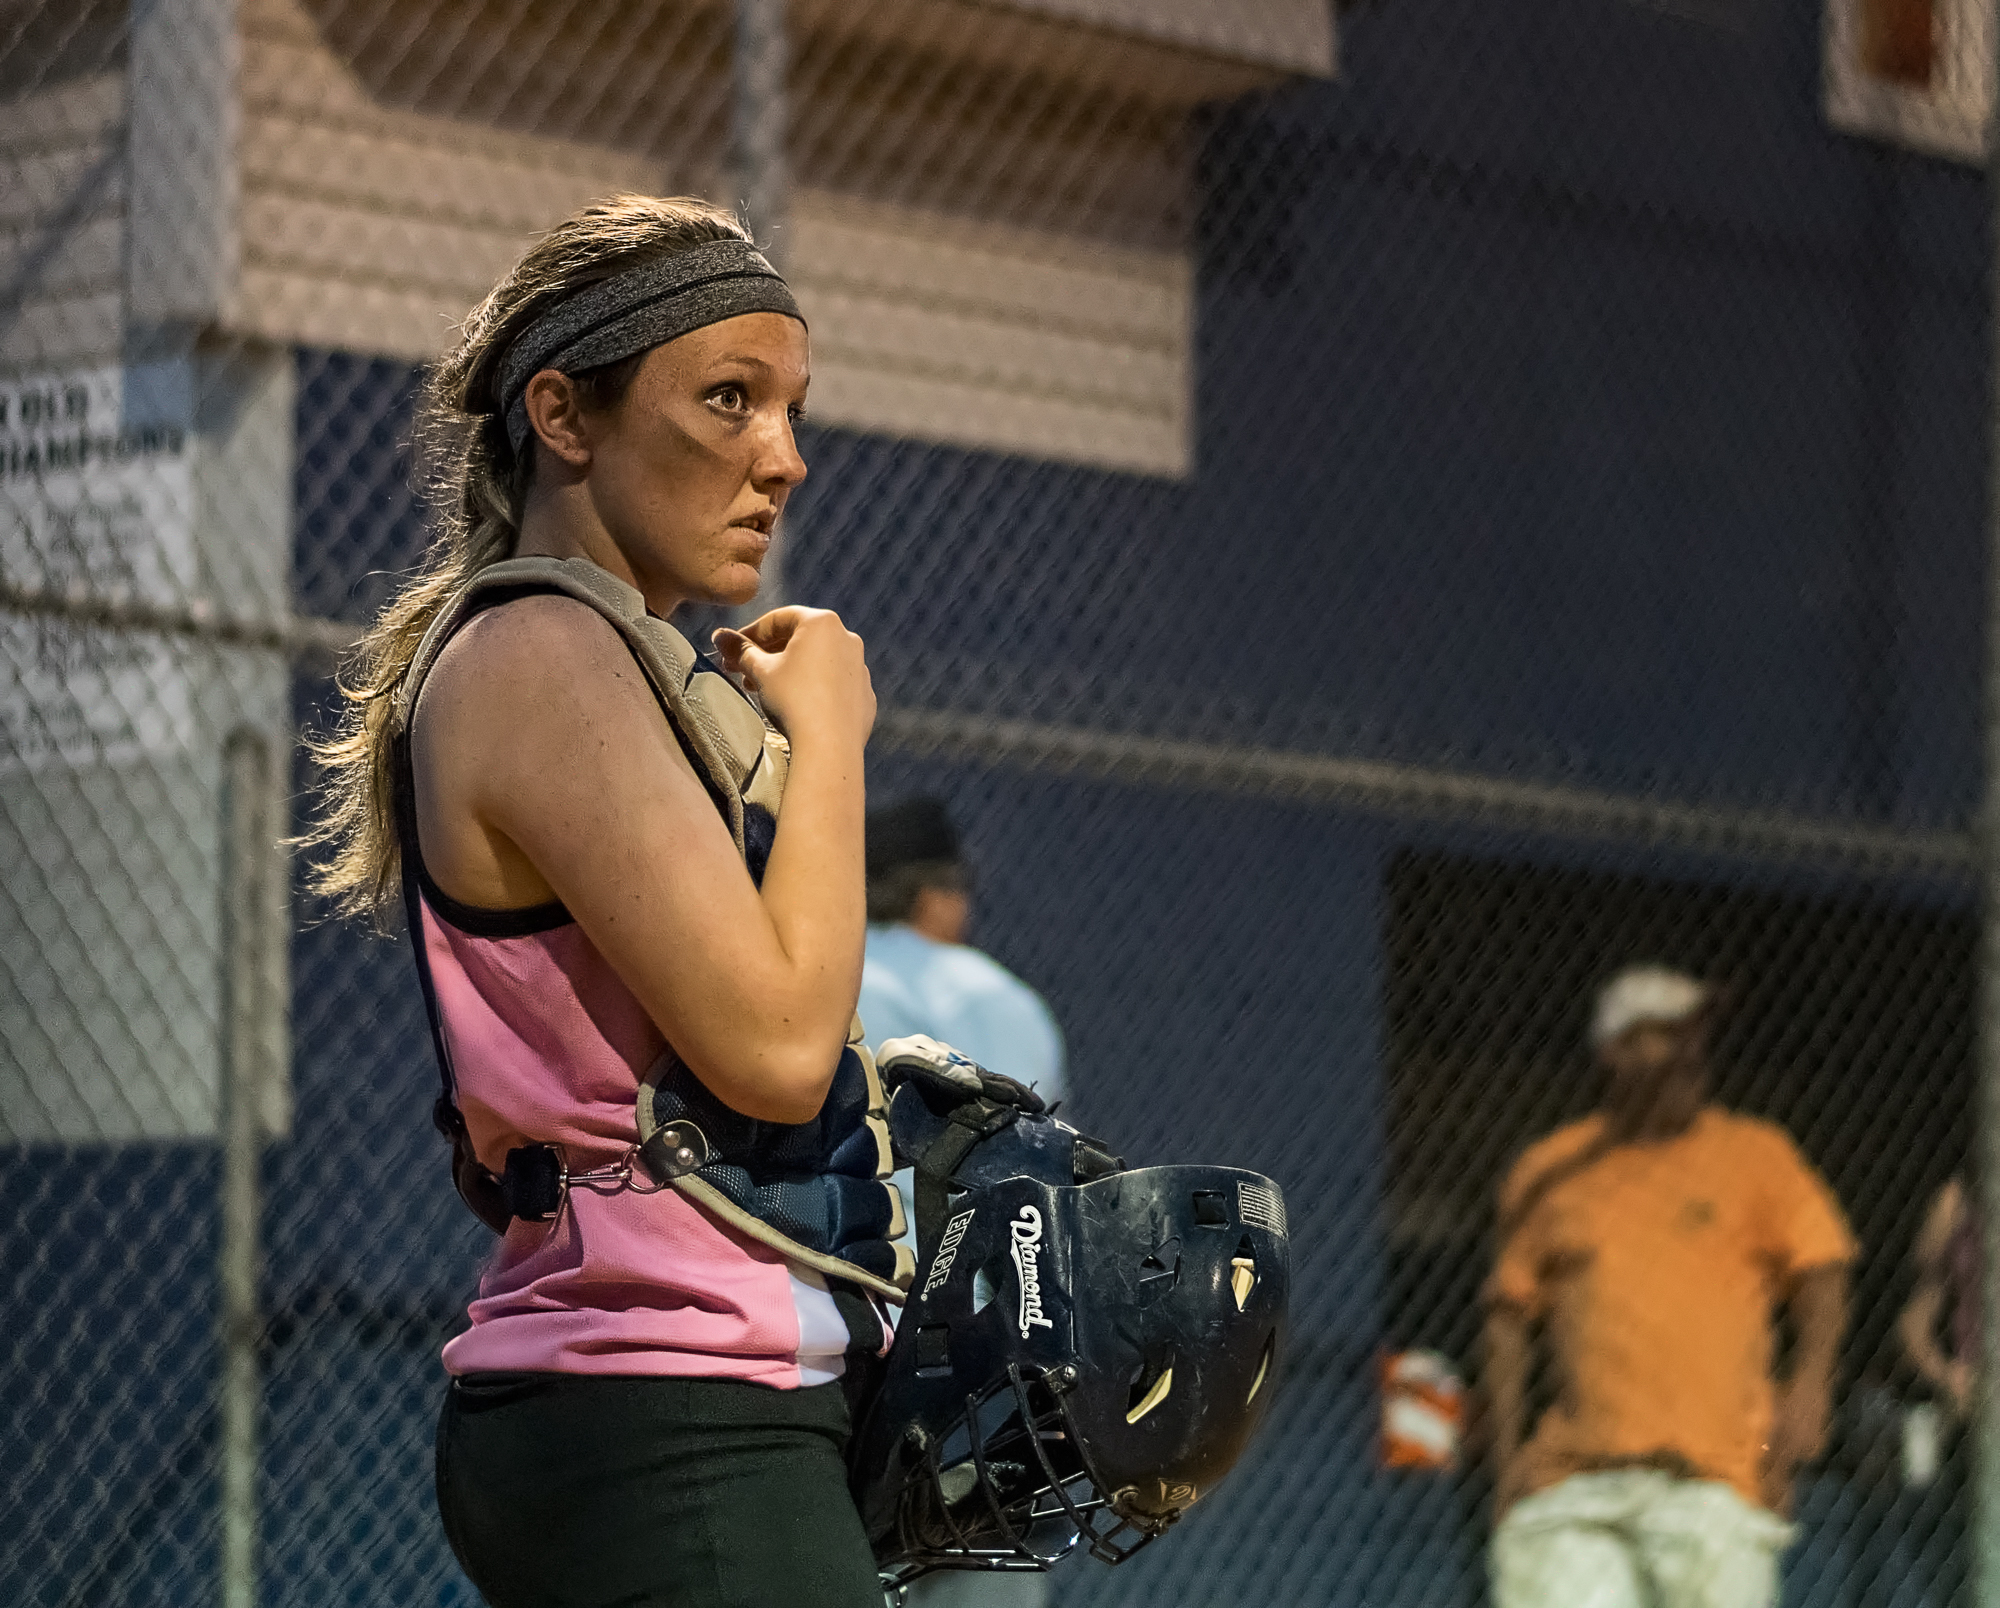
This is using the 50mm f/1.8 through a hole in the fence. I was using a shutter speed of 1/640th here, which is slow for action. I also, for some reason, was shooting at ISO 1600. I definitely could have dropped the ISO and the shutter speed and gotten an equivalent exposure. I probably came straight from shooting action and didn’t want to miss this moment, so I didn’t get my settings all the way set.

This hat and glove weren’t going anywhere, so I could take my time to frame up the shot and I didn’t have to worry about a fast shutter speed at all. Incidentally, this is also shot at f/5.6 at 280mm, and you can see the way the background just completely disappears. I shot this at 1/250th of a second. These peripheries to the game or event can be really important to capture. They help tell the story of the day, even if they’re not the peak action.
Go Wide
We always think of action photography as getting tight into the action and seeing the faces of the players, that’s a great way to shoot. But if you can shoot wide every so often, a lot of the issues that you face with a budget camera set up are going to be alleviated.

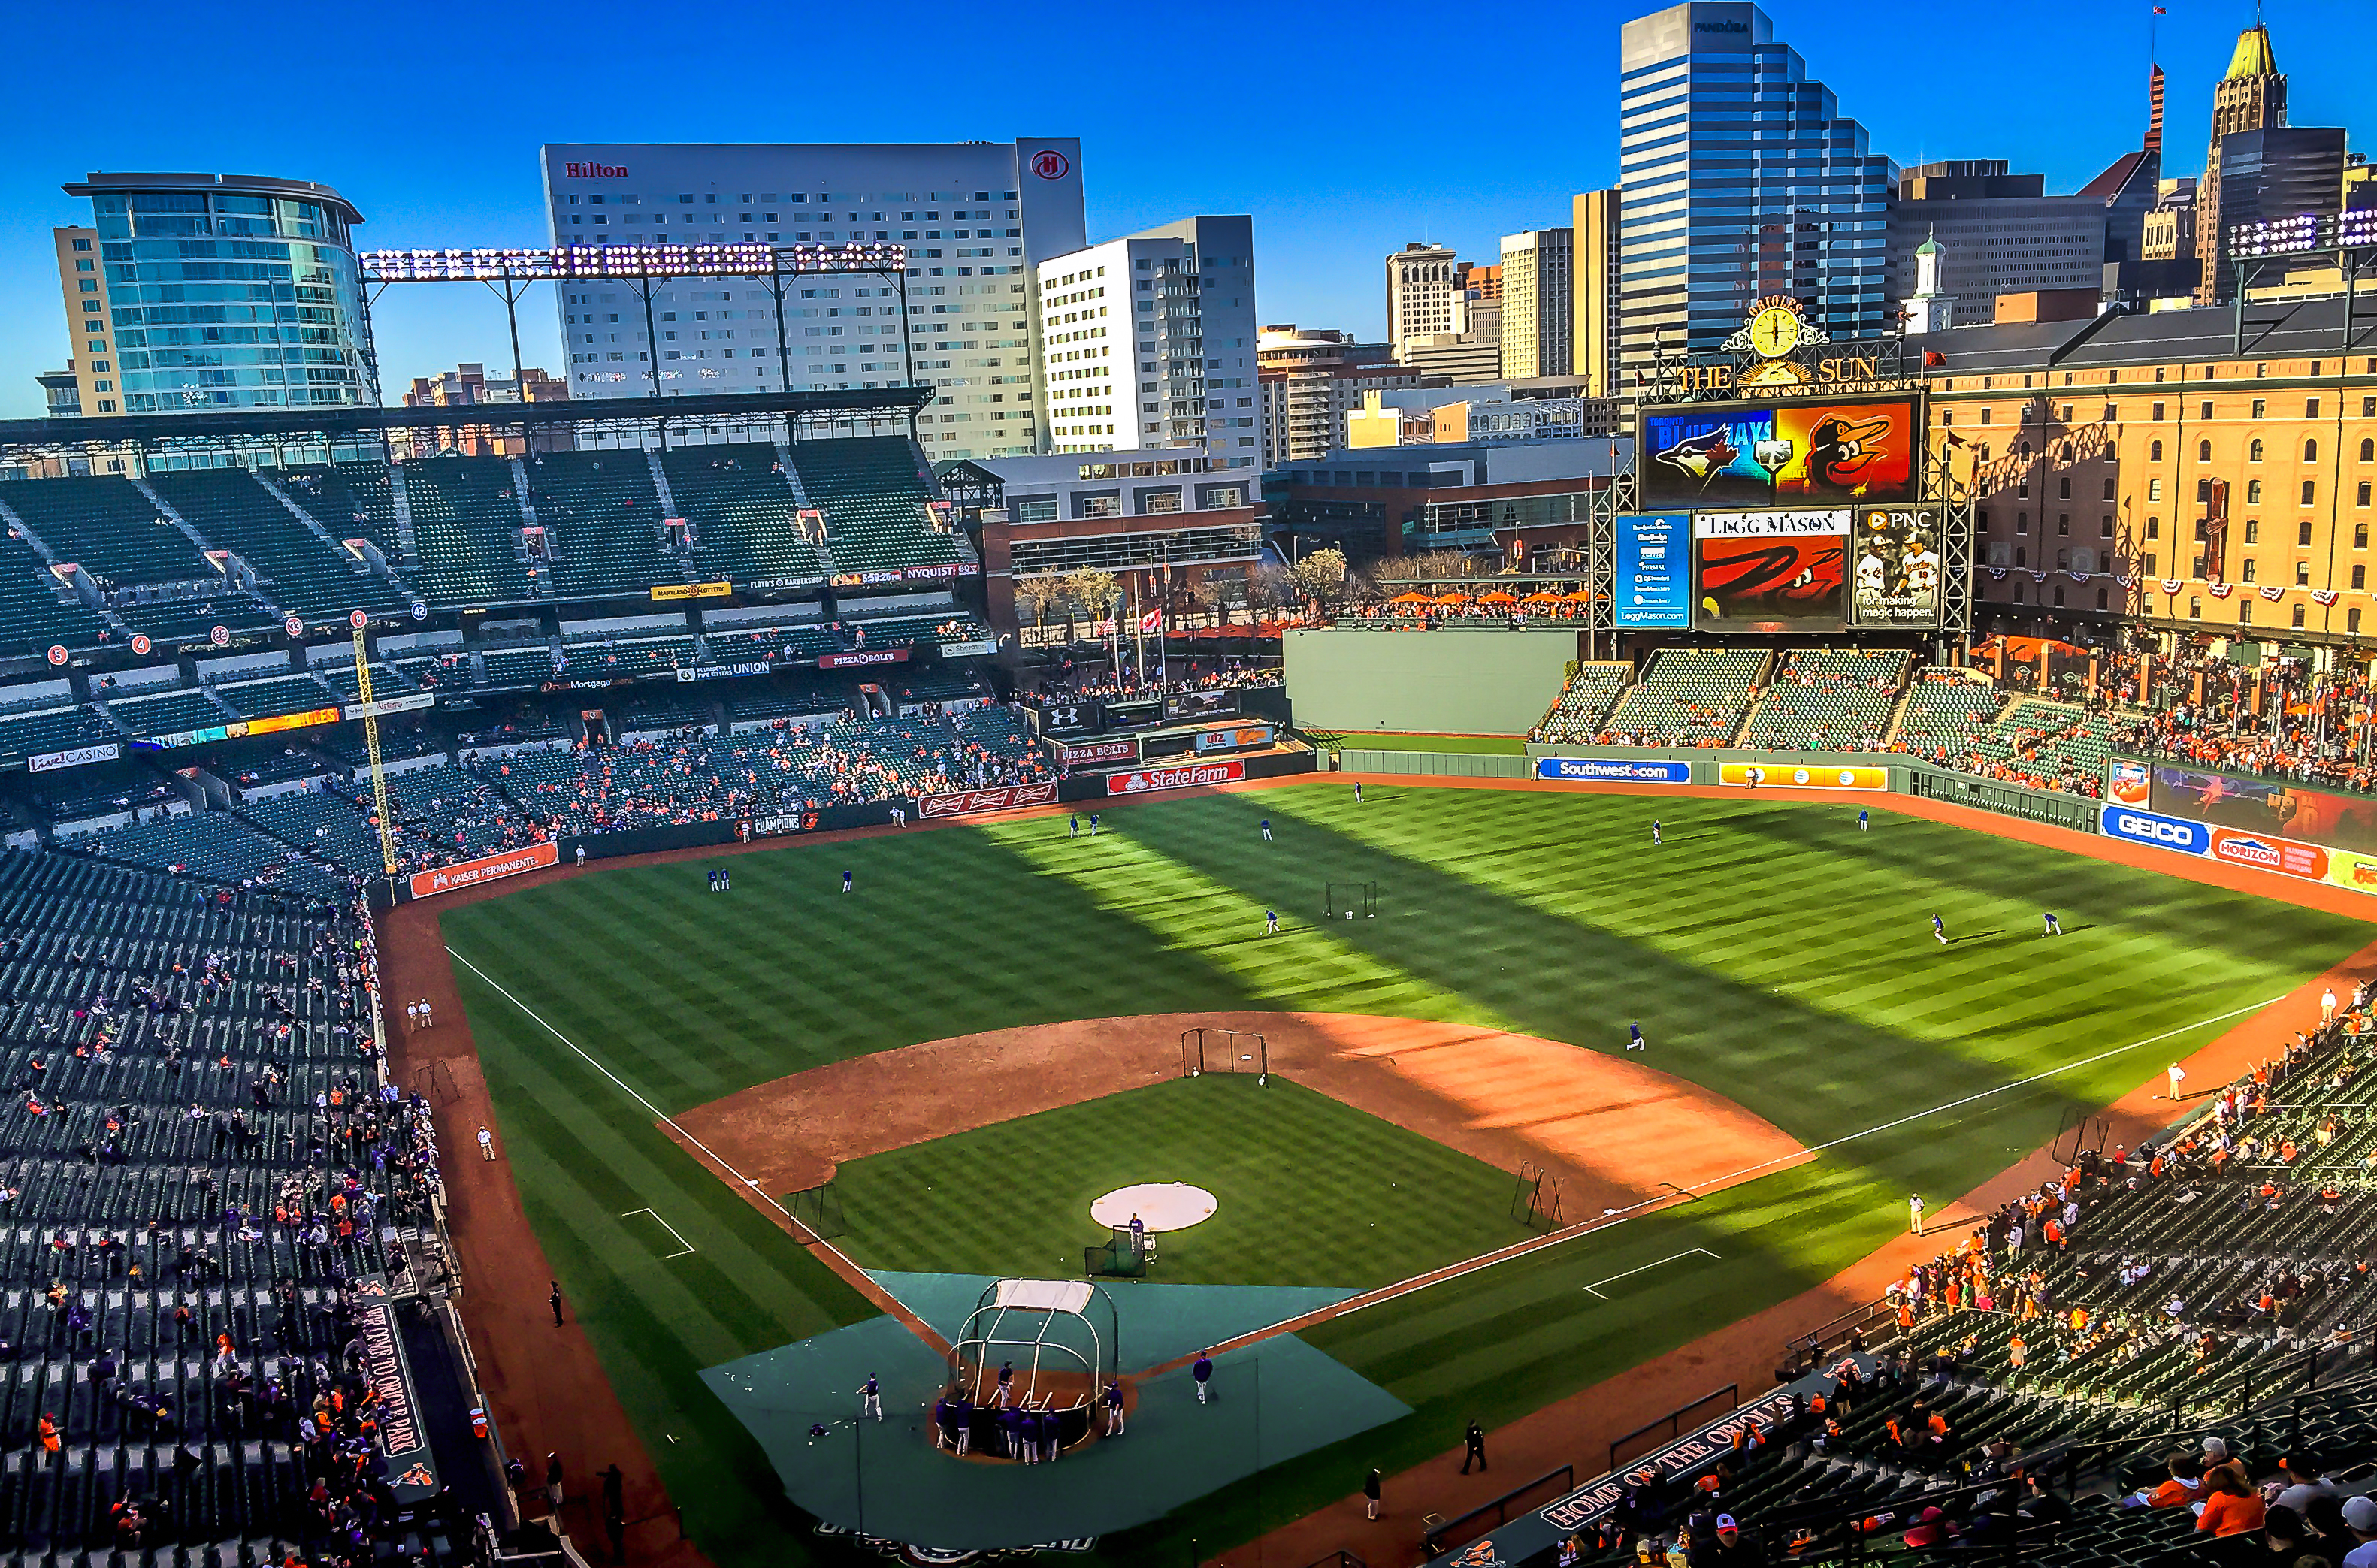
This is from the very top row of Nationals Park in D.C. It’s a HDR bracket, but the shutter speeds weren’t important at all as long as they were fast enough to hand-hold using the 18-55. It’s an establishing shot and it showcases the natural beauty of the stadiums that these athletes play in.
This is a very similar shot to the one above, but this one was taken with my iPhone. The lenses in these smartphones are extremely wide angle and it makes these sorts of shots very easy to capture with your phone. It doesn’t get much more budget than that.
Focus Often
Since the autofocus system in these entry-level cameras leaves something to be desired, we want to make sure that we give it as many tries as possible to get it right. If I have the option, I will focus, recompose, shoot, focus, recompose, shoot, focus, recompose, shoot over and over again, giving the camera a new chance to lock on to my subject every time. If you’re slightly neurotic about this, you’ll find that one of these shots will be sharp.
If you’re shooting fast action and don’t have this option, try to find something really high contrast to focus on. I like to focus on the numbers on the back of the jersey for this. Even using this strategy, however, you’ll have to just be okay with the fact that you’re going to miss some shots. Shoot often, and you’ll still get the keepers you need almost all of the time.
I use back-button focus to make this easier for me. Basically, in back-button focus, we remove the act of focusing from the shutter button, so the shutter just takes the picture, and then we assign that focusing to a different button on the camera. I love back-button focus and use it all the time, even when I’m not capturing action.
General Action Photography Tips
While these tips aren’t necessarily about overcoming the limitations of a budget camera system, they’re still very important to creating those classic, high-impact, action images. I should note, with the exception of the one image I pointed out above, every image you saw was taken with that entry level camera set up. Some of the images in this section are taken with my current setup, which is a bit more professional and more expensive- the Nikon D750 with a Tamron 70-200. I’ll note what I used below each picture.
Get Close and Get Low
Even with a telephoto lens, the best thing you can do is get yourself as close to the action as possible. With a variable aperture zoom like the 55-300, you can use a shorter focal length and a wider aperture, or you can get really tight in on the subject’s face or other details.
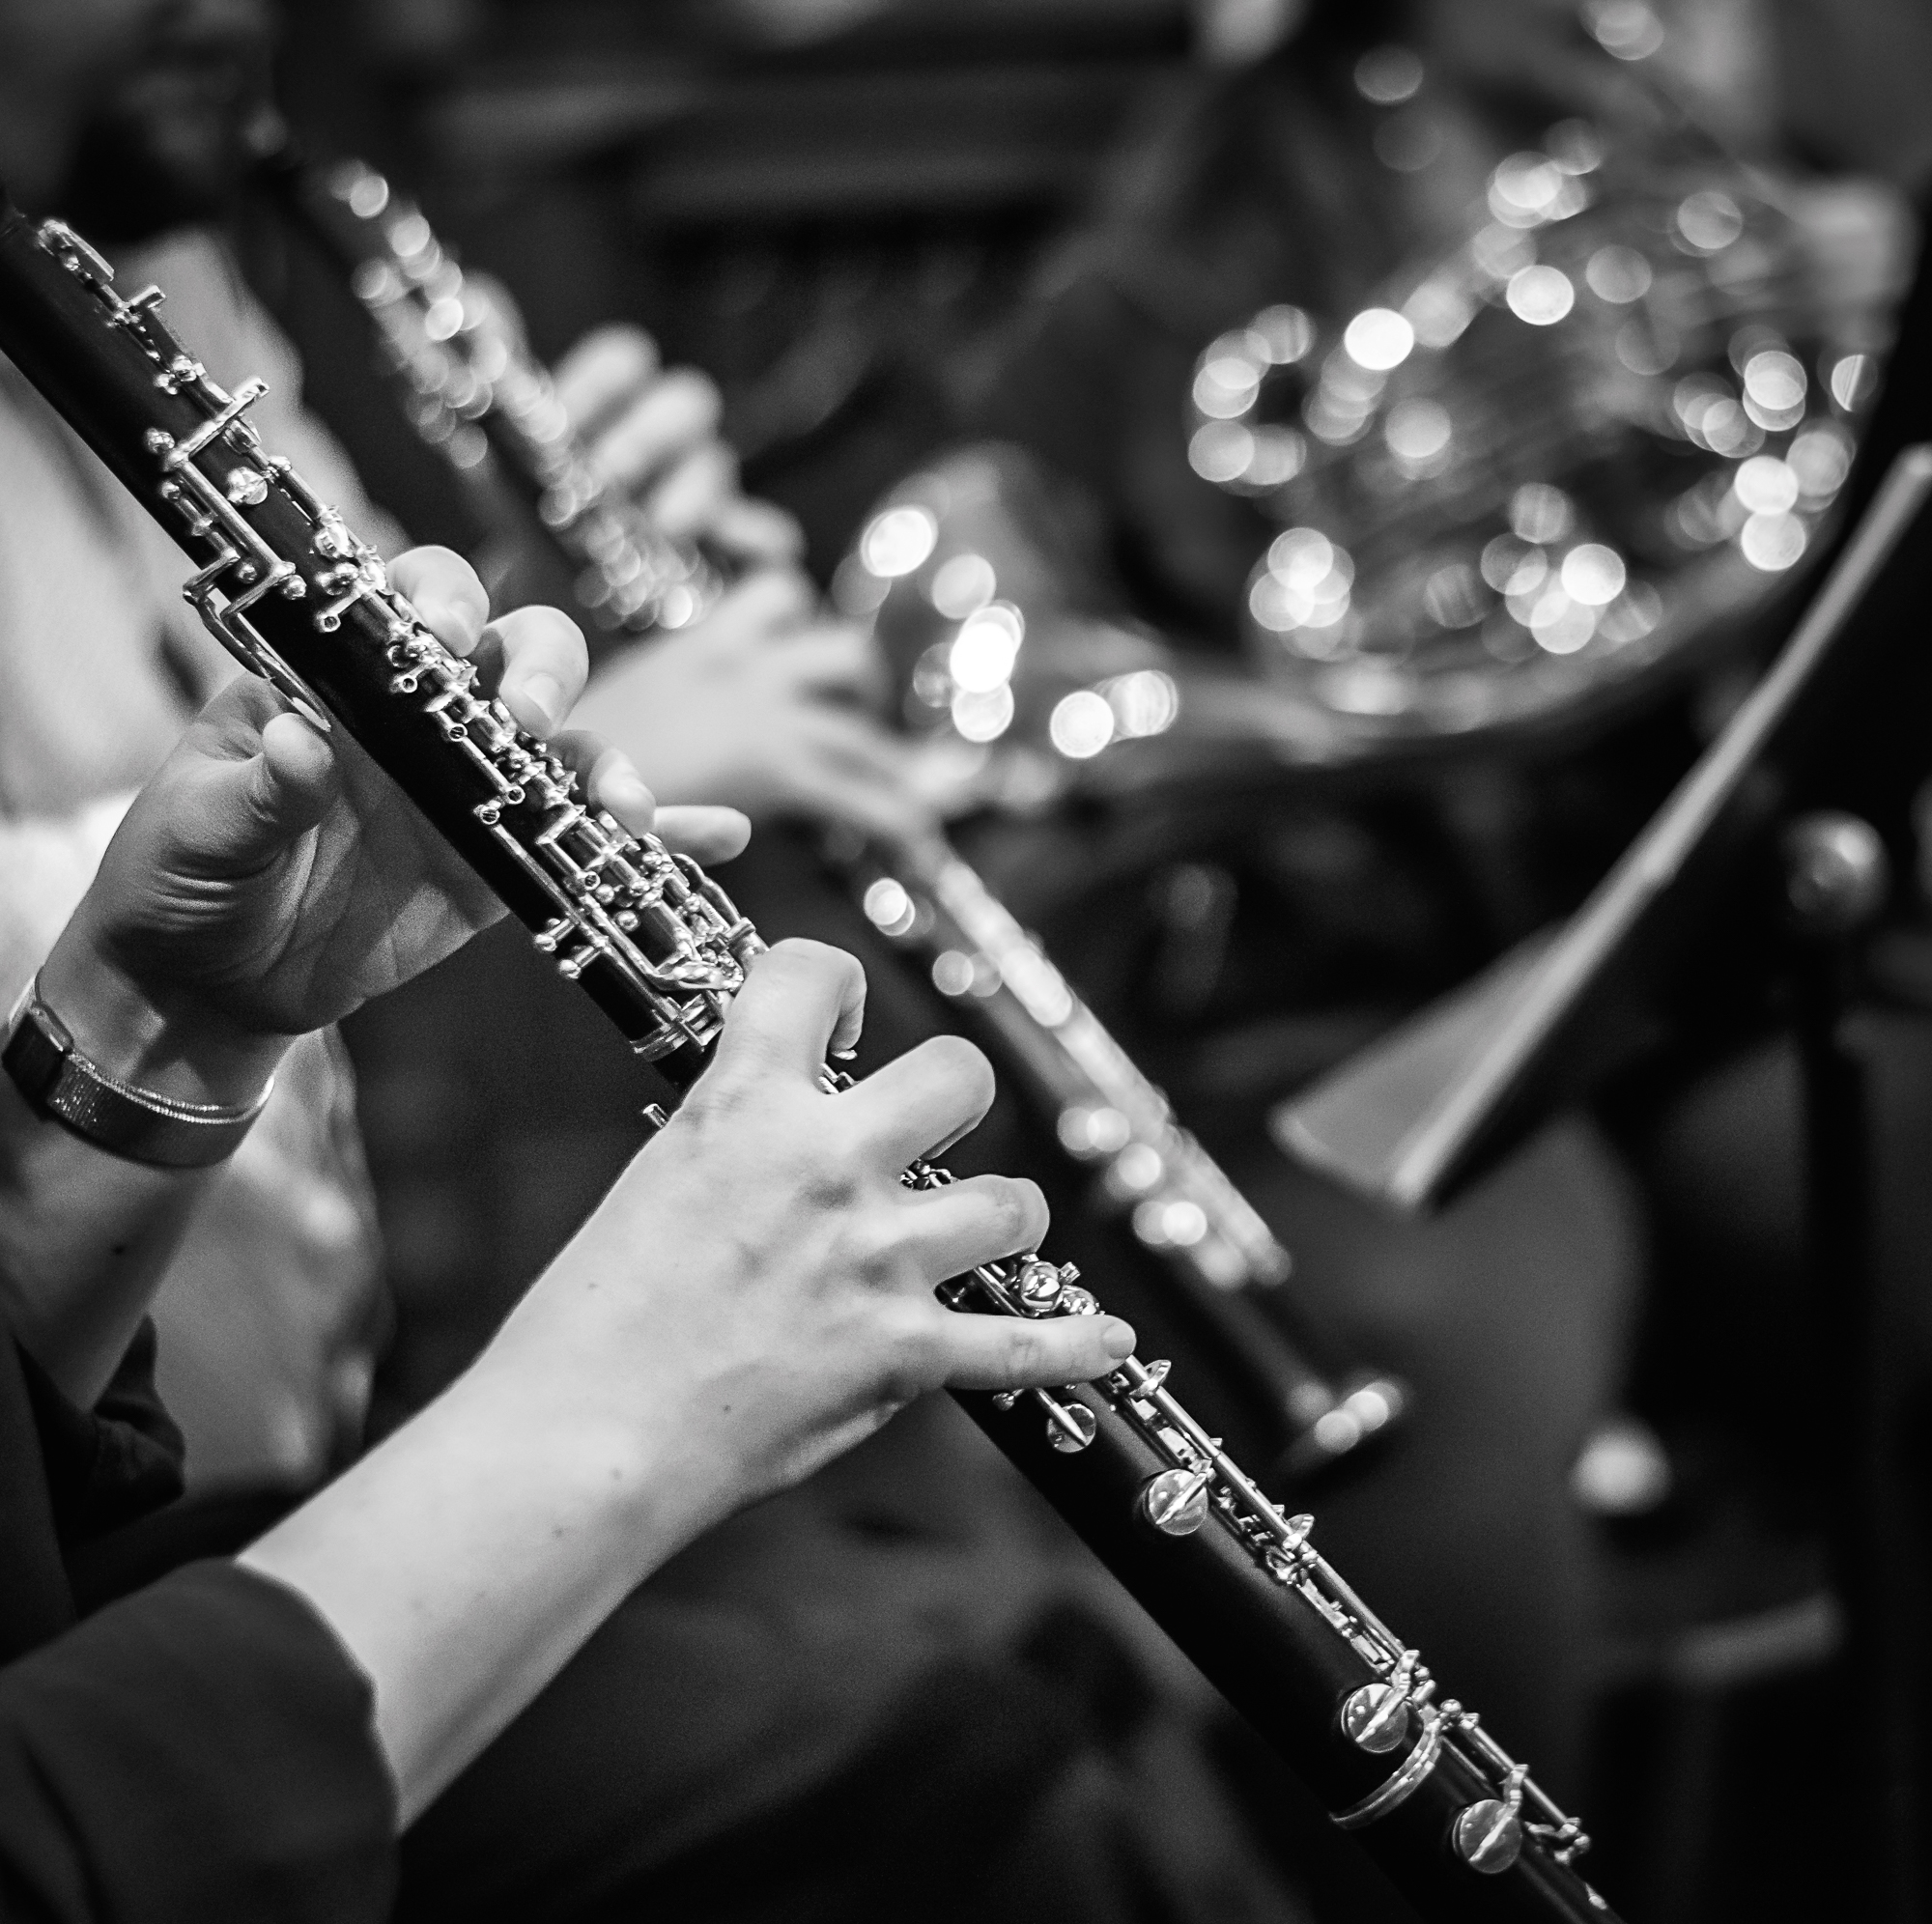
Nikon D3300, 50mm f/1.8, ISO 800, f/1.8, 1/200th
This was taken during a dress rehearsal for a festival concert that I covered in June. I asked permission to get close to the performers beforehand and they were totally cool with it, so I was quite close to this oboist. You can see how the combination of proximity and shallow depth of field knock out the background and it fills the frame with the details of her playing.

Nikon D750, Tamron 70-200 f/2.8, 200mm, f/2.8, 1/200th, ISO 3200.
Although I’m also very zoomed in for this shot, I’m standing close enough to allow me to get right into the subject’s eyes. This helps us connect with the subject which can be especially important for situations when they’re in uniforms that sort of strip their identity from the crowd.
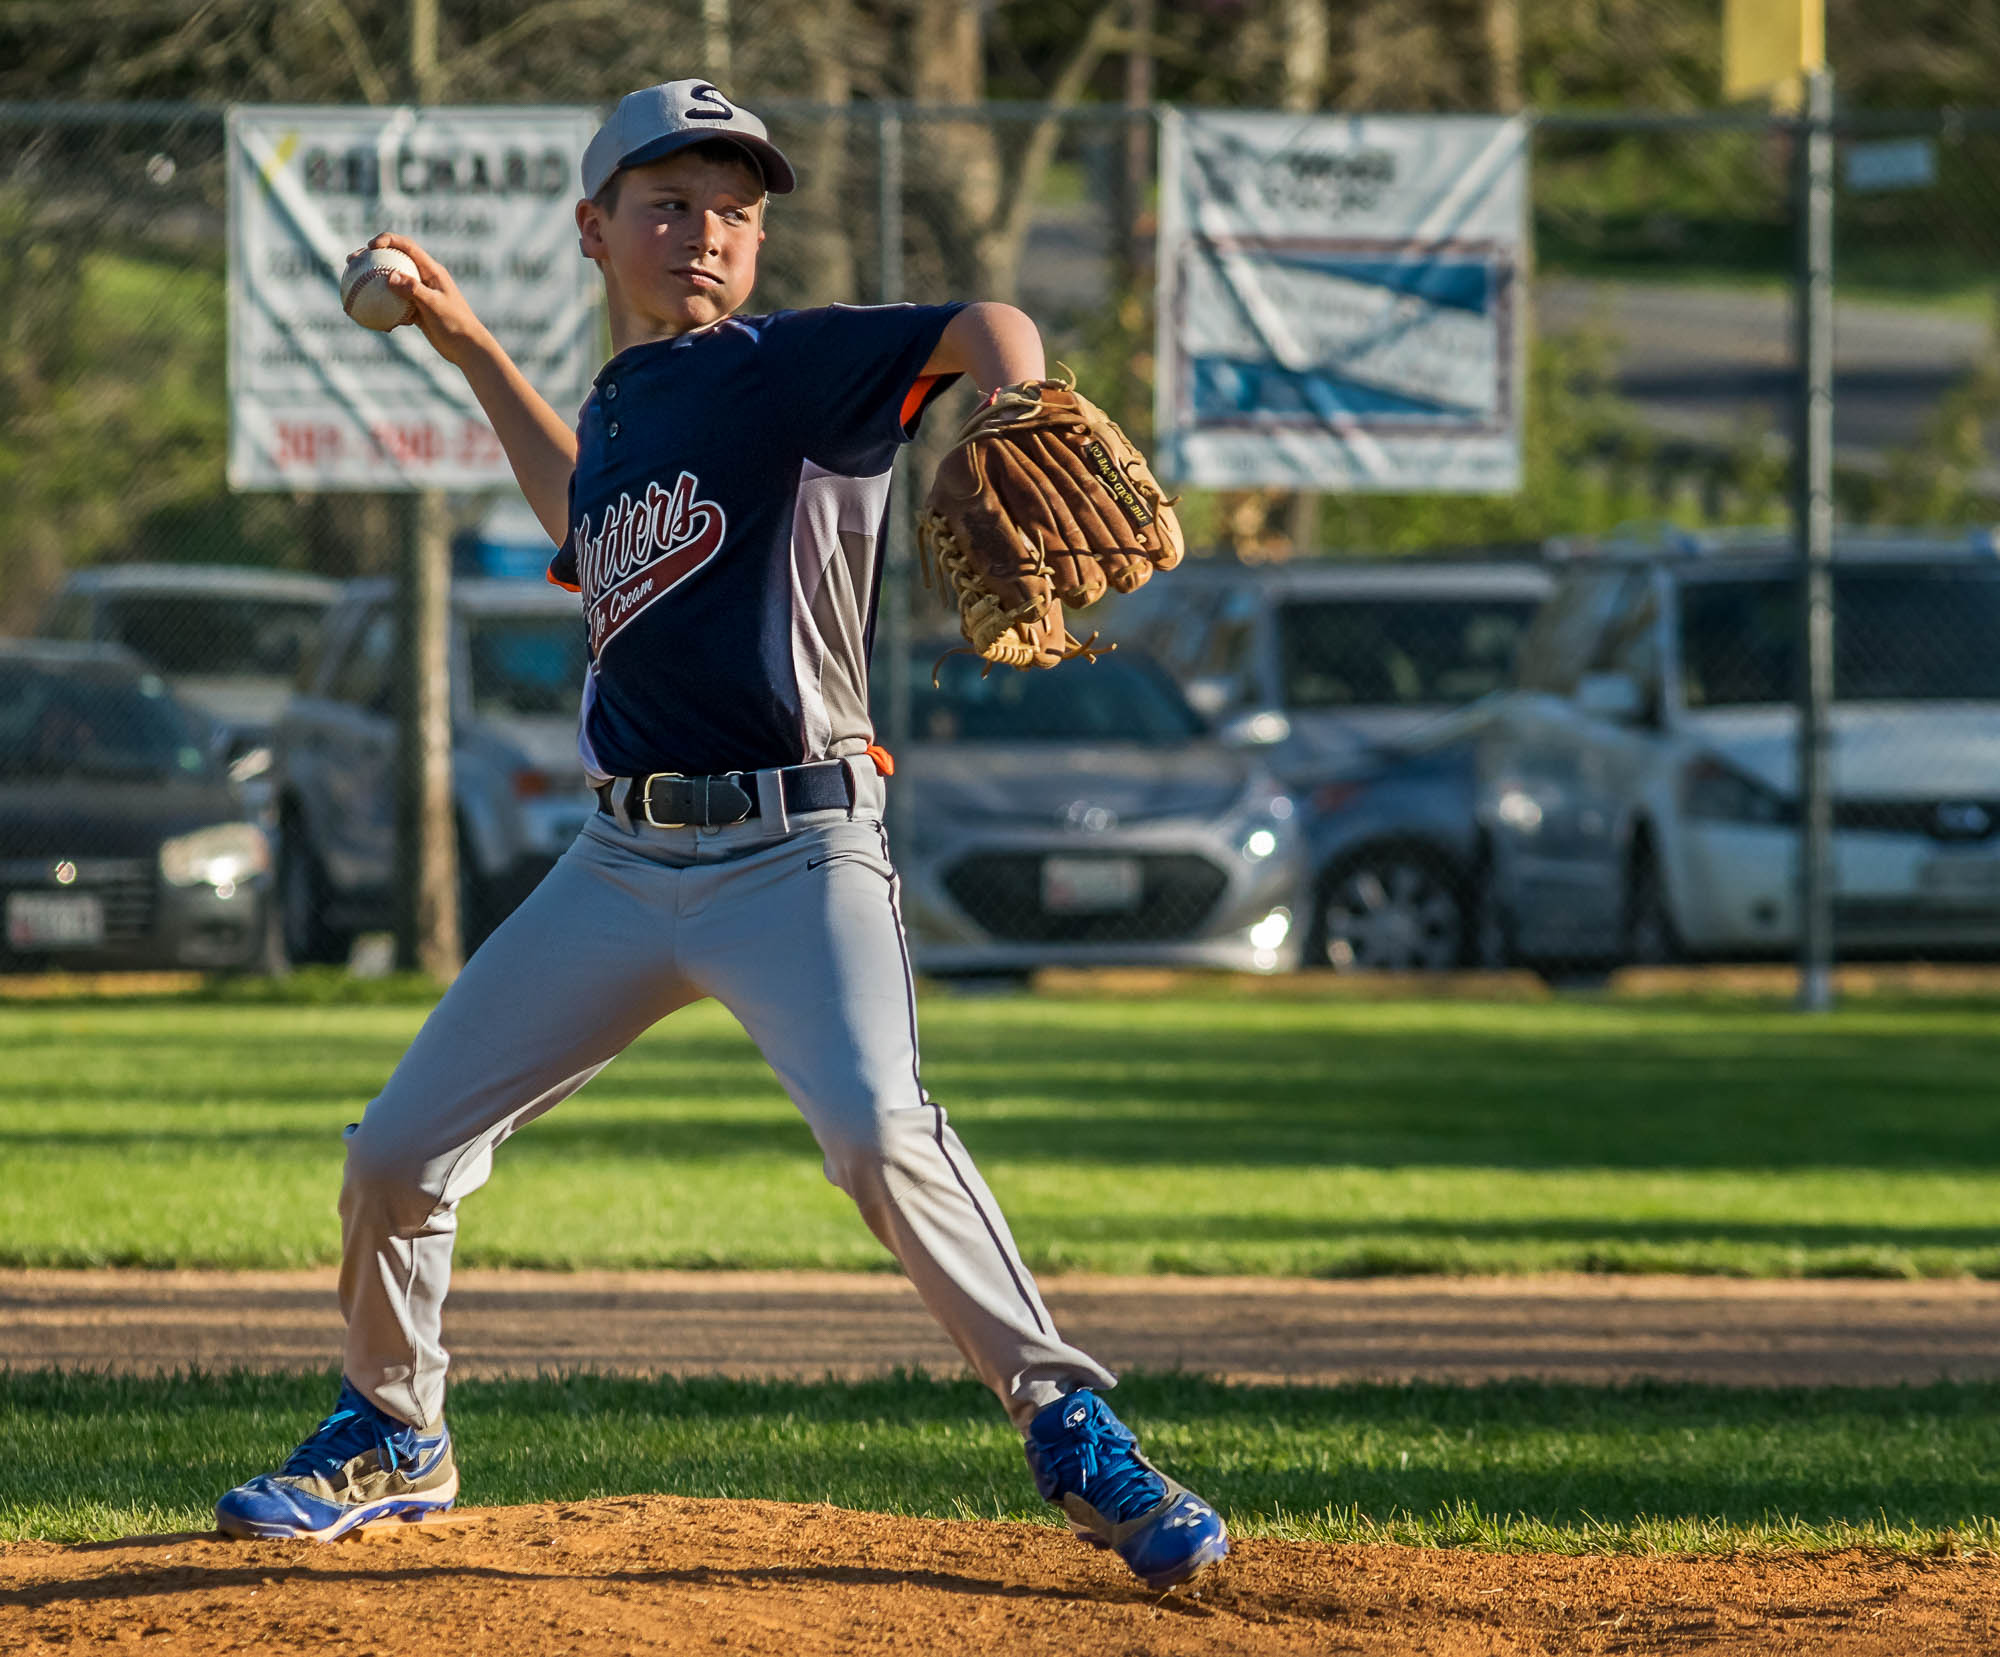
Nikon D3300, Nikon 55-300 f/4-f/5.6, 165mm, f/5, 1/2000th, ISO 400.
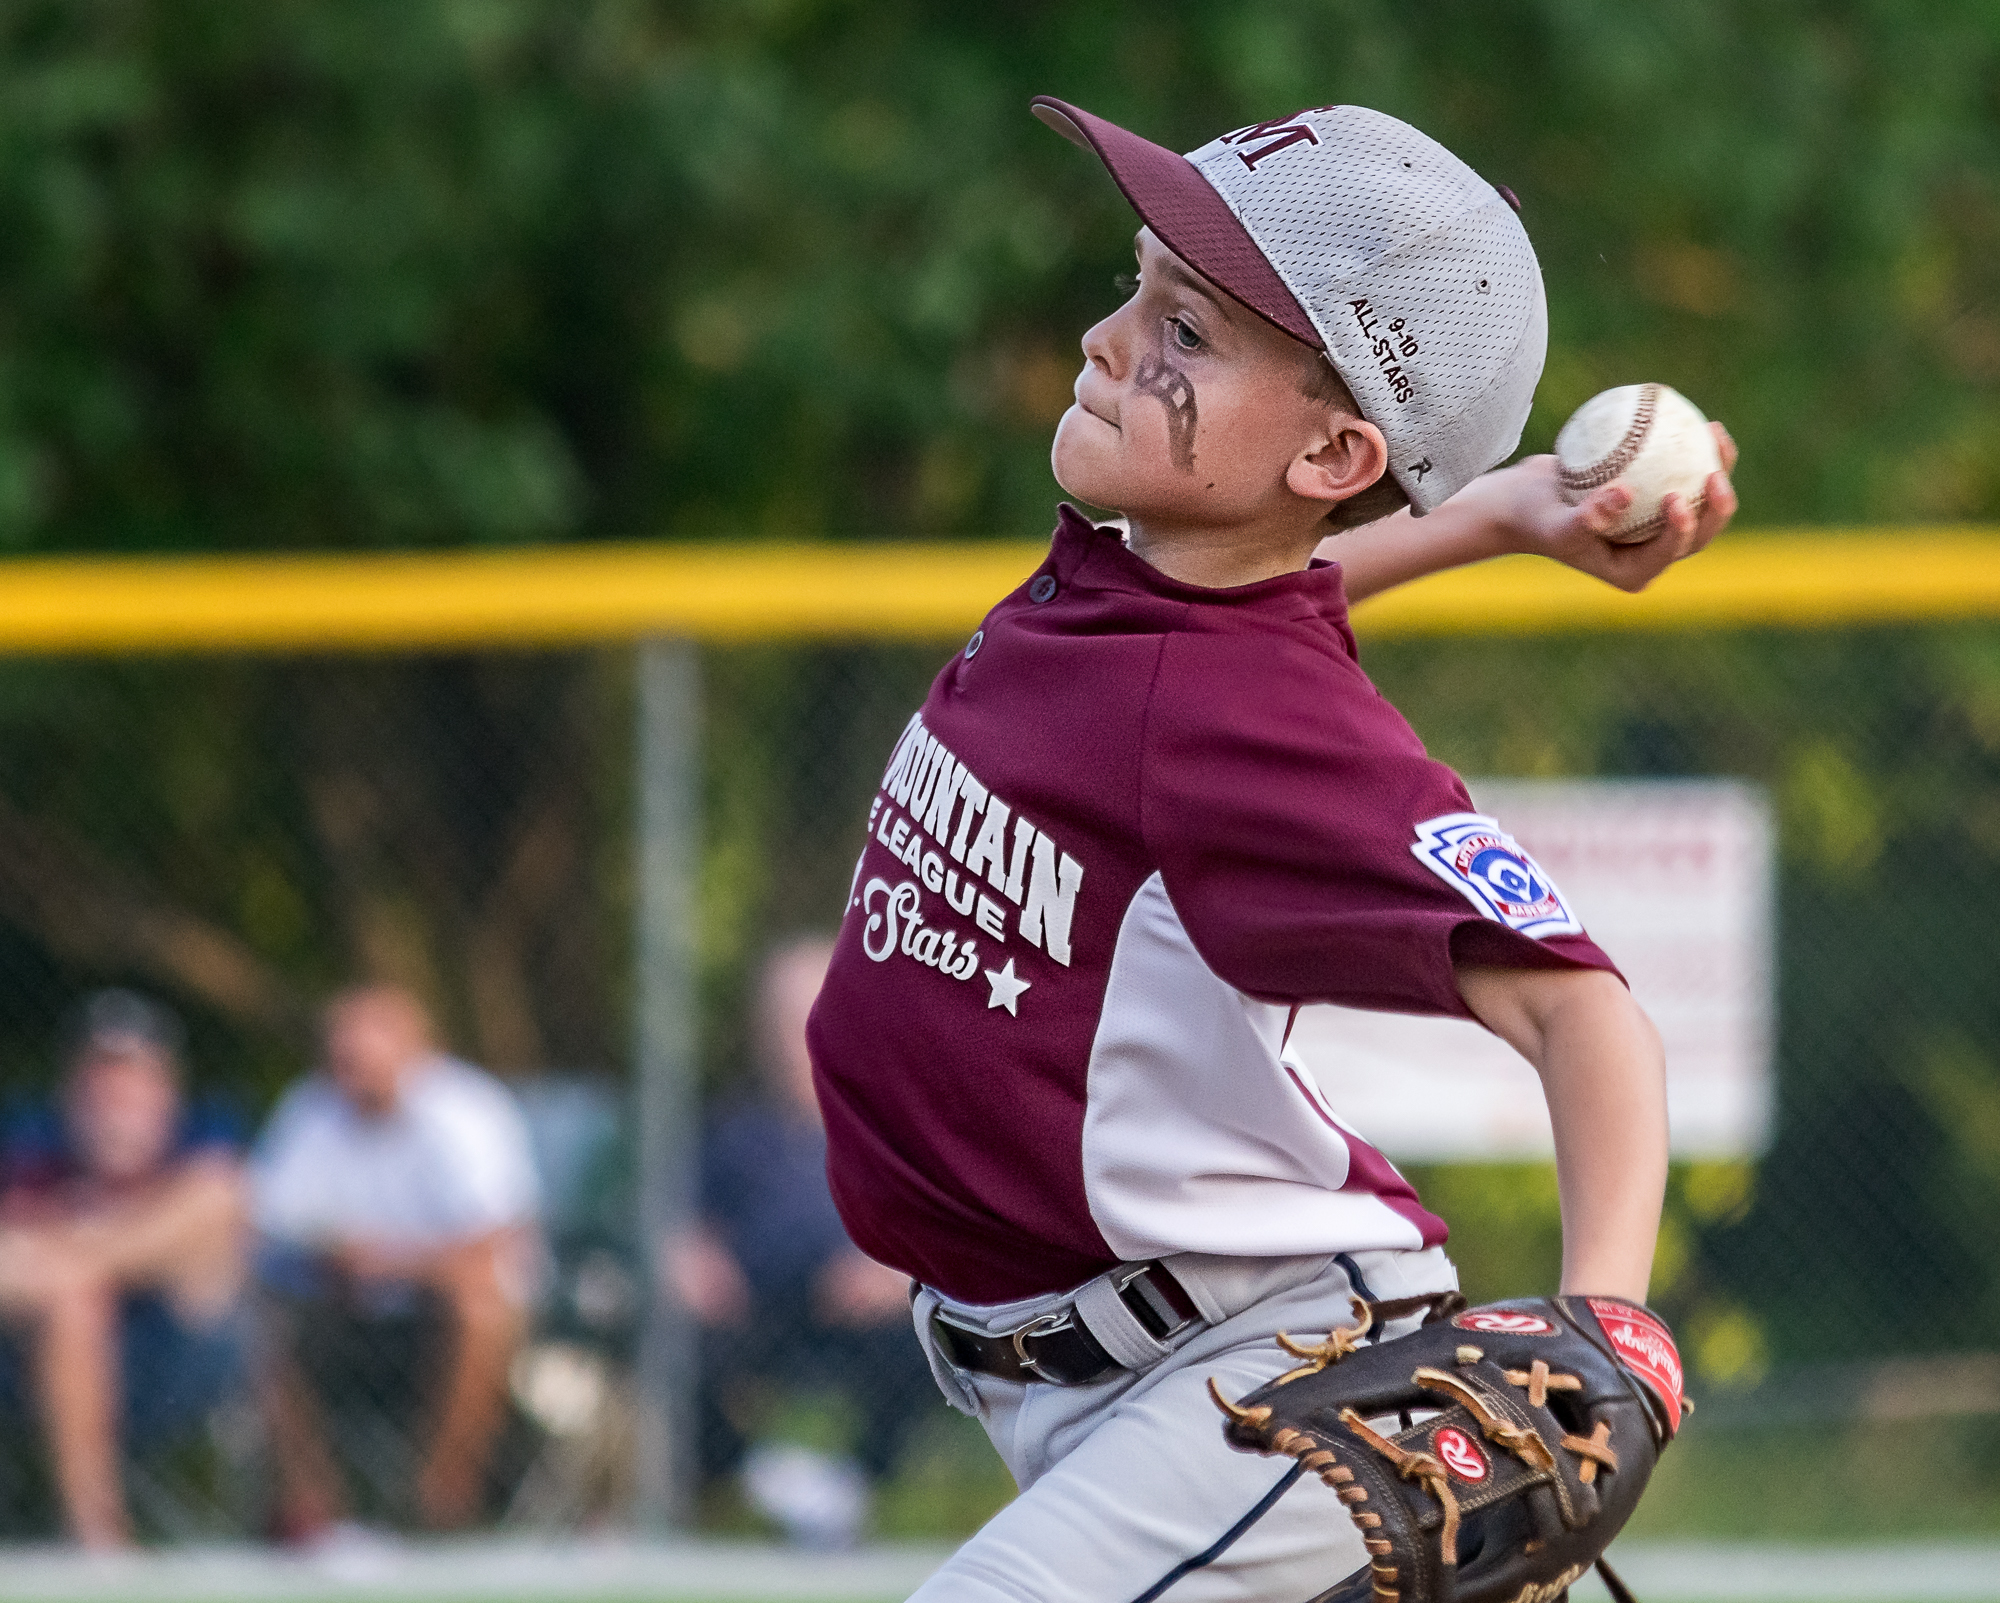
This is why getting low is so important. This kid is 10, and not a particularly tall 10-year-old at that. But by getting as far below him as possible and shooting up, his head can touch that fence in the outfield and he towers over the cars. He looks imposing, impressive and dynamic. I do the majority of my baseball and softball shooting sitting on the ground, since I can camp in one area for a little bit. Then, I’m shooting up on the players.
By the way, if you want to shoot professional sports and still get low and get close, buy yourself some tickets to a minor league baseball game. You can usually pick your seats, so select seats in the first row down either baseline. You won’t spend more than $30, usually much less, and you’ll get fantastic access. I’ve done this and seen photographers for the news outlets sitting a couple seats down from me, so I know it’s the best vantage point in the stadium.
Time the Action
Even the most frenetic action has pattern. If you can decode that pattern, your photography will improve immensely. I photograph lots of baseball. The pitcher repeats his windup over and over again. There are tons of spots in that windup to photograph. Which one is best? How do you know?
Well watch him for a few pitches, with the camera off your face. What point looks dynamic for you? Then, take some test shots. Don’t burst, take one frame per pitch and try to time it up. Are you getting that moment? Did you miss one way or another consistently? Adjust, rinse, lather, repeat and before you know it, you’ll be getting those dynamic moments every time.
The same goes for the shot of the ball on the bat. Up above, I showed two pictures of a baseball and softball player with the ball just off the bat. Neither are part of a burst sequence. That was just watching the action and timing. Now, it’s not like I just picked the camera up, went click once, and had it. I have tons of shots missing the moment. When you just fire a burst every pitch, you’re liable to get the shot just before the peak moment, and then just after, but not the shot you were after. Far better to time the action and fire when you want the picture to be.
And by understanding and keeping your head in the game, you’ll be in the right place at the right time.
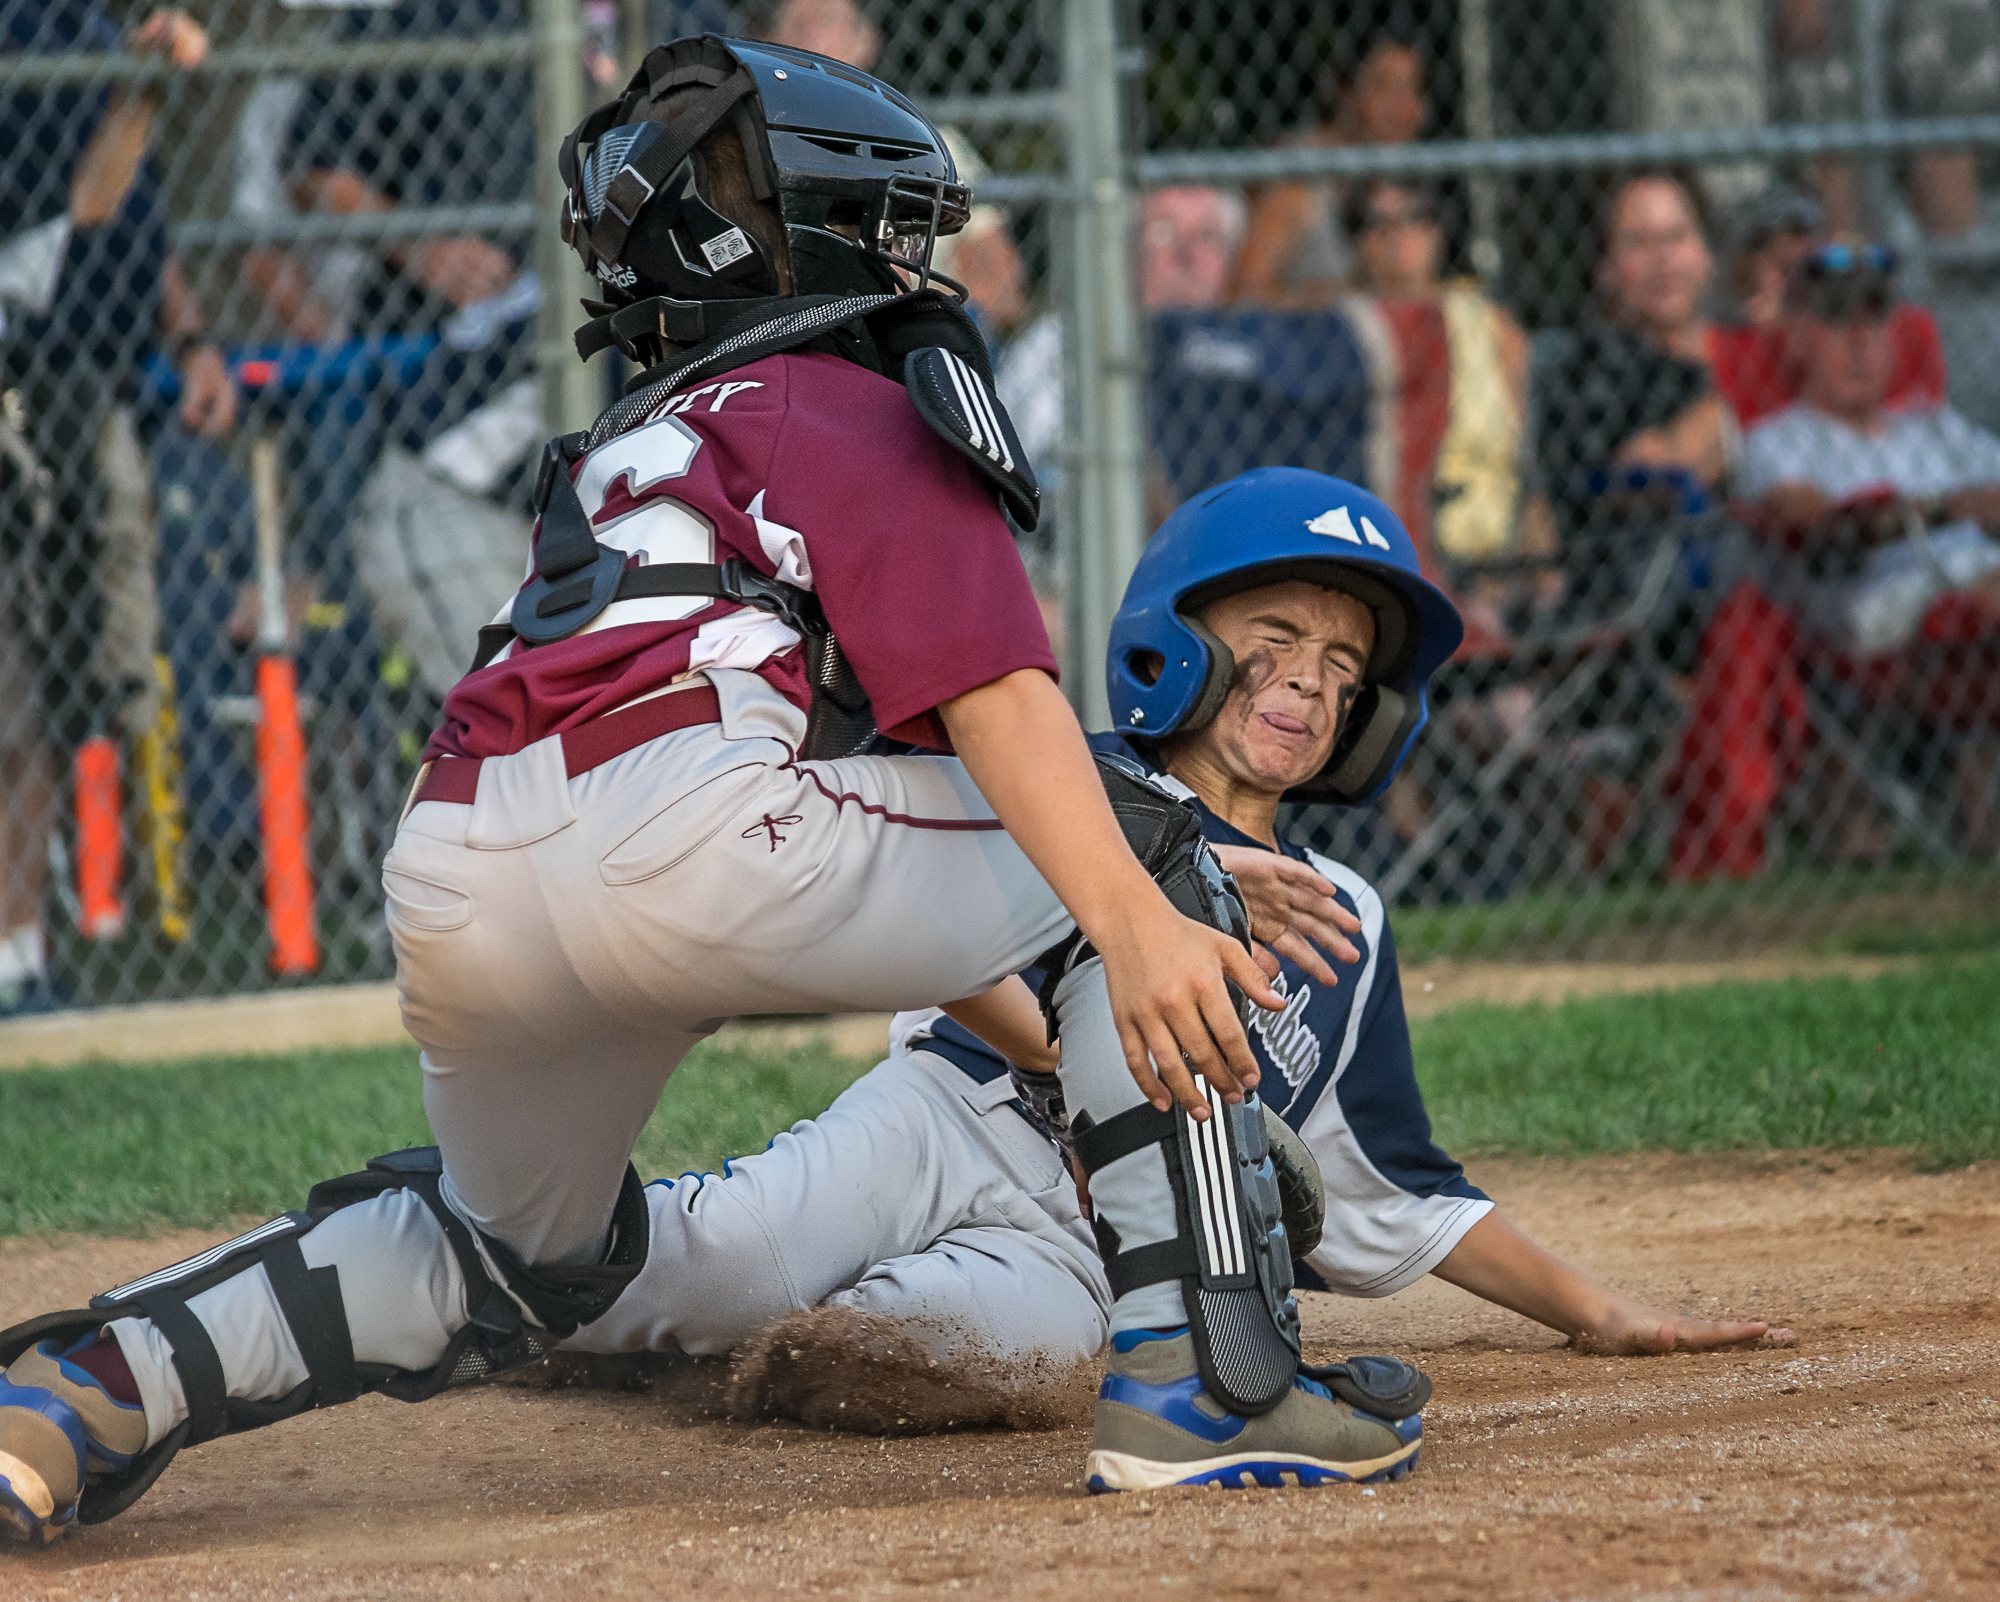
Nikon D3300, 55-300 f/4-f/5.6, 1/1000th, ISO 800, 155mm, f/5.
This shot ran in the local newspaper with the coverage of this game. I had photographed at both leagues all season and I knew that the team in blue loved to be aggressive and run. So as soon as they got a runner on third, I camped waiting for a play at the plate. Sure enough, the ball was grounded and he took off. I didn’t even try to follow the ball, I knew what I was hoping for, I got lucky and it happened for me. I just stayed focused on the plate and as the runner slid in, I started firing. That sort of anticipation can help keep you from missing key moments in the game.
Be Sensitive to What’s Around You
I photographed T-Ball once. I was scared to do it, too. How on earth will I make dynamic images with these little kids, some of whom are actually sitting down on the field, I wondered? But I did it, and tried my absolute best to make my best images.
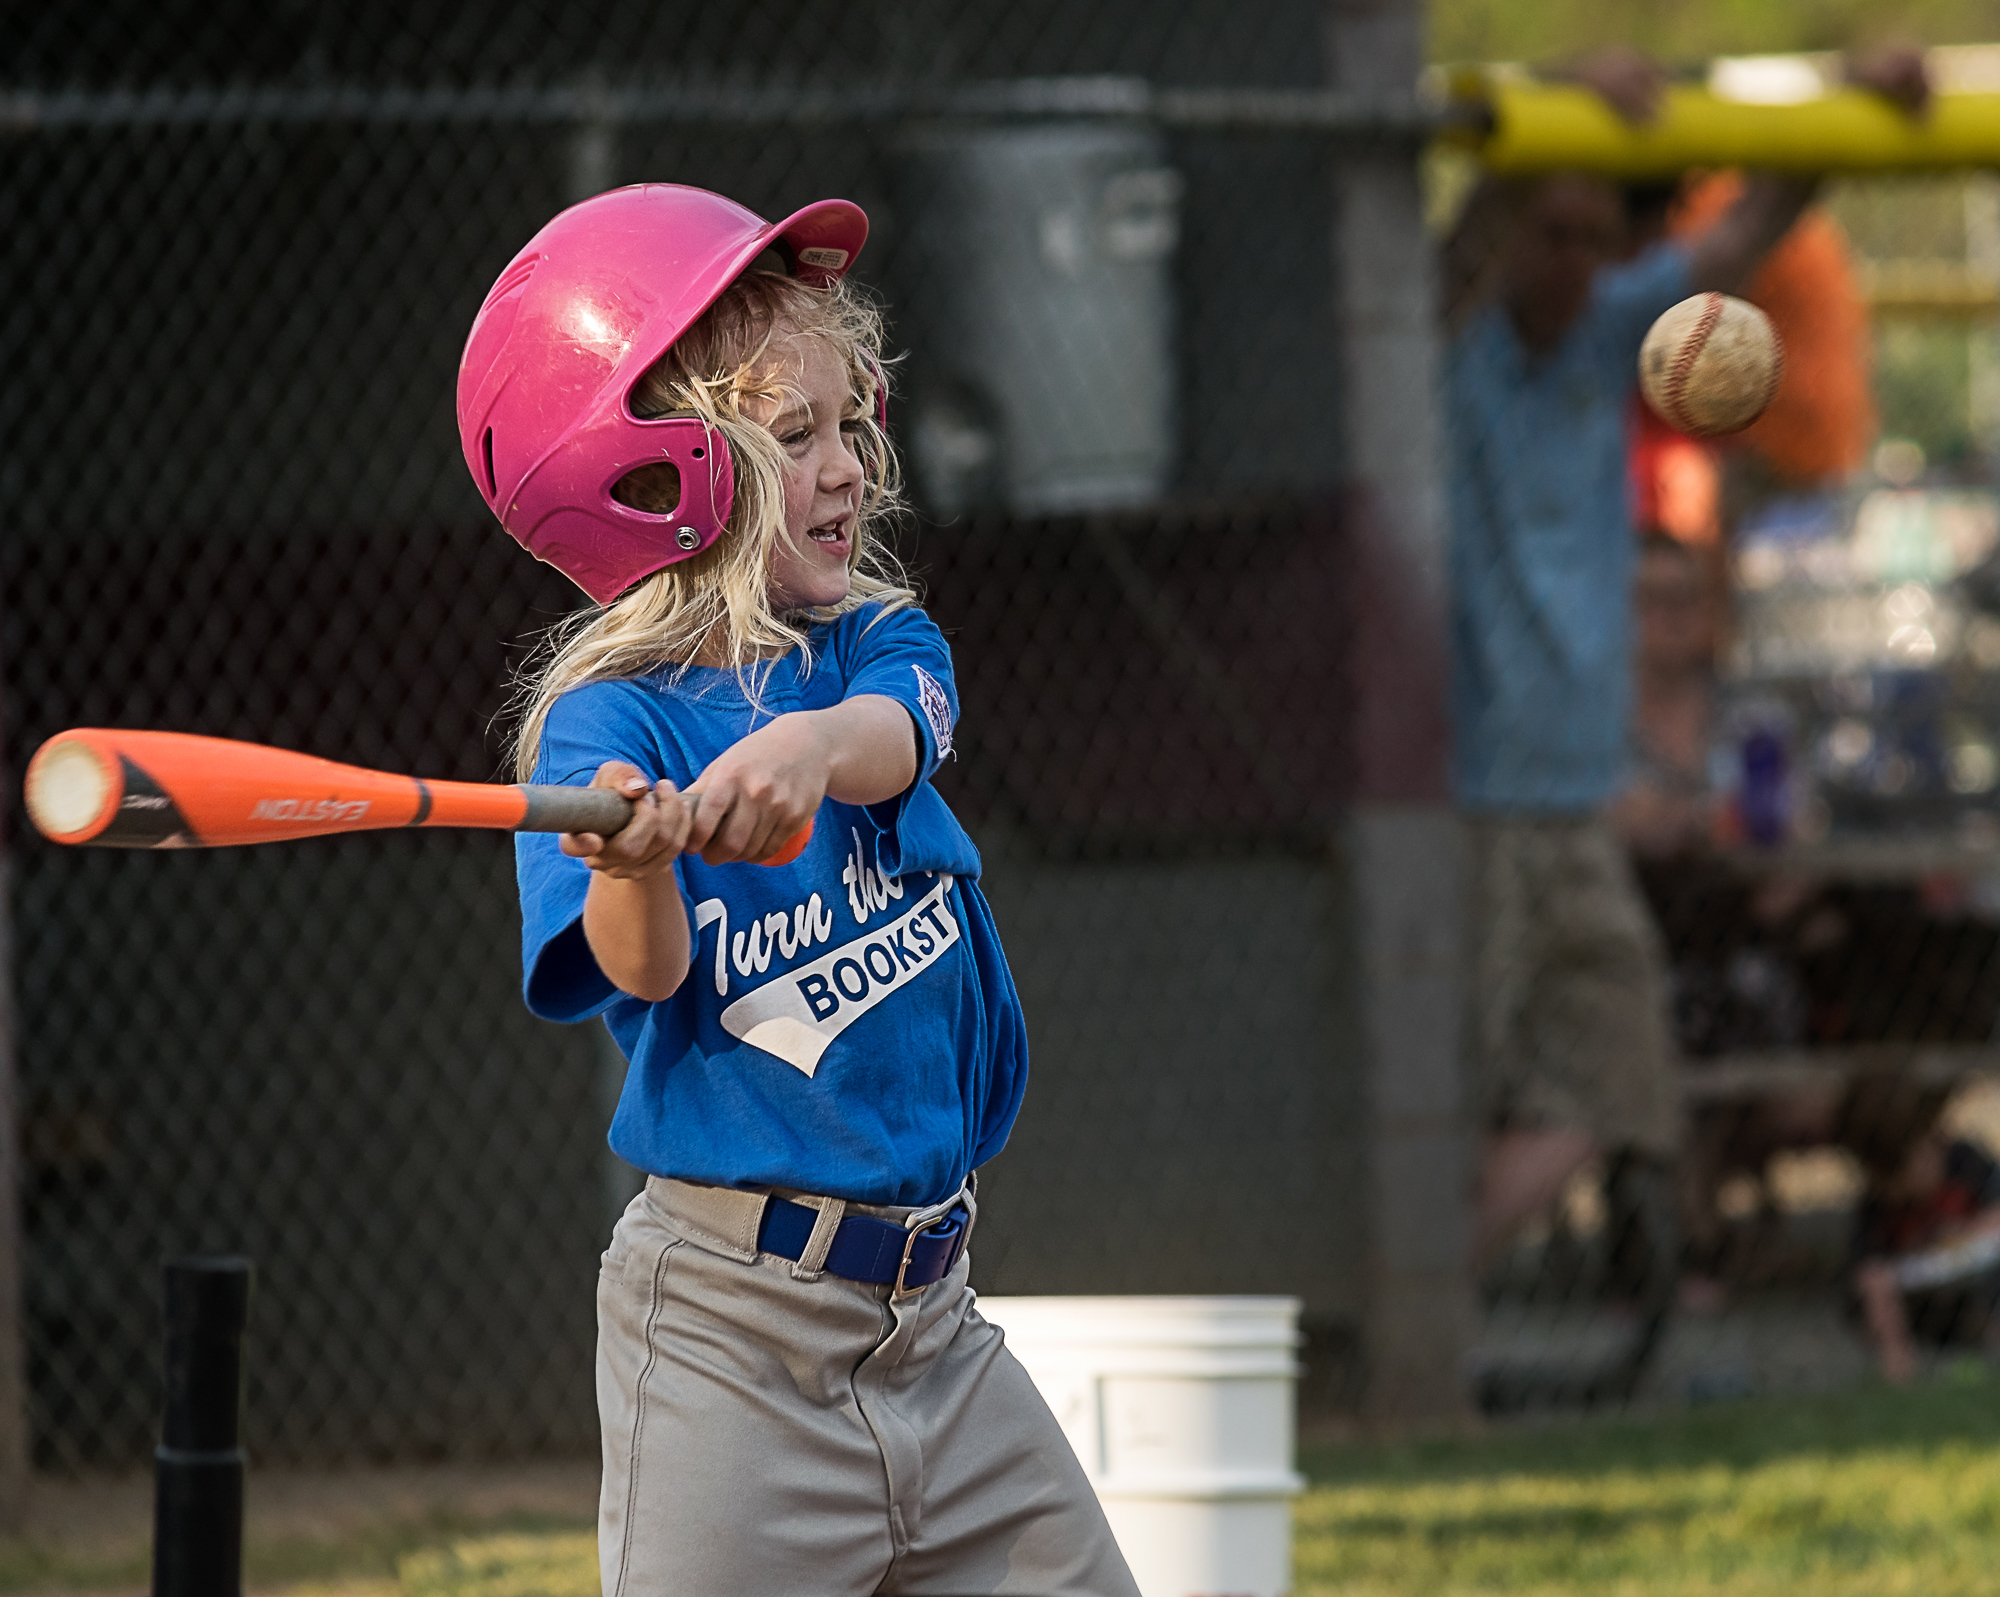
Nikon D3300, 50mm f/1.8, 1/2000th, f/2.8, 50mm, ISO 400.
This is one of my favorite shots ever. This little girl is absolutely adorable, and her making contact with that baseball was one of the most exciting things to happen on that field all season. Would you see this shot in Sports Illustrated? Probably not. But for that girl’s family, and everybody who was there that day, this is a special special shot. I love it.
Be happy with what it is that you’re photographing. Don’t try to make six-year-olds playing T-ball look like they’re in Game 7 of the World Series. It won’t work. Find what makes them unique and find what’s exciting about what they’re doing. That’s what you photograph.
Conclusion
I hope that you’re seeing that it’s completely possible to make really exciting action images on your budget. We just have to be smart about how we overcome the limitations of our equipment. I hope that this blog post has helped you do that. I want to see what you come up with! Please don’t hesitate to share any of your shots with me, or to ask me any questions you might have. One more time, thanks to the folks at Northrup Photography for giving me the opportunity to write this post for you and for being an awesome resource in my own photography education.
Happy shooting!
-John