Want to submit your Light Painting Photo to Tony & Chelsea LIVE for review? Watch this weeks episode HERE. It airs Thursday nights at 5pm EST (check your timezone.)
Light Painting
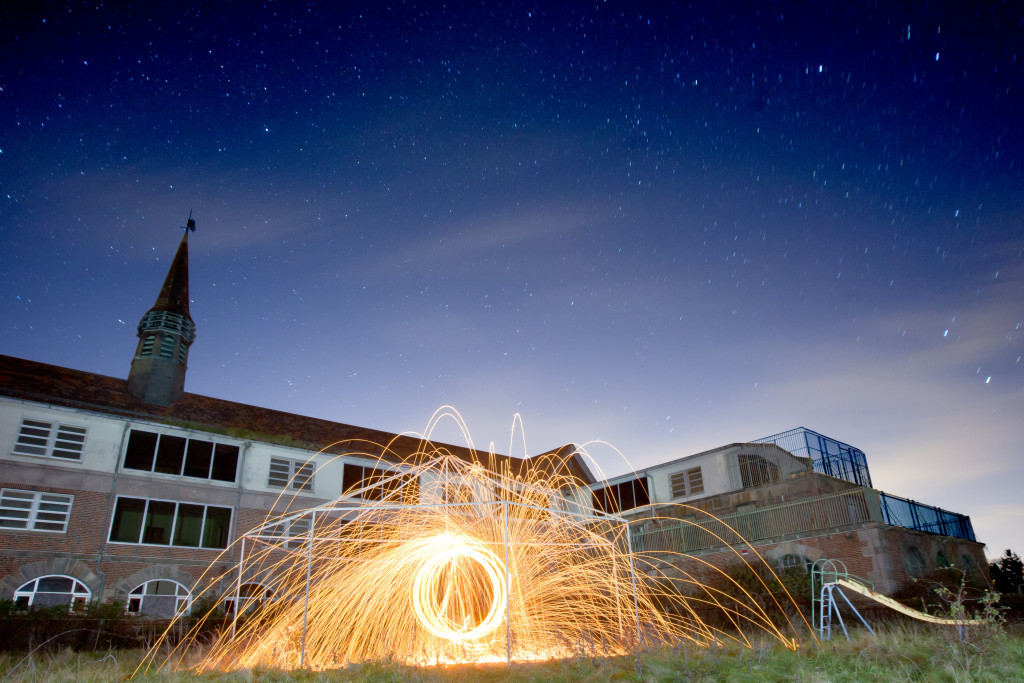
Light painting is manually adding light to a long exposure. During a long exposure (say, 30 seconds,) you can walk through the frame without appearing in the final picture. This gives you the opportunity to walk around a picture and selectively add light wherever you’d like it. To help hide your movements, wear all black.
At its simplest, you might use light painting like a portrait photographer uses strobes—to improve the ambient light by filling in shadows. However, light painting is also a rapidly developing art form where people create amazing pictures using night landscapes and complex, custom-build light contraptions. Though he wasn’t the first light painter, Pablo Picasso showed the world light painting in 1949 when Life magazine photographer Gjon Mili visited him; Picasso had been inspired when Mili showed him his photos of ice skaters with lights attached to their skates, jumping in darkness.
Light Painting Tips:
- Long exposure Use bulb mode (learn how to set bulb mode on your camera here) and a remote shutter timer to keep the shutter open for minutes at a time. (Get a cheap remote shutter timer for Canon and Nikon here.)
- Light source You’ll need something to “paint” with such as a flashlight, glow sticks, or glow wire.
- Keep moving Whoever is doing the painting needs to keep moving so that they don’t show up in the shot.
- Don’t set a fire Be responsible out there, kids.
This is a small excerpt from the Night Photography chapter of Stunning Digital Photography. Read more on night photography here.

