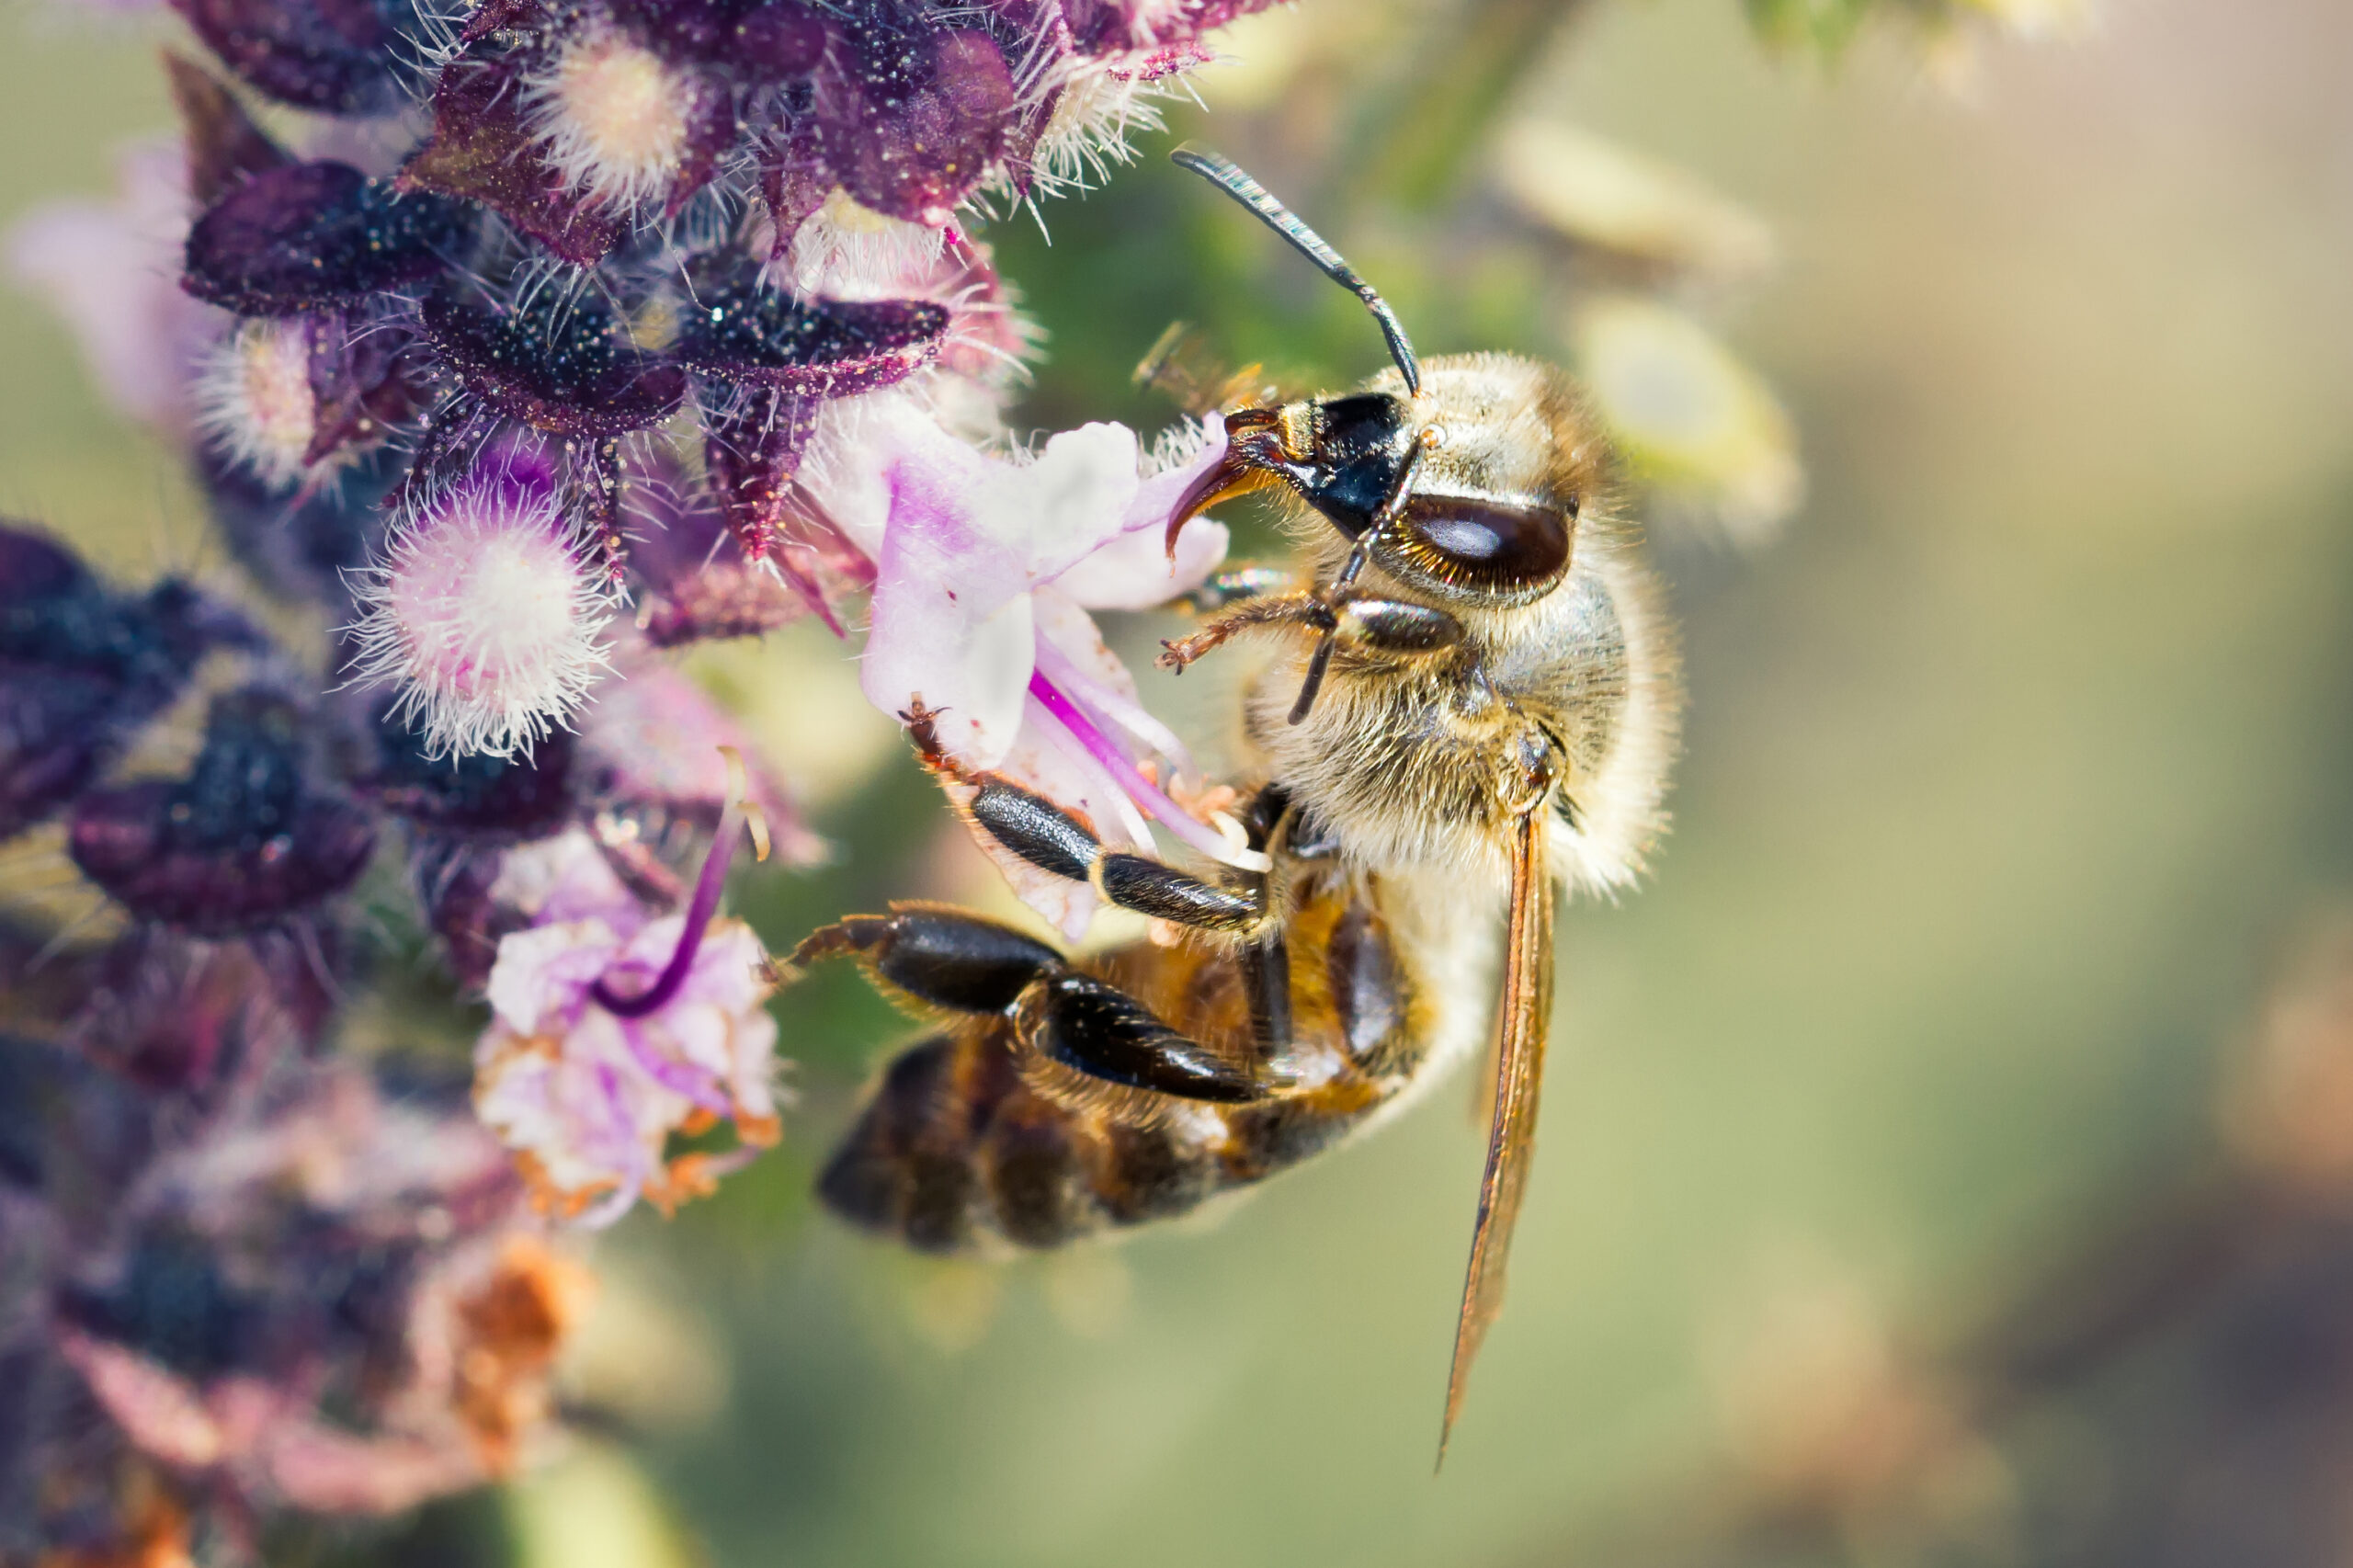

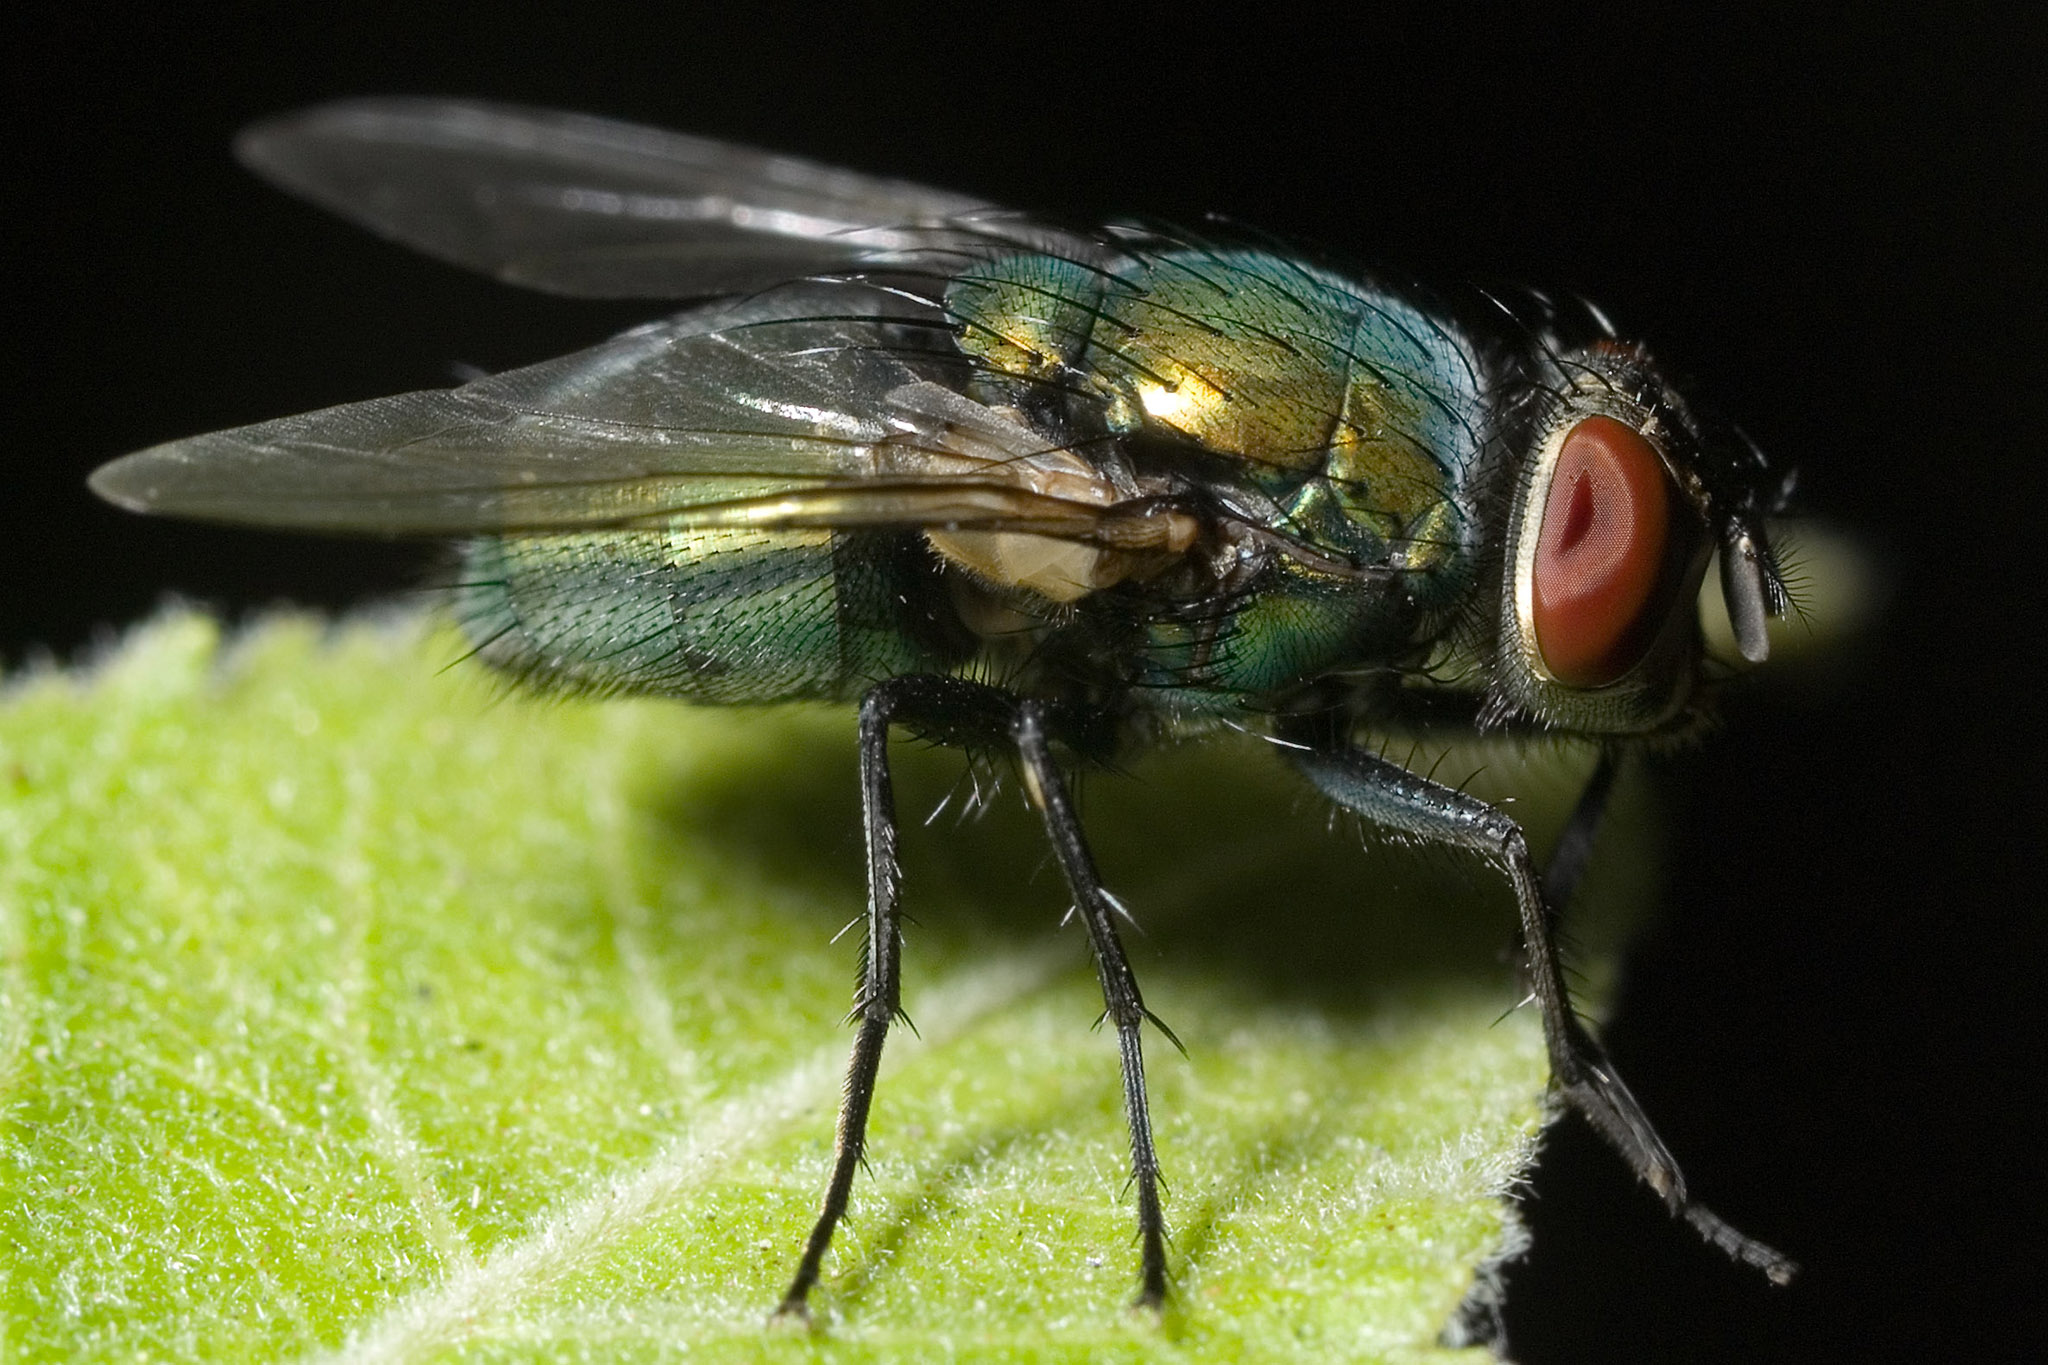
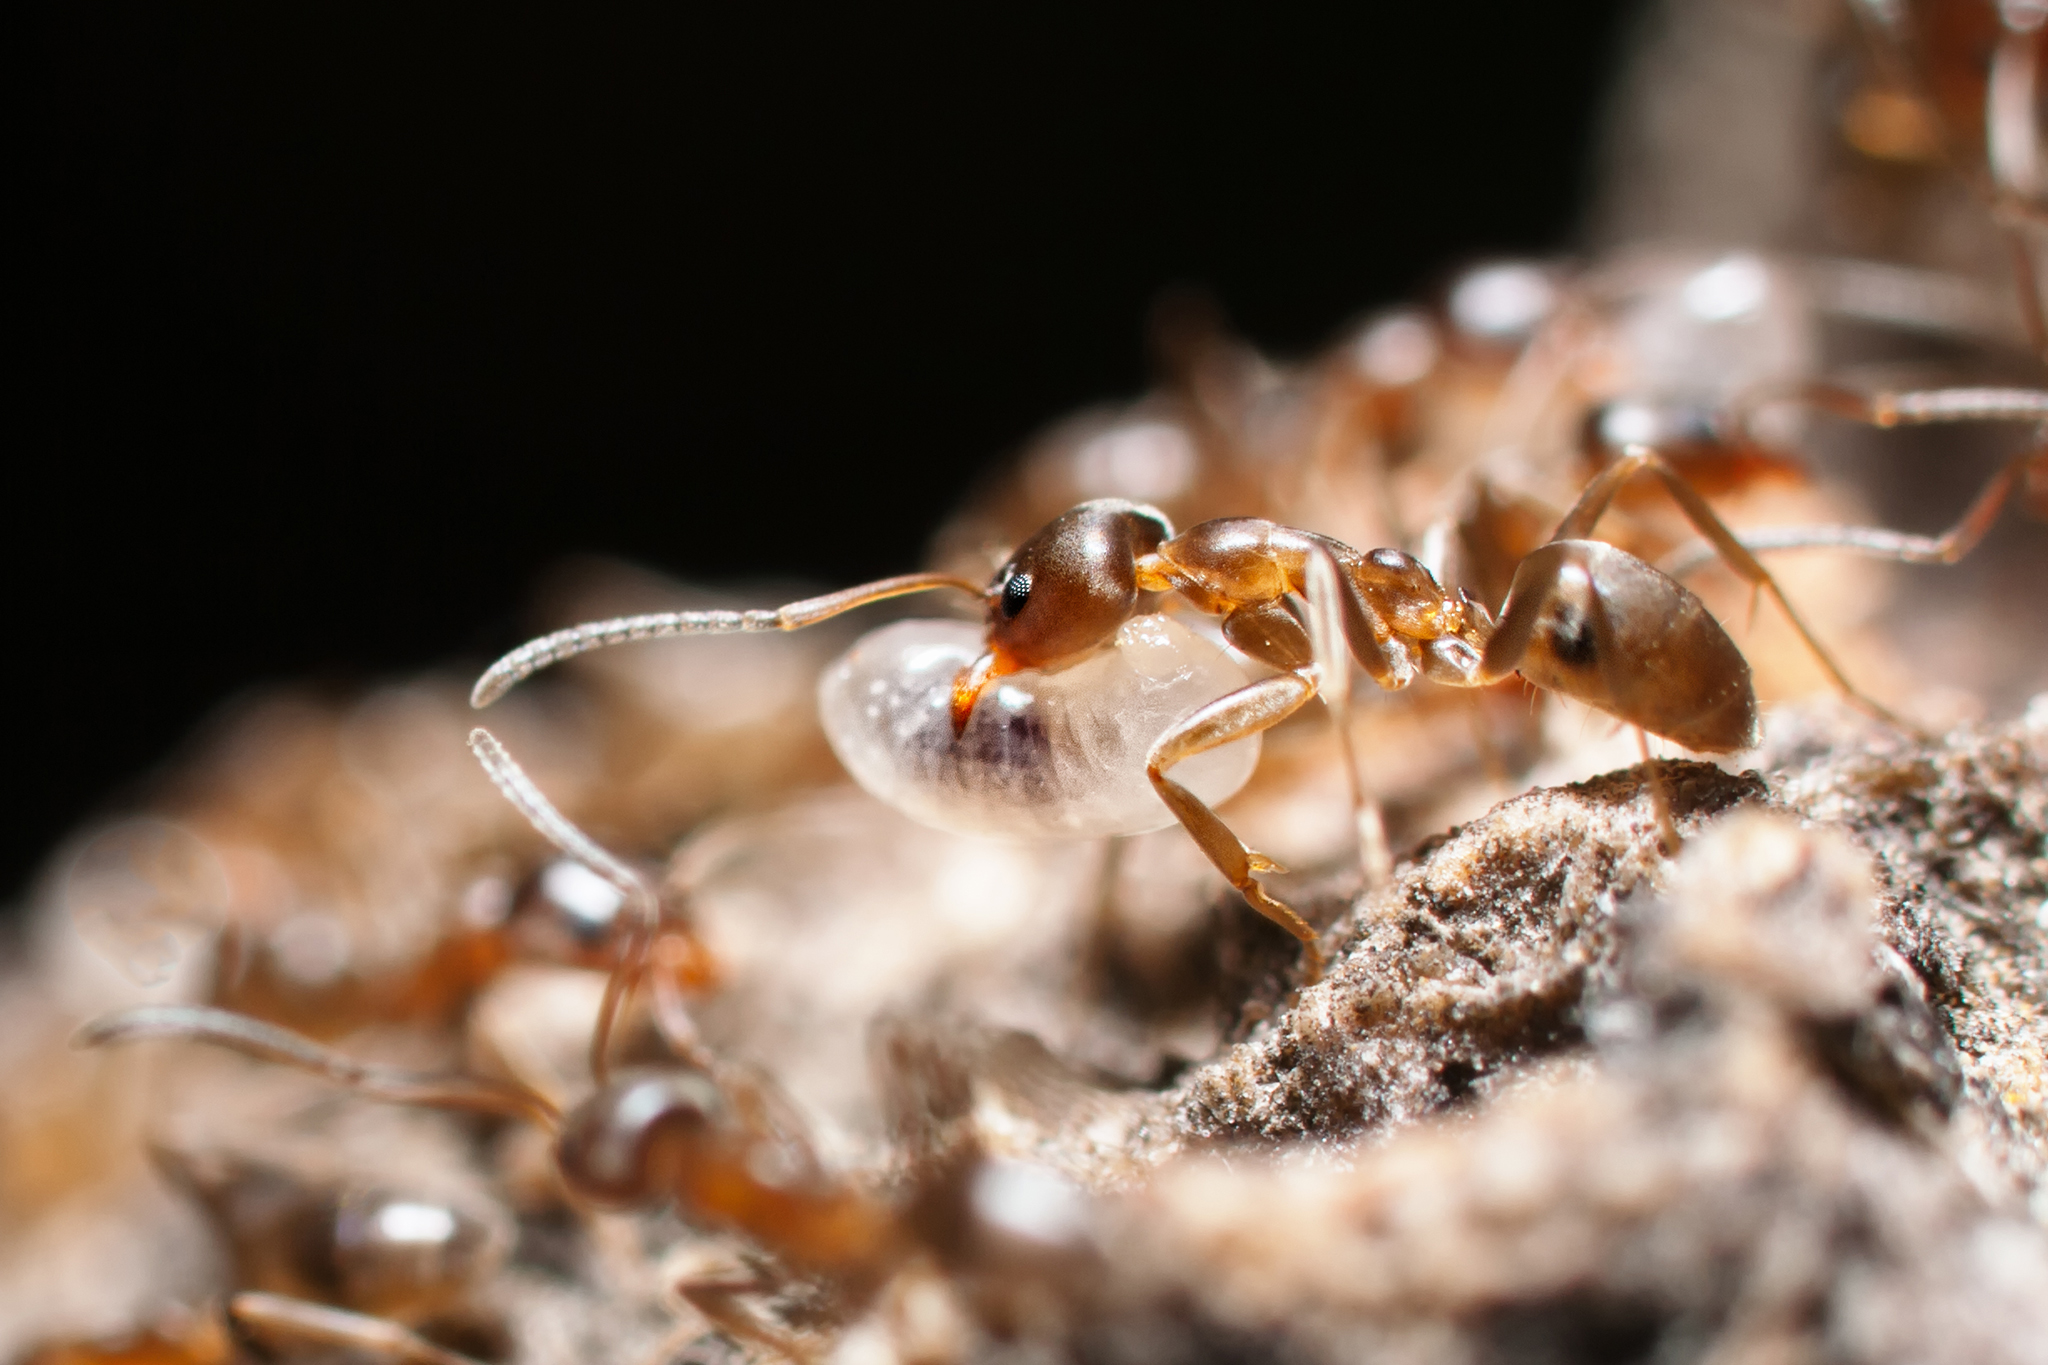
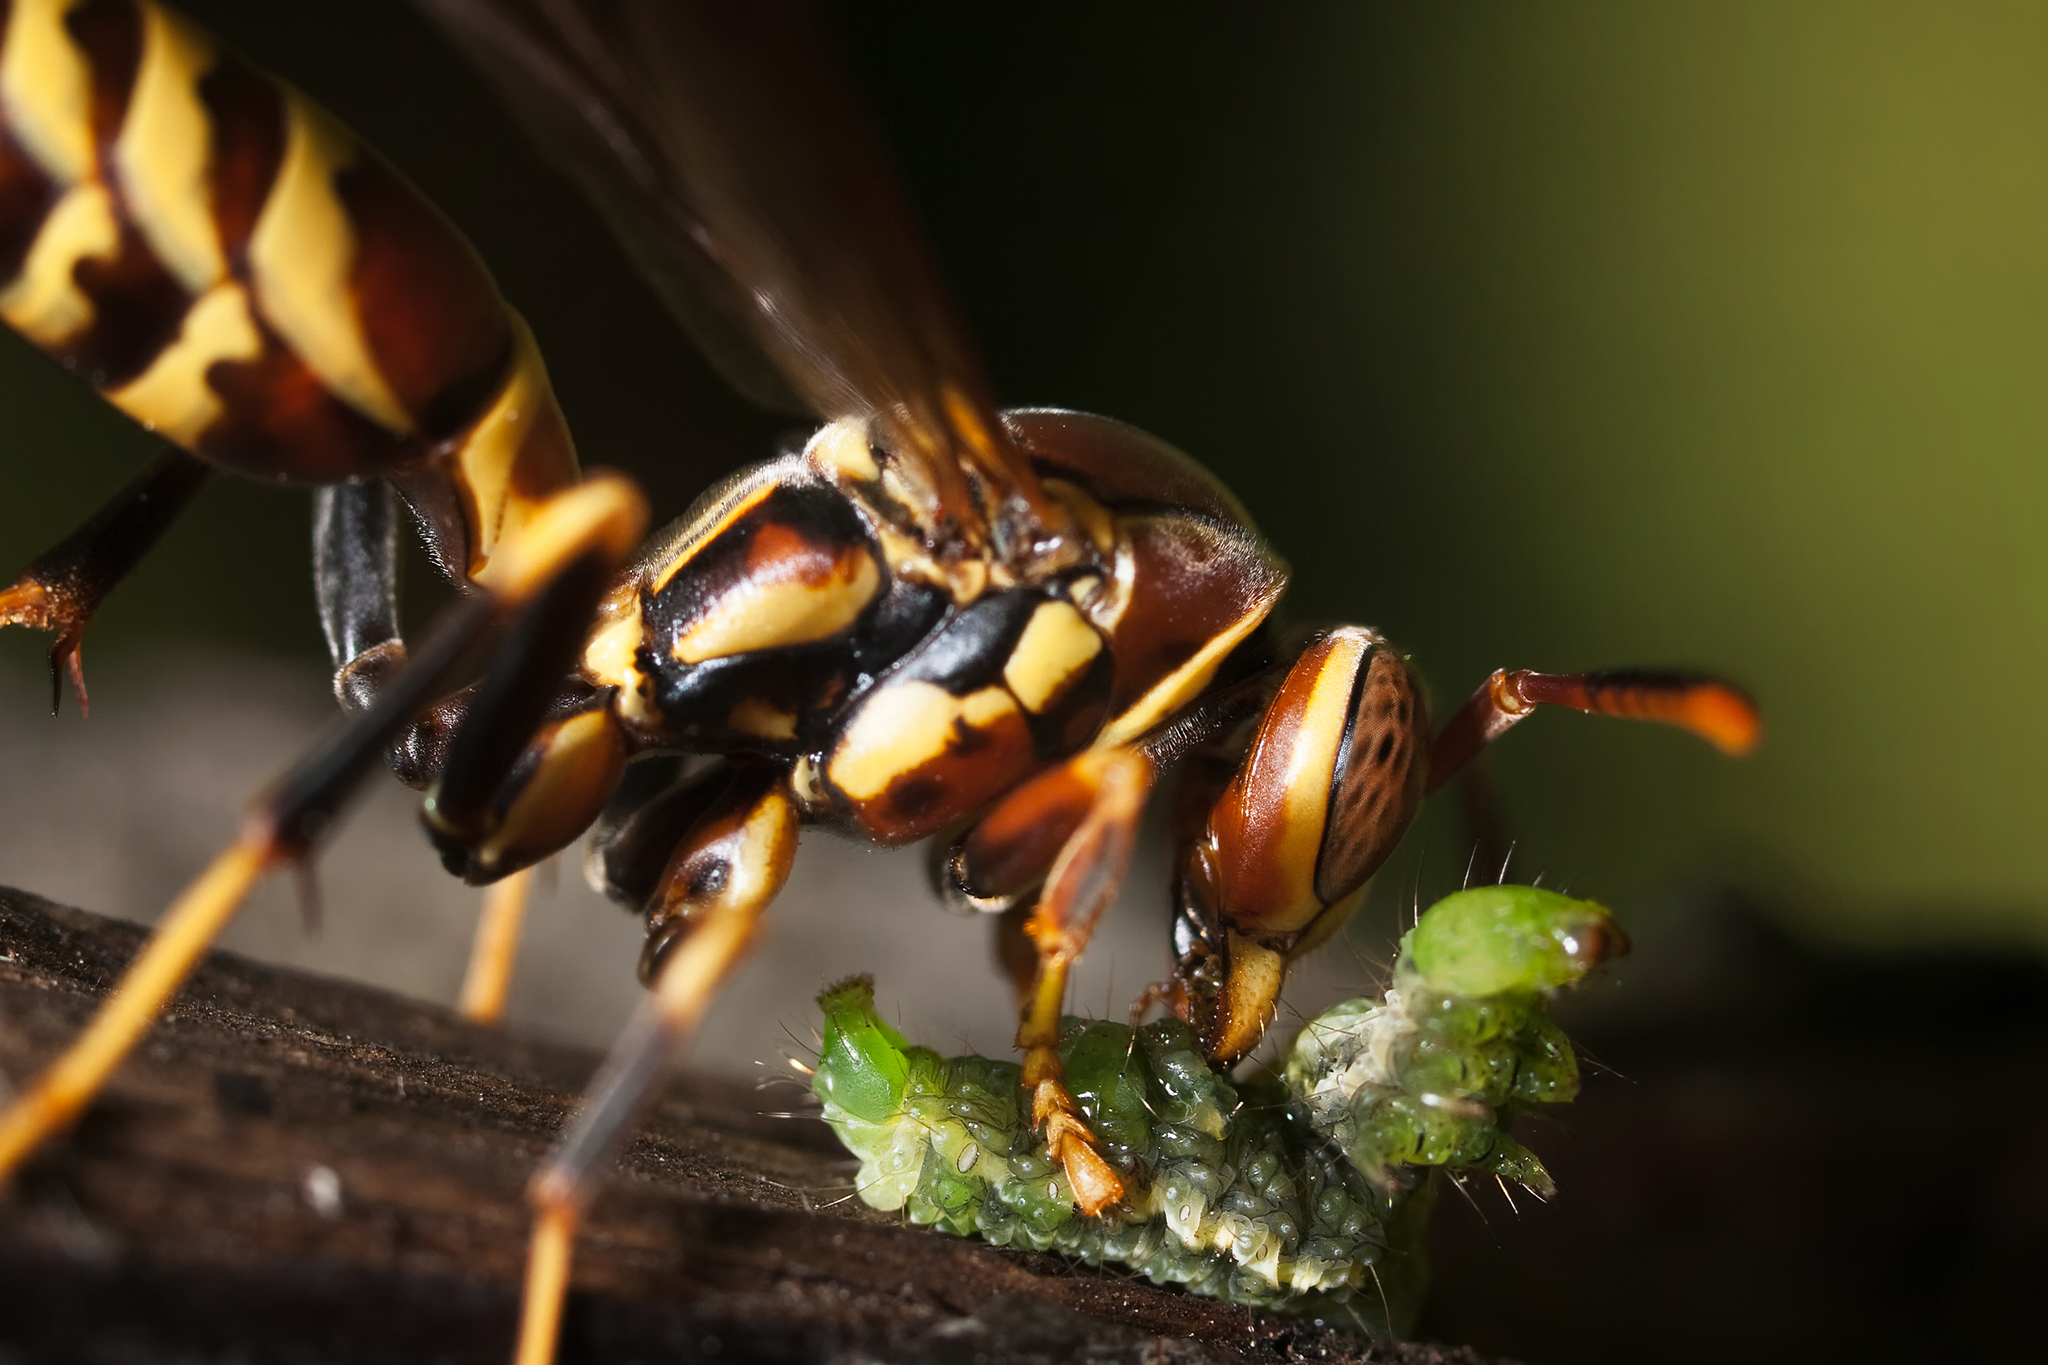
Spring is just around the corner here in the northern hemisphere, and with Spring comes a profusion of little animals that can make interesting photographic subjects. For compelling pictures of these little critters, you have to get really close.
Chapter 12 of the Northrup’s book, Stunning Digital Photography, covers macro photography. There are a lot of different approaches and tools you can use to get the shots, and that chapter covers them all, so if you’re new to macro, start there.
Here we’re going to talk about shooting close (around 1:1) pictures of living animals using a macro lens and an external flash.
The main technical problem with shooting moving things at 1:1 is getting light onto your subject. For depth of field you’ll want to stop down, which also reduces the light getting into the camera. To freeze subject motion, you’ll want reasonably fast shutter speeds. And for quality, you’ll want lower ISO. But you and your camera will often be blocking much of the light, and also the physics of light and macro lenses means there is less light than you would expect at any given aperture. And forget about using a tripod. Tripods are great when your macro subject is dead or inanimate, but insects don’t wait for you to get your tripod adjusted, and tripods won’t help with the faster shutter speeds we need.

The answer is flash.
Here’s a basic recipe. Variations, like anything in photography (and cooking!) are almost always a good idea.
Ingredients
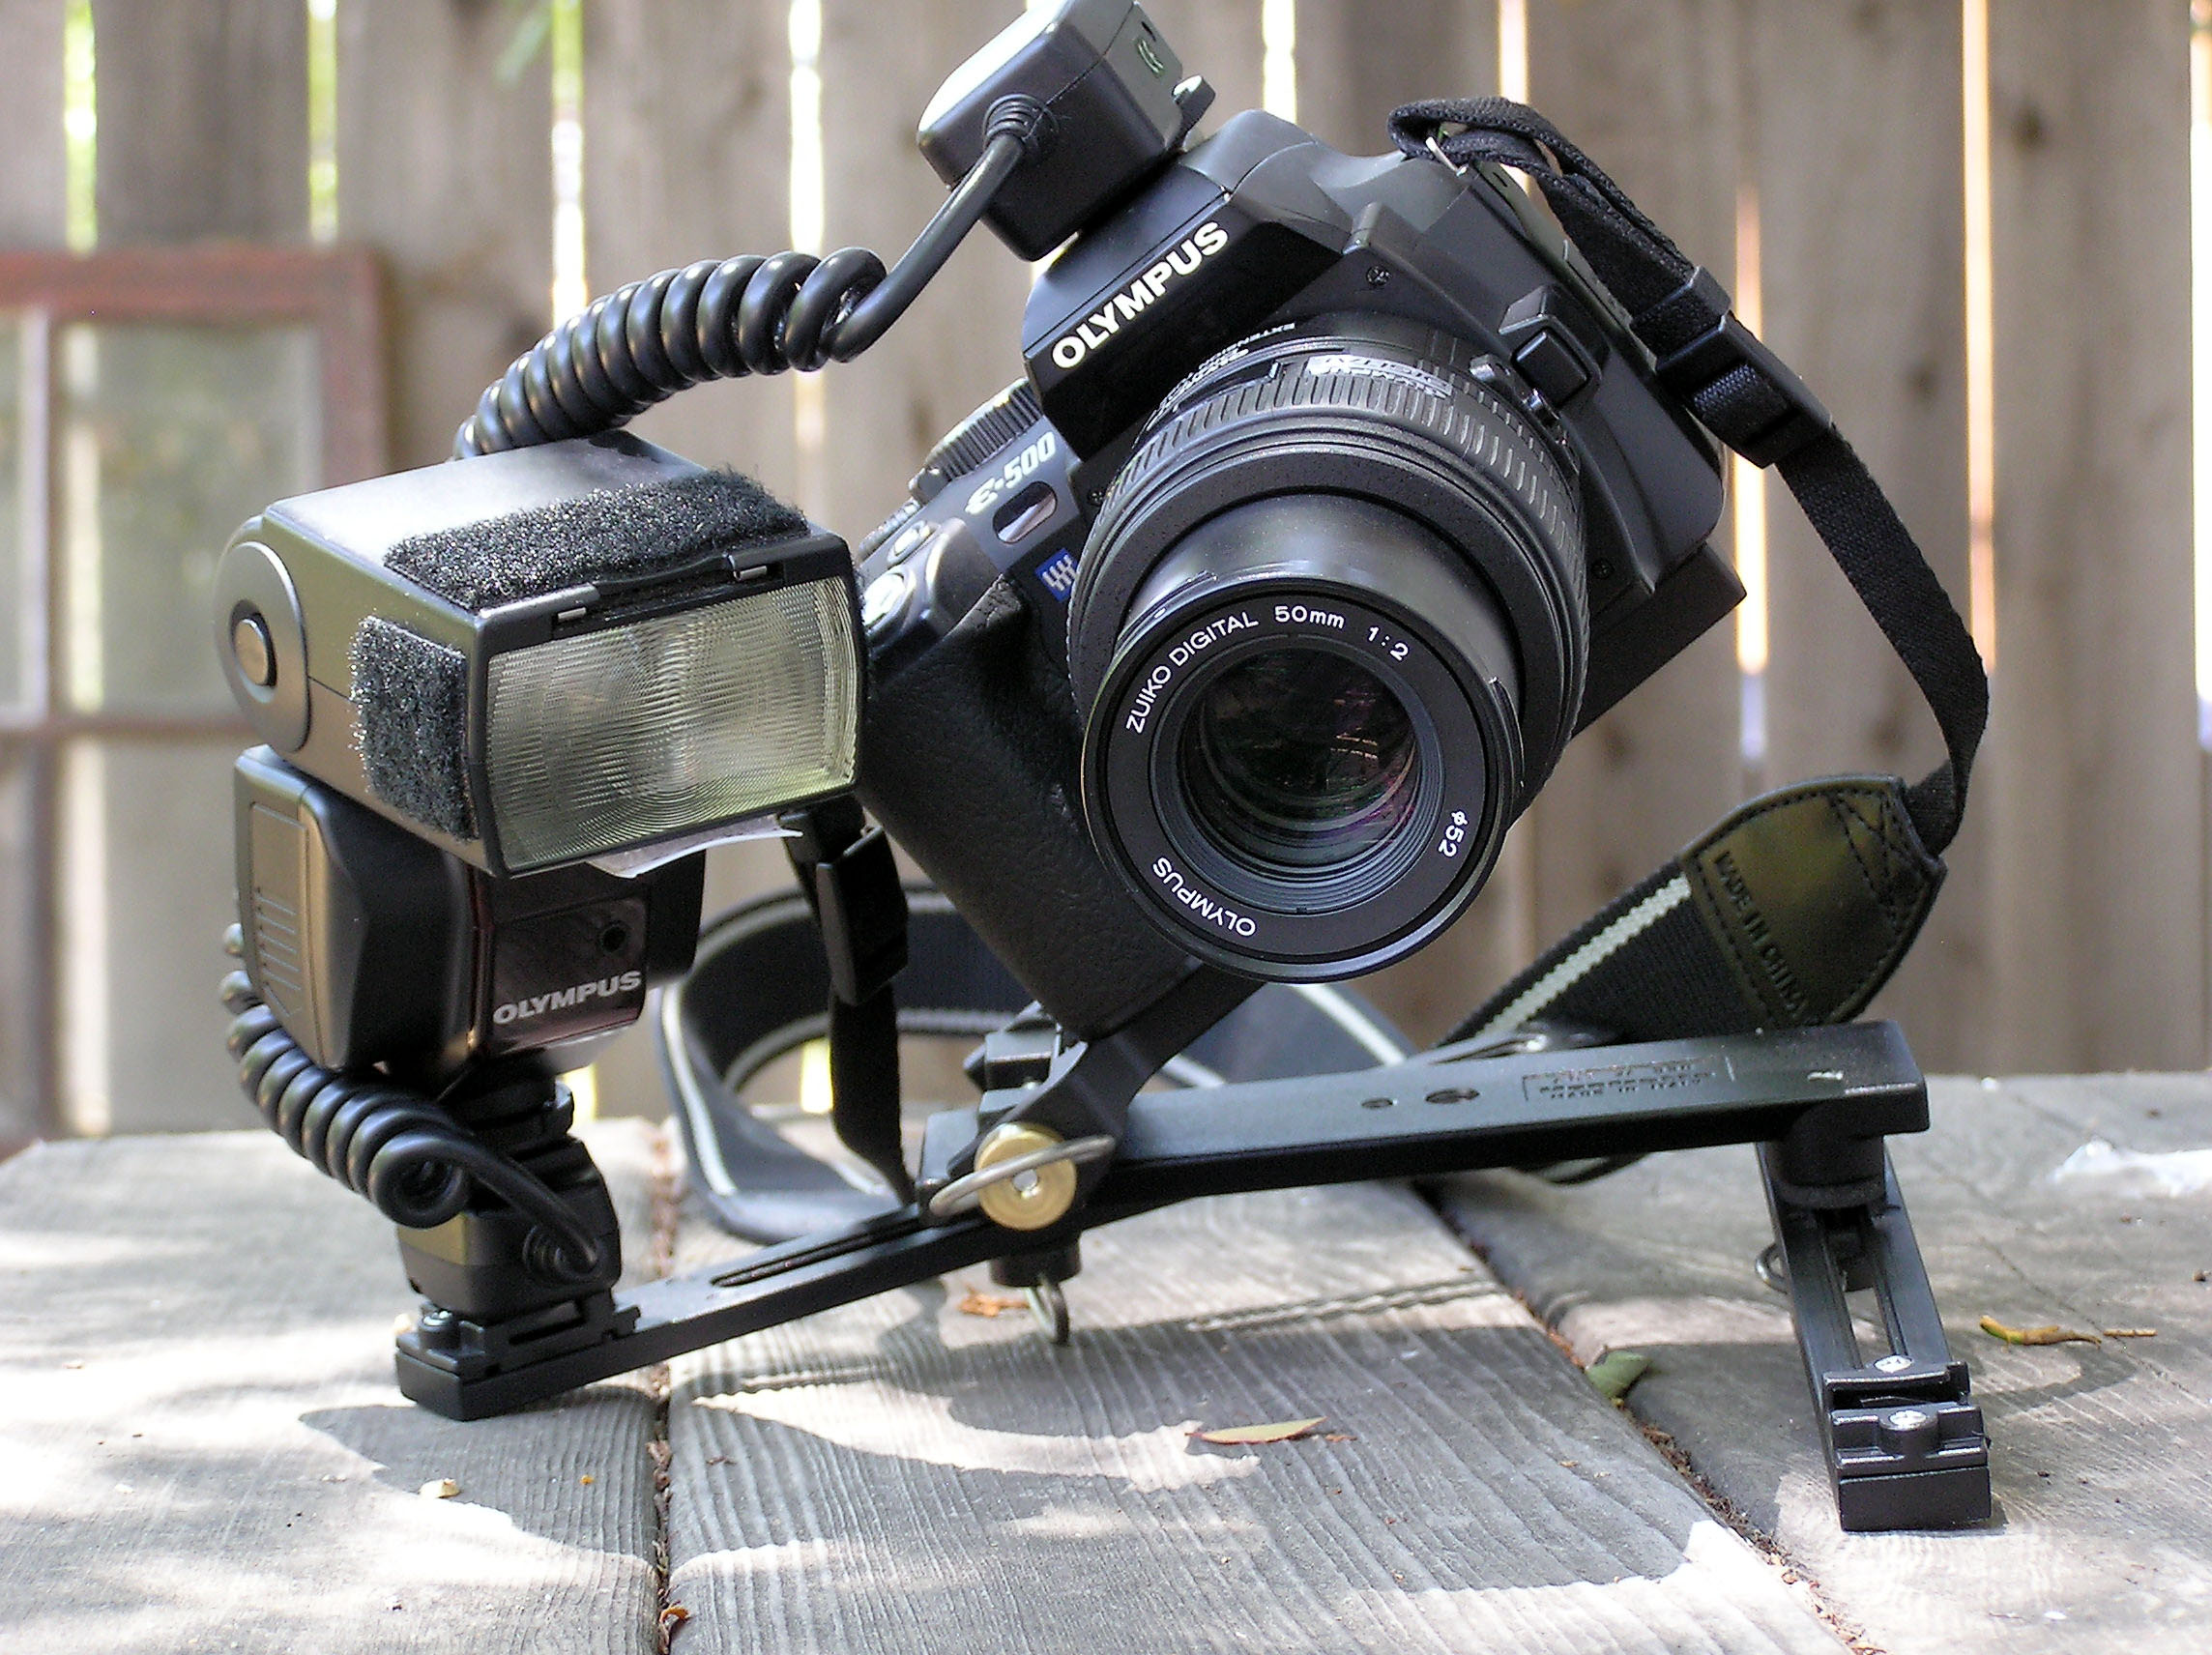
1 camera body
1 macro lens
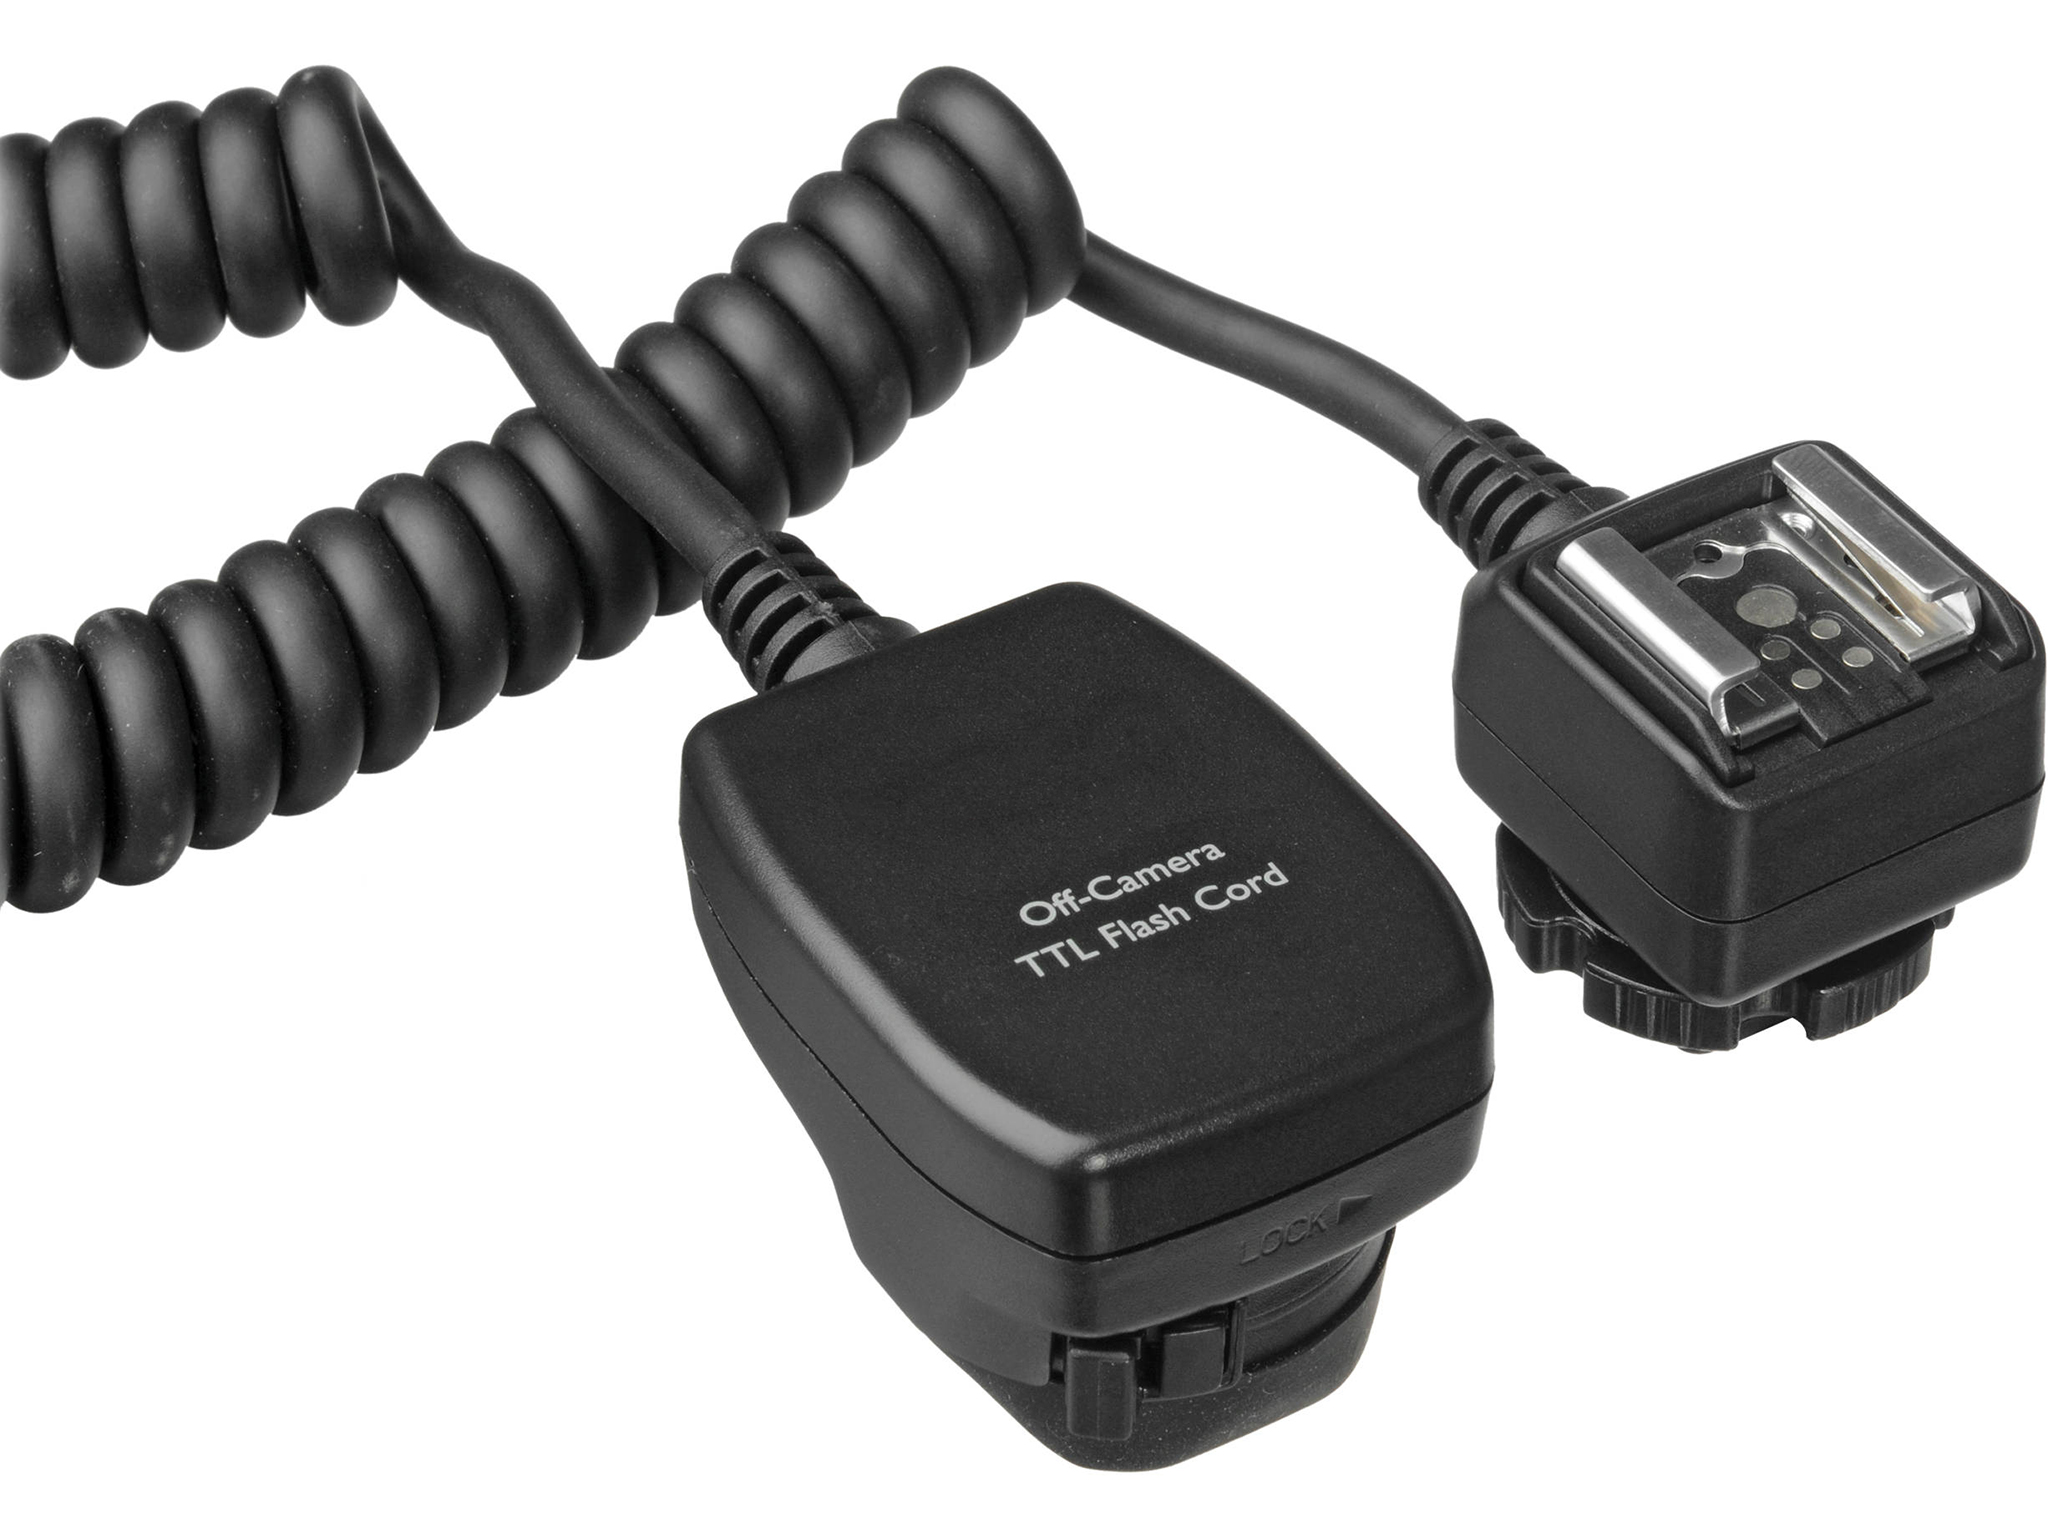
1 TTL capable external flash. This can be a system flash or a compatible brand like Yongnuo.
1 off shoe TTL flash cable or TTL wireless trigger.
Optional Seasonings
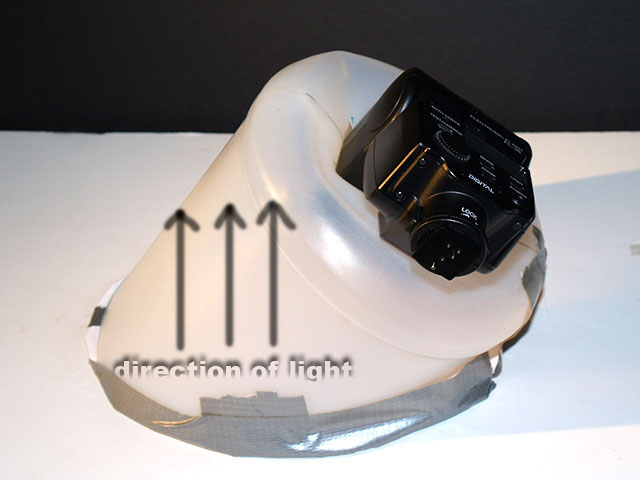
A diffuser for the flash. Could be store bought, could be a translucent container lid. The soft or hard quality of a light source is related to how large the light is in relation to the subject. In the case of macro, your flash will be pretty large in relation to the subject, so you may find you don’t need a diffuser.
Also possibly handy, a flash bracket.
Preparation
Set your camera to fully manual (M).
Start with f/11 for the aperture. Because of diffraction, which is exaggerated in macro photography, stopping down too far will rob sharpness from your images. But not stopping down enough will give you a ridiculously shallow depth of field.
For the shutter speed, start with the maximum sync speed your camera supports. It’s usually around 1/200 but check your manual. This will create darker backgrounds because fast shutter speeds reduce ambient light… but it’s a place to start. We want to freeze subject motion blur and camera shake, but the flash will also help with that. Later, experiment with slower shutter speeds which will let in more background light and look more natural. If your flash has high speed sync capability, you can use even the fastest shutter speeds to get dramatic black backgrounds.
Set your ISO to auto, or to the base ISO, whichever you prefer. This is another setting that you’ll experiment with. Higher ISO will allow in more ambient light at the expense of image quality.
Put your flash on the cable or set the wireless TTL trigger and set the flash to TTL. On Canon, it’s called eTTL, on Nikon it’s called iTTL… whatever it’s called on your camera, it causes the flash to fire a tiny pre-flash milliseconds before the main flash, and it uses data from the pre-flash to automatically adjust the flash output for you, based on your camera’s settings.
Put your lens in manual focus mode. Auto focus will not work this close.
Technique
With the flash ready to fire, turn the focusing ring on the macro lens until it’s at its closest possible focus. Many macro lenses have markings (2:1, 1:1) on the barrel and the lens will grow longer as you turn the focus ring to closer.
Hold the camera in your right hand, hold the flash in your left. Move the entire camera closer and closer toward your subject until the moment when what you want to be in focus looks like it’s in focus in the viewfinder or on the screen. Actually, no, you went too far. Move back. Ok, too far back. Rock the camera in and out, looking for that crucial moment of focus. It’s fleeting. With insects, look for the individual facets in the creature’s compound eye. If you see these, you have critical focus. You should have the end of the lens pretty close to your subject. Is the flash in your left hand about a foot or two away from the subject? It is aimed at the subject from an angle? Perfect! Take the picture! But don’t smack the shutter button, *squeeze* it gently.
The flash adjusts the light so that you can pick the shutter speed and aperture you want no matter what the ambient light is. Remember to play with the settings to get the look you want. Realize also, a macro is like a long telephoto shot… a little tiny bit of camera shake will really show, so be steady and use IS or VR if you have it.
Be subtle and calm and you can sneak up to most critters. Using the flash in TTL mode off the camera will allow you to use BOTH faster shutter speeds AND smaller apertures, without resorting to a tripod. If you think the flash is too harsh, dial it down, move it closer (yes, closer! Harsh shadows are caused by a small apparent light source and moving it closer makes it larger,) or stick on a diffuser… If you need your left hand, try sticking the gear on a bracket. Manfrotto makes a good one for this.
The bracket will free up a hand to hold the camera steady with, but it may prevent you from lighting your subjects from dramatic angles. You may want to avoid lighting your subject from straight on, that often provides a flat, uninteresting effect and it’s why many nature and artsy macro shooters poo-poo ring flash in favor of twinflashes. With your flash off the camera, you can try lighting your subject from any angle you can reach with your arm. The more oblique to the subject, the more dramatic the image.
That’s not to say macro ring flashes aren’t useful. They can give your shots a “beauty dish” look that really shows a lot of detail. If you get one of these, just be sure you aren’t buying a continuous “LED ring light”. These are not bright enough and do not freeze action the way an actual flash can. Macro ring flashes usually have small continuous lights on them to help you with your manual focusing.

This kind of photography is challenging and getting perfect focus can be frustrating. You’ll have more tossers than keepers. But getting a great keeper makes it worth the effort!
You can read Eric’s last post here.