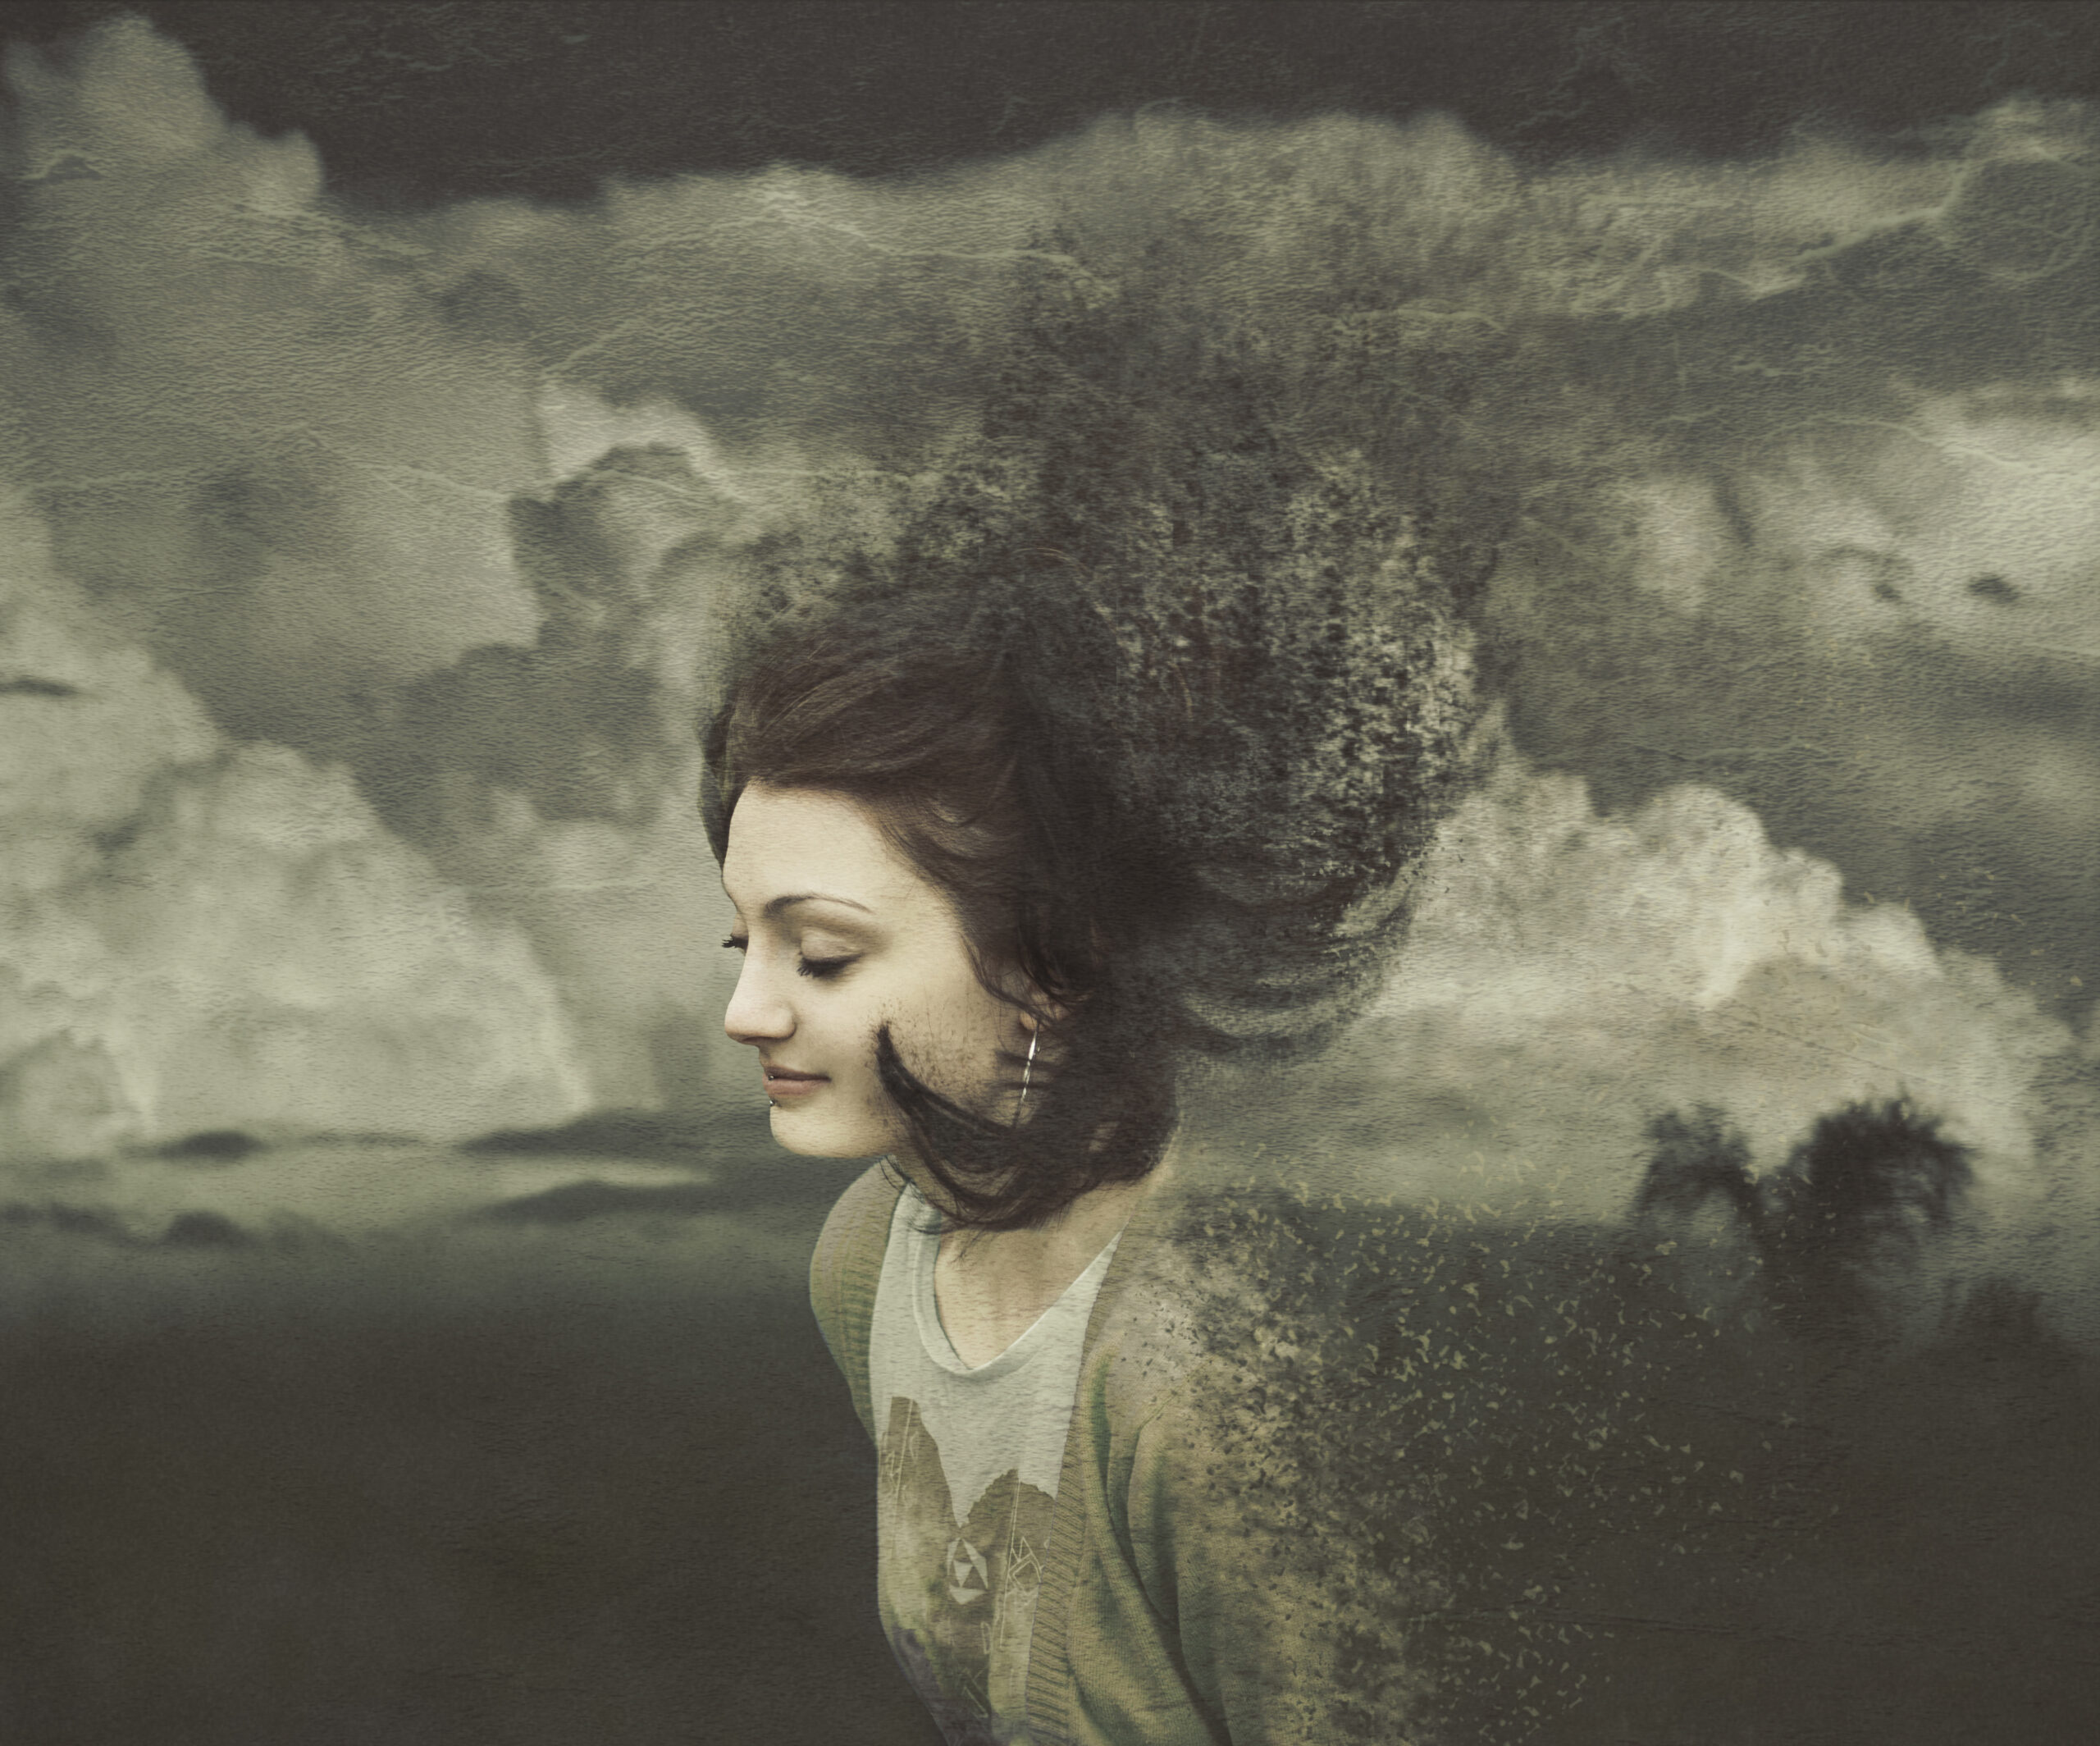
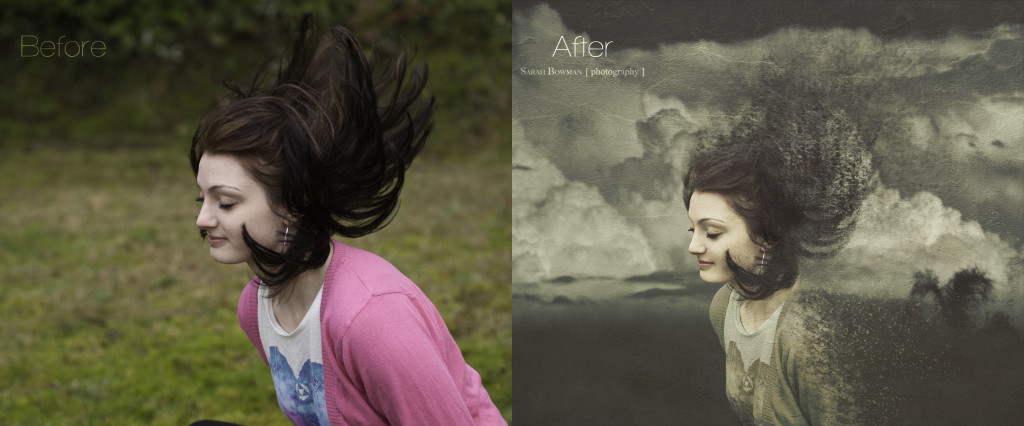
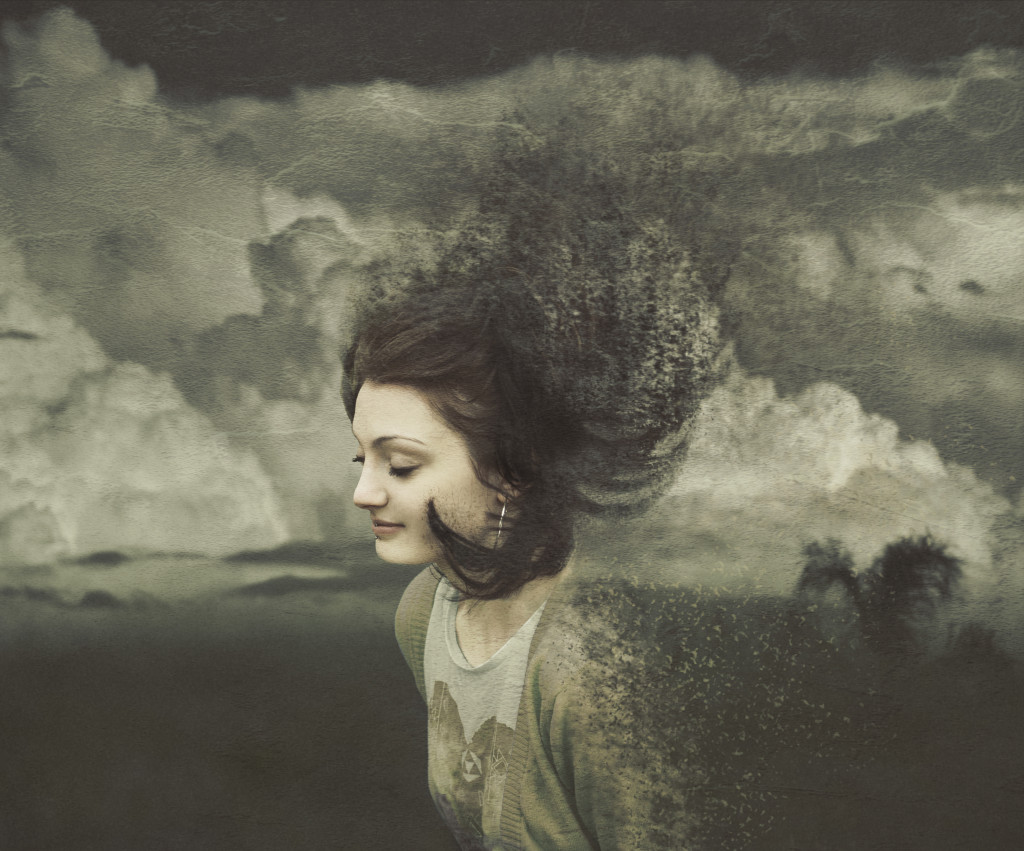
This image nearly ended up in my trash-can; however, I kept on playing around with ideas in Photoshop. Looking at the flow of her hair, I wondered if I could make it look as though she was fading away. The method is surprising simple and doesn’t take that many steps!
For this particular look I used an image of my sister in law, Hayley Bowman, doing a hair flip. I thought that it would be cool for it to look as if there was no gravity, ethereal; as though she was starting to fade away.
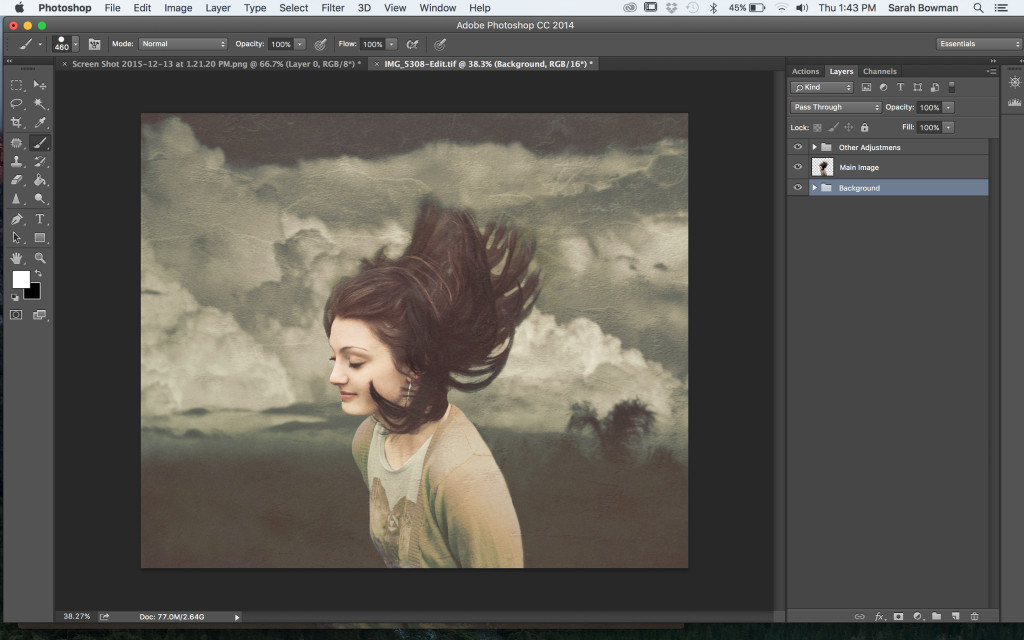
I started by cutting my subject out and then made all of the main adjustments and retouching on the model. After that, you can either put them on a different background or, if you also took a picture of the same background but without the subject in it, you can use that image underneath. You can check out how to do this by watching Tony and Chelsea’s video tutorial that uses the same technique!
By having a background layer underneath your model, you will be able to paint with black on a layer mask to erase away the subject.
That leaves me with this image. I made other adjustments for the background and main image, but I grouped them so that they would not be distracting for this tutorial.
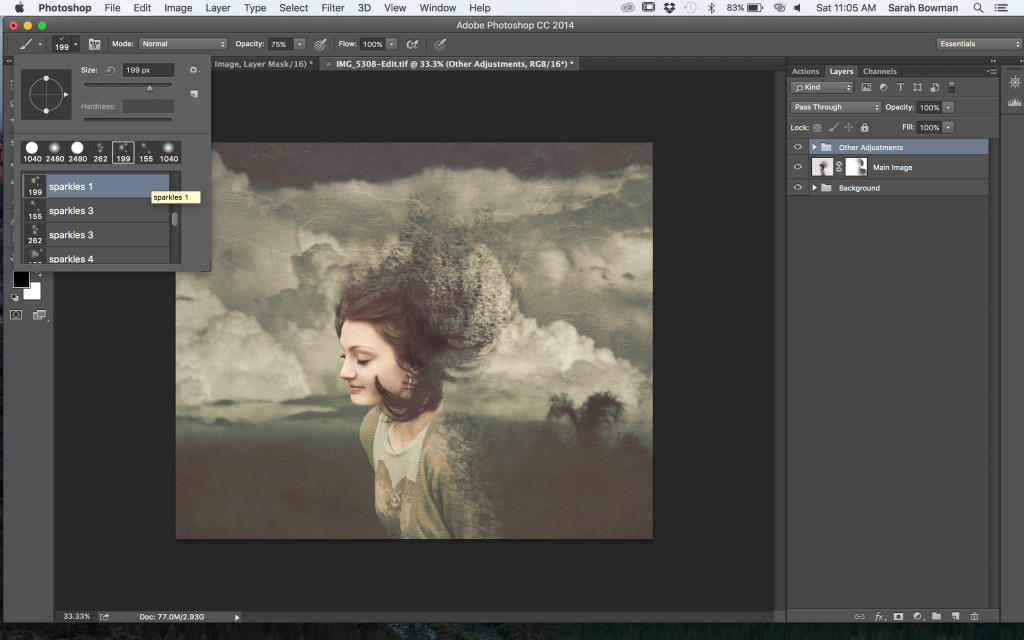
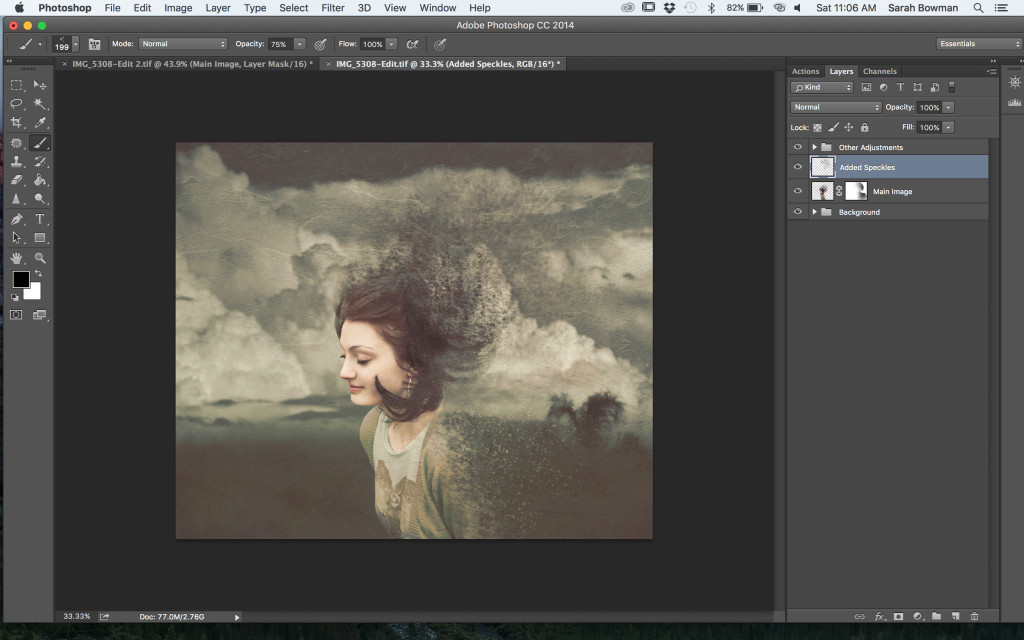
Add a layer mask to the layer with your subject. By adding a layer mask to this layer, I can paint black with a speckley brush to make it look like the subject is fading away. You can look online for brushes with different textures which is what I ended up doing for the fading away areas. If you are not wanting to do that then you can try to just use the normal brush with very soft edges and keep on adjusting the size to add variance to the speckles.
Focusing on the back of the model, paint with your speckled brush on the layer mask with black (black is to hide). Make sure that you do enough to get rid of the outline of her back and a bunch of her hair. You should also use the brush at a lower opacity the more you paint into the subject.
When you are satisfied with how much of the subject you have taken away then you will want to add extra speckles that are in the air. For this image I didn’t want to erase too much of the main subject away. Create a new layer above the current one and, with the same brush, sample some of the colours in the subject and paint in the area behind her. For example, to make the hair look like its fading away into the wind I sampled the brown in her hair and began painting into the pretend wind. You can sample more than once, and it would be best to include more than one type of colour. The same step is also done for the clothing. You can play around with the opacity of the layer and size of the brush you are using. Now it looks like her particles are blowing away in the wind!
I hope the this tutorial helps you!
~Sarah Bowman
Model – Awesome musician Hayley Bowman!
Facebook – Instagram – Website – 500px – Website – YouTube – Twitter


Comments are closed.