I love Photoshop…. No really, I love it. I can’t believe I’m uttering those words but it’s true.
As a beginner photographer, I had a rough start with my editing. I had no idea where to start so I resorted to using free programs I found on the internet. I thought these programs were genius! They would apply these absolutely horrifying “AMAZING” filters. I thought my pictures looked fabulous. I won’t even tell you the name of these programs because if I can spare you the horrific step I made you’ll thank me for it someday.
It didn’t take long before my frustration set in and I realized that my images didn’t look professional. I just didn’t have the ability to achieve the results of some of the photographers I admired. When someone finally asked me to slim their arm, I knew I needed to bite the bullet and get Photoshop. Using it was another challenge, I was so green that I had to Google how to even open a photo. That’s how little I knew.
The point of this is that anyone can learn Photoshop. I knew absolutely NOTHING when I started with it. If you have a little bit of patience, YouTube, an ebook reader, and a computer, you can go as far as your imagination takes you.
The Edit
Let me begin by saying there are 1,001 ways to edit eyes. I have used many different techniques and this is one I’ve started using the most since it’s easy with high visual impact.
Begin by zooming into your photo to 100%, if that’s not enough go further, until you can see the eye detail (this will be more dramatic on lighter colored eyes).
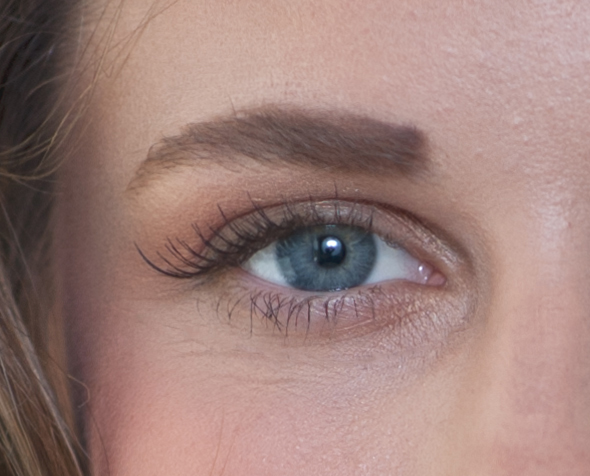
This image is SOOC (straight-out-of-camera), which means no edits have been made.
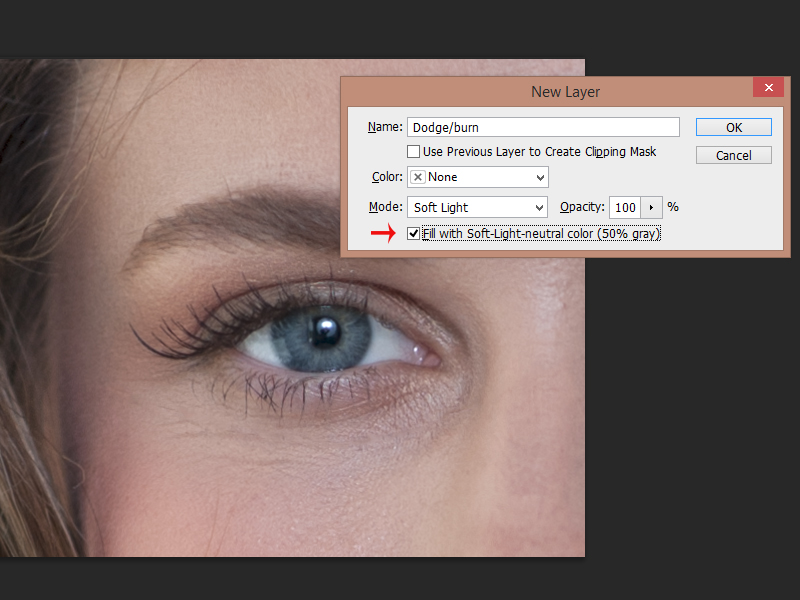
From here we’re going to set up a 50% gray layer for dodging and burning using my preferred method. Click the new layer icon while holding the Alt key. This will give you a menu option for your new layer.


Name your layer “dodge/burn” or “eyes”, or whatever name you like, then in the Mode list, select Soft Light, and then fill with 50% gray as shown below. Then click OK.
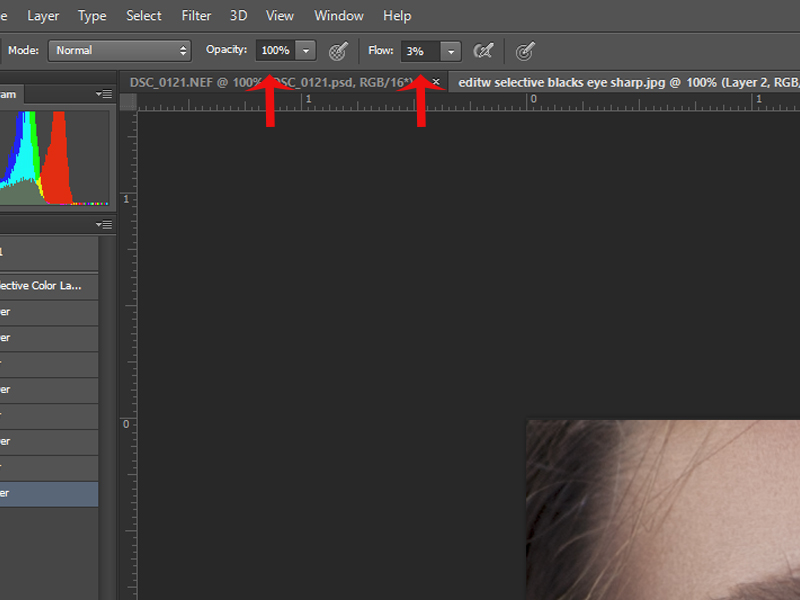
You will now see a grey layer in your layers panel. Using your brush, (hotkey is “B” on your keyboard to toggle to your brush) set your brush hardness to zero. I usually start with the dark areas first, so click on the color black in your color palette and adjust your brush settings to 100% Opacity and 3% Flow.
The iris is complex. Lots of people just use the Dodge tool and dodge the iris until it’s brighter; but they lose depth. Dodging and burning the lights and dark sections of the eye independently takes a few extra steps but looks much more realistic and offers a more dramatic effect.
Begin by darkening the Limbal Ring; this is the outer dark ring of the iris. The easy way is to draw a dark circle around the iris and be done with it, however most eyes have jagged points, or lines that fall inward, or little black specks throughout the iris. Spend time with a very small size brush quickly darkening each area, being careful to not make it look “perfect”, the dark areas in the eyes aren’t perfect, so if you draw a perfect circle it will scream fake.
There have been many studies that suggest someone’s attractiveness increases when the Limbal ring is darker; a strange fact, but true! Take caution as to not over-do this and be aware that the Limbal Ring fades as we age, so do not make it too dark in older folks is it will look very unnatural. Teens and children usually have this the strongest.
Once you’ve finished darkening the eye, darken each lash (top and bottom). This sounds time consuming and tedious but it should just take a few seconds to swipe each one quickly. For woman I also darken the eye shadow area on the upper lid as the camera usually washes out the makeup.
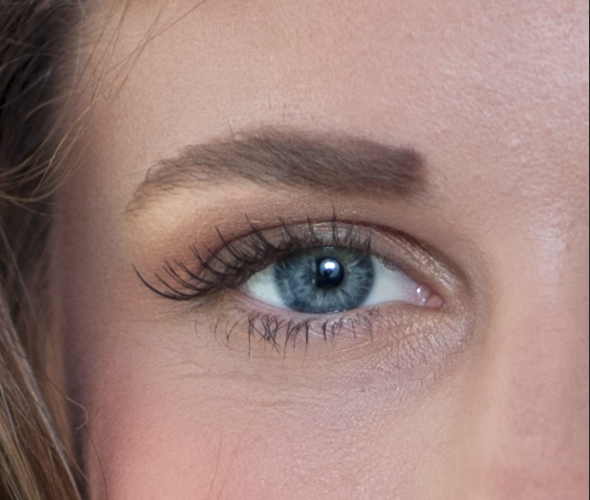
Now it’s time to switch to the white paint brush. Keeping your brush settings the same, go back to the iris and lighten the areas you didn’t darken. This creates contrast, and you will notice the eye starting to “pop”. I do occasionally brush the whites of the eyes, but only the part right next to the iris, I don’t ever whiten the corners as they naturally should be darker. Next, if it’s visible, lighten the area in front of the lower lashes, the section where some people apply eye liner. Your eye should start to look something like this;
I sometimes like to take it a step further and add a little more contrast, but ONLY to the blacks. So from here I click on the Selective Color adjustment layer and under Color, a drop down menu will appear. Choose the color black.
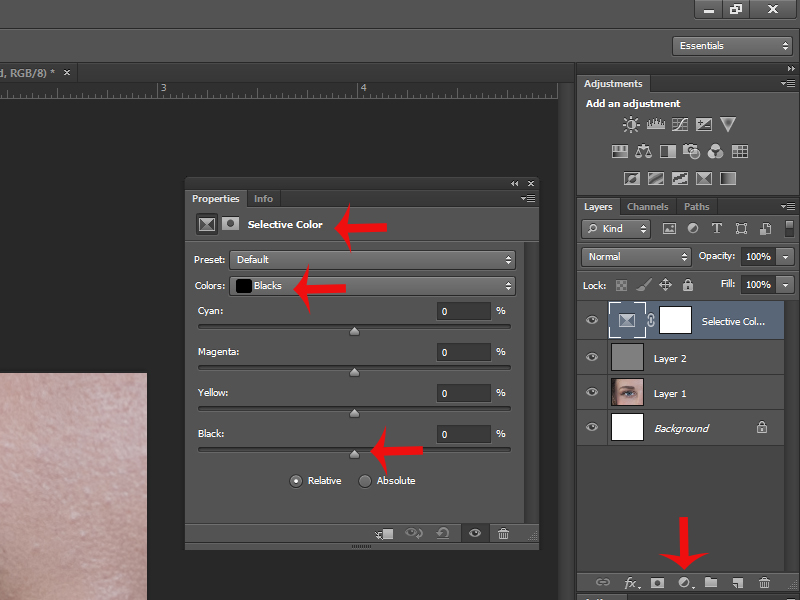
Now using the bottom Black slider increase the blacks to taste. I usually end up somewhere between +4 and +10. Your image should now look like the next figure; it’s subtle but makes them pop even more. Making adjustments using the adjustment layer will affect the whole image. If you only want to affect the eye, you can add a layer mask and remove the areas you don’t want the adjustments. To understand more about Layers and Masks check out Tony’s video ‘Photoshop Essentials: Layers & Masks‘.

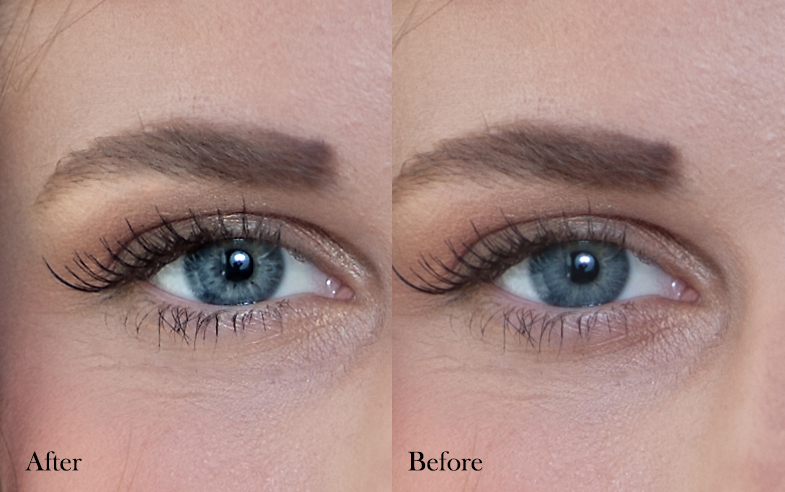
Keep in mind, the other parts of this sample image have not been edited, but once you’ve completed your image and sharpen the image your final should look something like this.
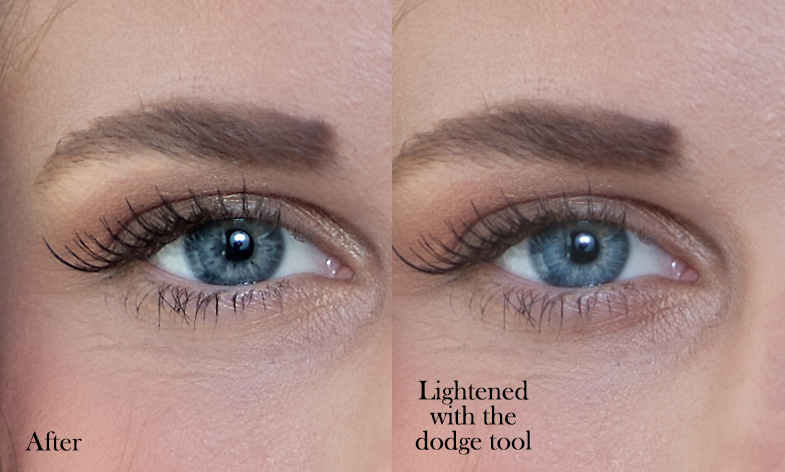
This may seem like a lot of steps but really once you start doing it often it only takes a few minutes. Here I show you example of what the eye would look like if I took the dodge tool, with no gray layer and just painted the inner part of the iris. I created a new layer, selected the Dodge tool, and set the exposure to about 40%, then painted a circle around the iris lightening the lighter section. As you might be able to see, this does lighten the eye, but the depth and intricate detail of the iris is missing.
There are some occasions when a quick swipe of the dodge tool is completely sufficient. When the subject is small in the frame, and the eye detail is not prominent, there is no need to spend extra time on the eyes. However, if the subject is filling most of the frame and the eyes show detail, I will always spend the time enhancing them.
I hope this maybe opened your eyes (haha, sorry I HAD to!) to an alternate method of enhancing eyes. If you have any questions about it, feel free to leave a message below!