The Philosophy
I won’t take too long with this since my last post was all about artistic vision and philosophical ramblings. This post is meant more as a tutorial. However, there are a few things I would like to share here. Sometimes, my goal when I am out and about shooting is to capture something other than abstract ideas. That is, I may be out with the goal of doing some self portraits or a few landscapes at the beach. However, the light or weather refuses to cooperate. Sometimes, I lose the mood. Whatever the case may be, I feel that if I am out there with my camera, I need to find something to shoot so I can use the photos as a sort of “bank” I can draw from whenever I need to. I have thousands of images on my computer that I can turn to whenever I am in a creative “rut” because of this. (I am the photographic equivalent of those poor folks on the show ‘Hoarding : Buried Alive’ lol.) I shoot tons of “throw-away” images that, later on, prove to be very useful in creating some very interesting and at times, award-winning images. I take shots of geometric patterns, shadows, and architecture. When I am taking these shots, I try to keep in mind that they will be used to create an image that will look FAR different from the image my camera captured. They don’t look like much out of the camera, but hopefully the tutorial below will help make your photos look like a work of art 🙂
How To Do It
OK, so this is the part I have dreaded. How to teach what I do in a few paragraphs and screen shots. I will admit, this is a bit hard for me. Most of the time, I am in a drunken stupor when I create these, so trying to impart this technique to you all while sober is a bit frightening. ***Hold on…grabbing some tequila*** OK… I’m back.
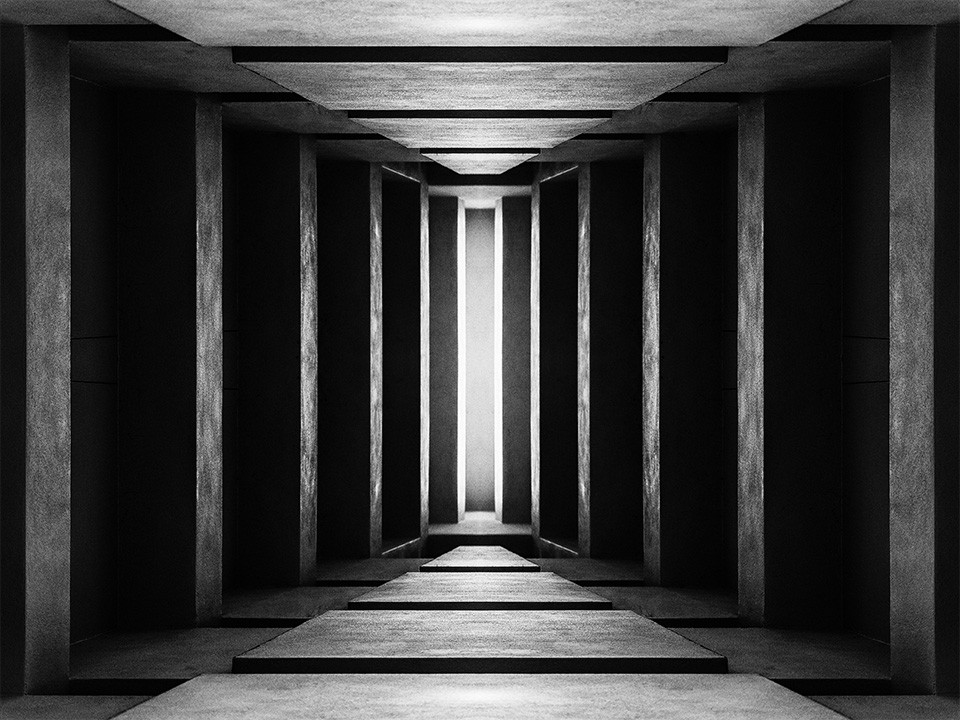
In all seriousness, here we go! You want to open your ‘ordinary’ photo in Photoshop. (Yes, I understand many of you may not have PS, but to me there is no better program for doing this, and it’s the only one I really have to do so) The screenshot below shows a boring shot of a ceiling I took in a museum

When I shot this, I took it with the express purpose to make something from it. I tried to frame it so I had as many lines, shapes and shadows as possible to work with. I did NOT have the finished product in my head. Rather, I simply captured something I thought I could work with later on. This shot went into my ‘creative bank’ for later use.
When I evaluate an image like this for transformation, I look for intersecting lines and shapes I can crop it down to as a starting point for making an abstract image. Below is a screenshot of this same image with lines drawn on it in an attempt to help you visualize what I see in my head when I am evaluating an image for an abstract transformation. Each color grid represents a possible crop. Notice that they all have lines or shadows that end at the corner of the ‘cropping points’ (green dots). Hopefully this isn’t confusing, but I really have no better way to impart this visually to you 😛
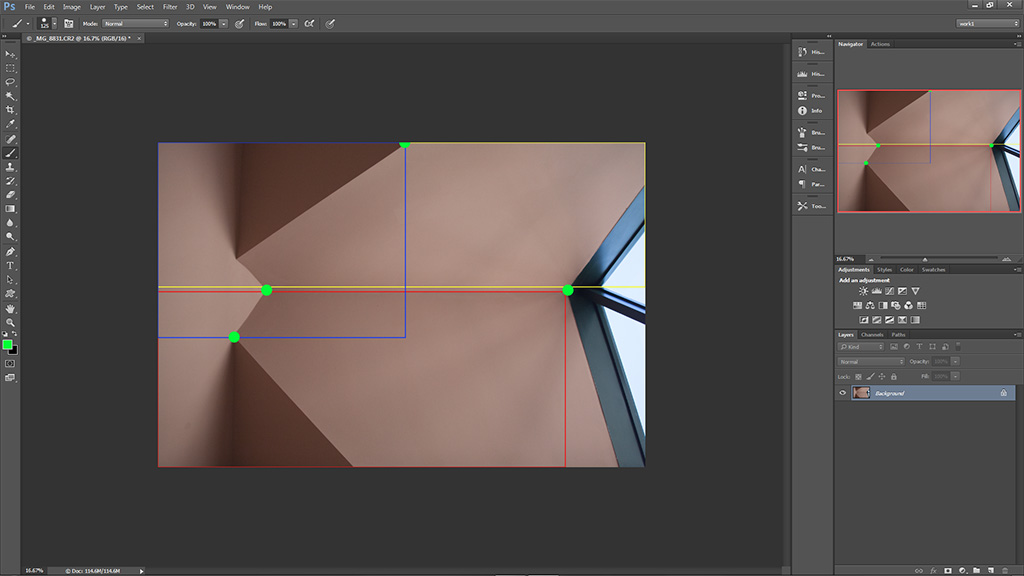
For this example, I went with the crop covered by the blue outline (See below). I thought the shadows and lines looked interesting. Remember, this is all an experiment. Crop your images any way you see fit. This method just makes it easier when it comes to the ‘mirroring’ part, which I will soon get to.

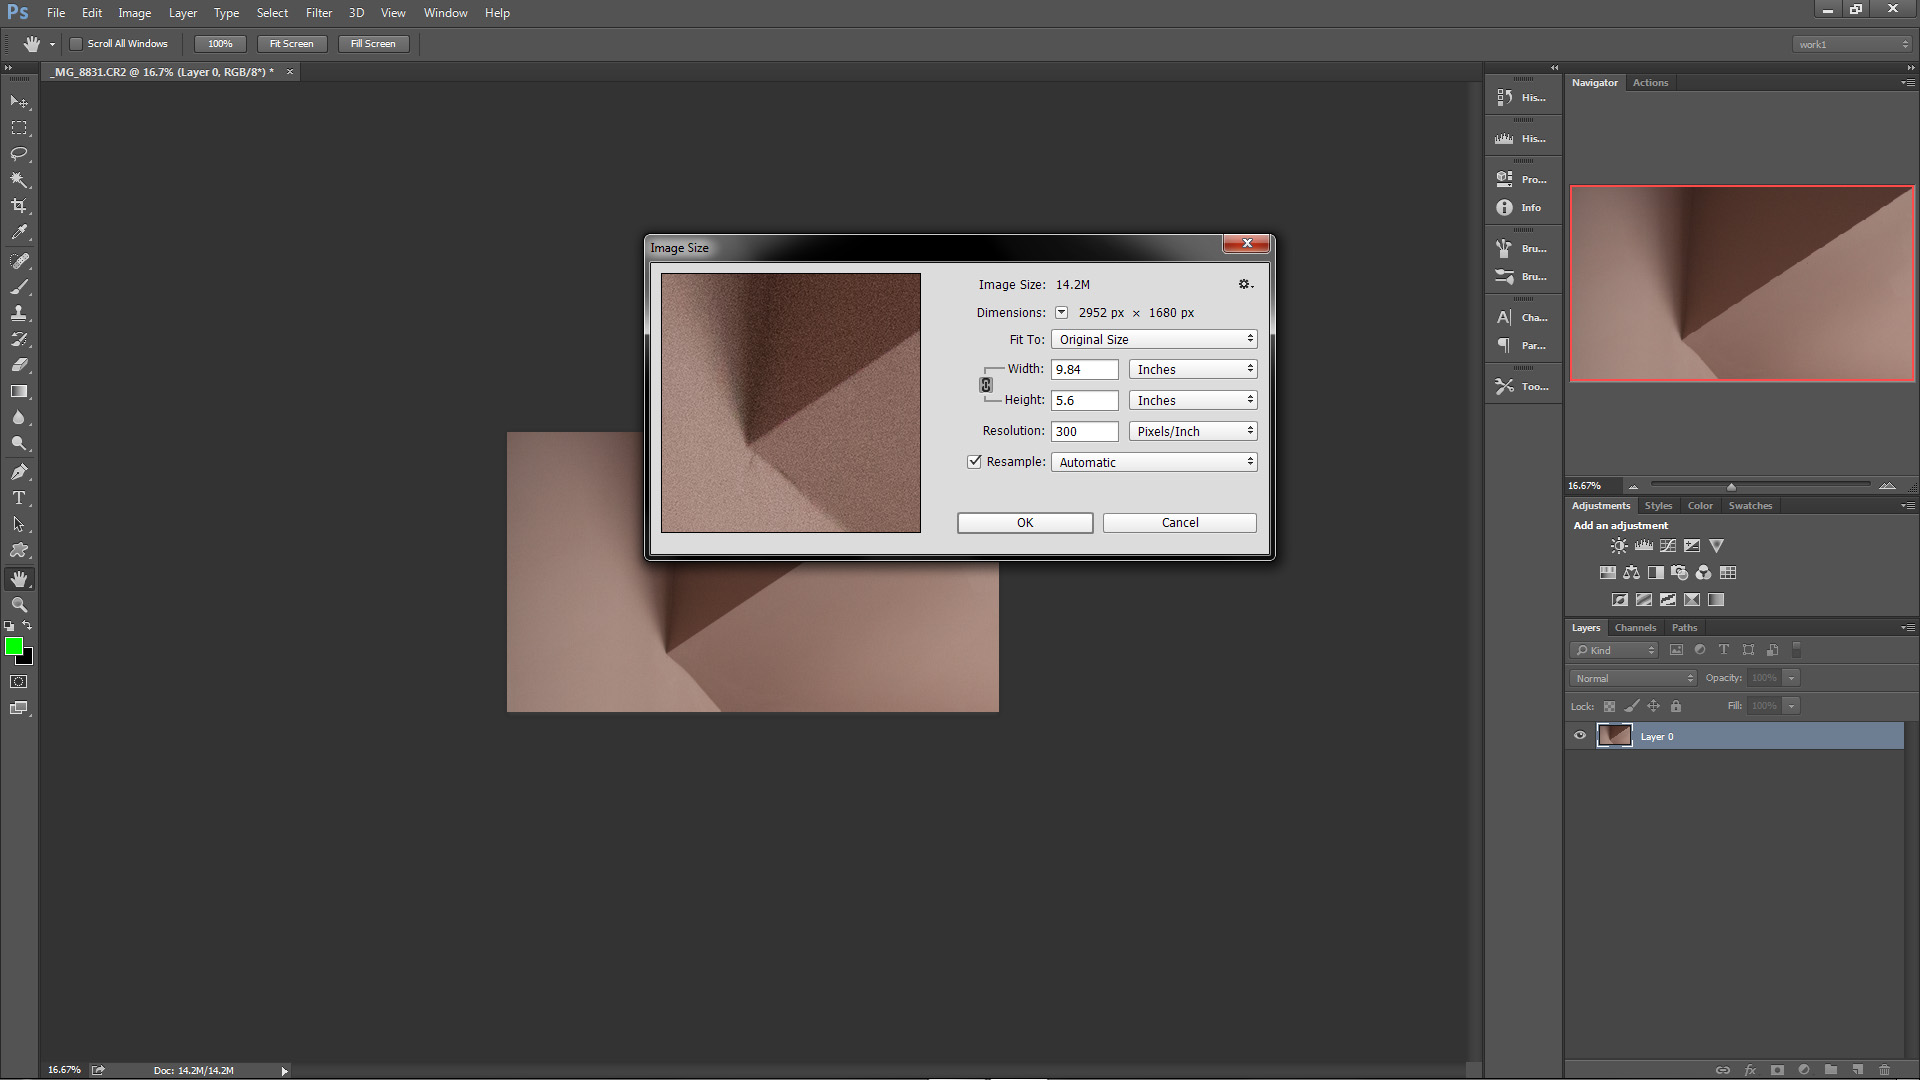
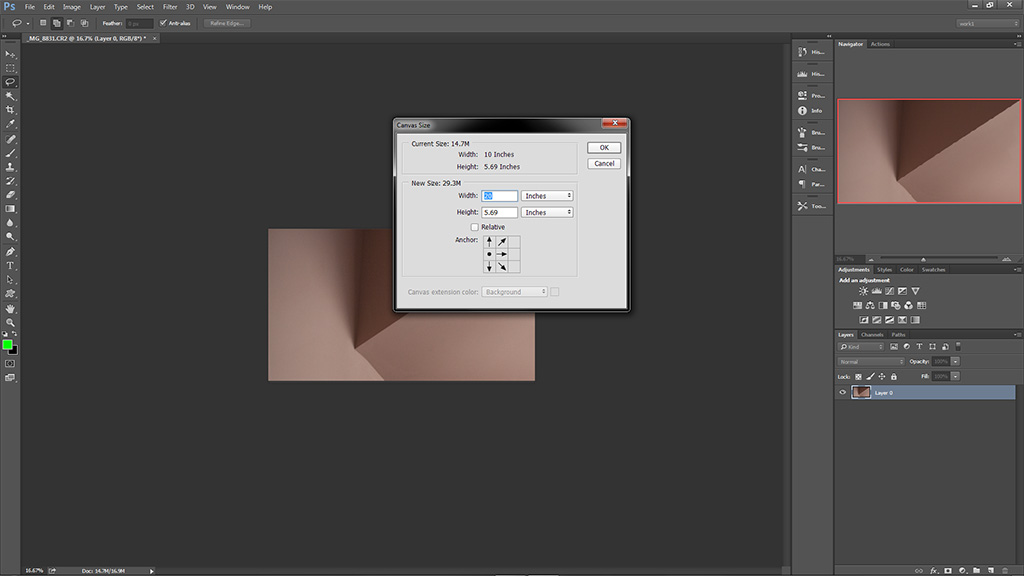
The next steps (see the next 3 screenshots below) will re-size the image to make it simpler to change the size of the canvas for the ‘flipping’ part. Depending on how you choose to flip the image (horizontally or vertically) choose the appropriate length and change it to a nice even number ( I use inches to make it simple) In this case I am going to flip horizontally, so I changed the image size to an even 10 inches across (it was 9.83…makes the math easier.) Having resized it, I then use the ‘canvas size’ option to set the canvas to 20 inches across, making sure to set the image to one side in the ‘anchor’ menu. This will create a blank space to one side of your image the same size as the original one. Hope you are keeping up, because I have lost myself already. Time for another shot of tequila. I encourage you to do the same.
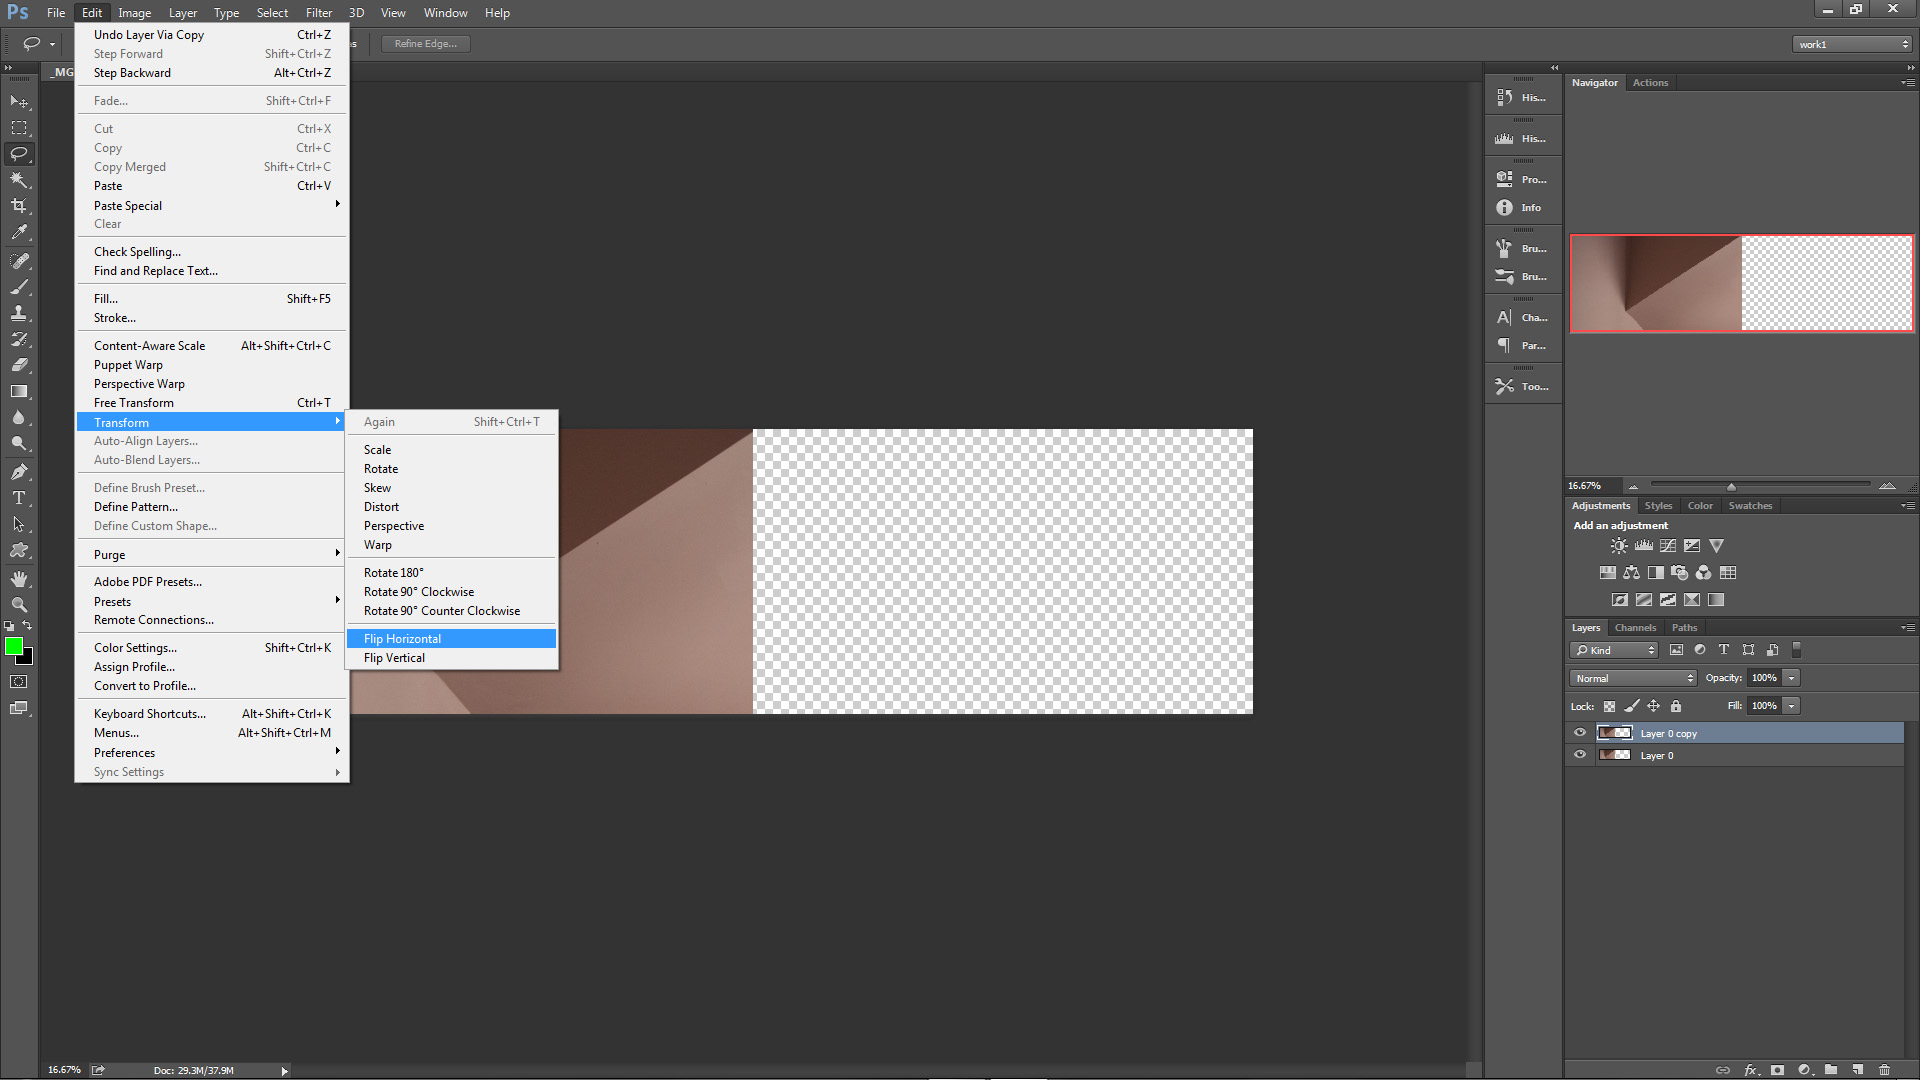
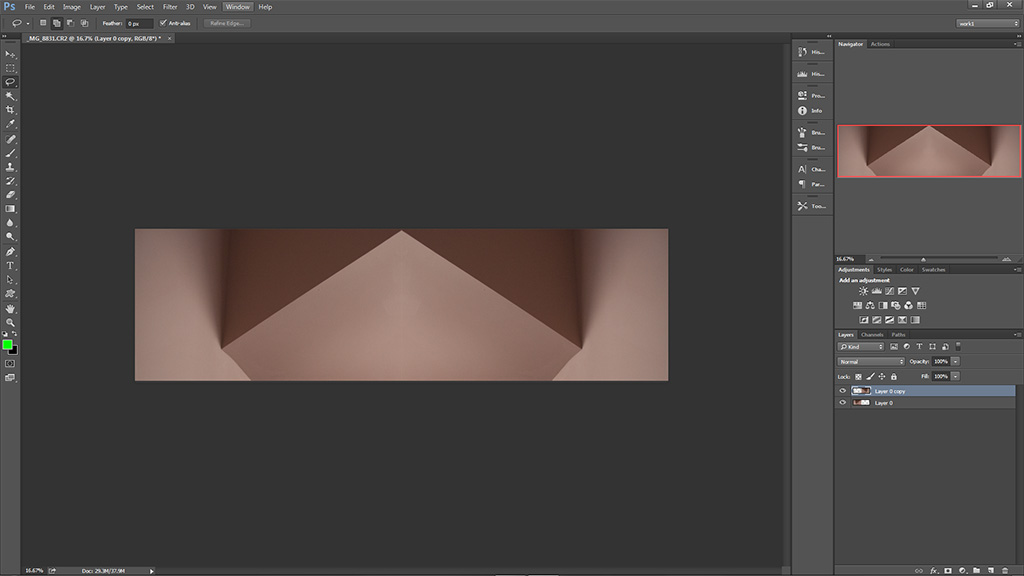
At this point, duplicate the layer and then flip it horizontally (or vertically, if you chose to flip it in that direction) using the image > transform menu. Drag the duplicated layer while holding the shift key (No I don’t know what the Mac equivalent is. Macs are evil.) [editor note: it is still the shift key] This will keep the layer straight as you drag it. After I did these steps on this particular image, this is what I got:
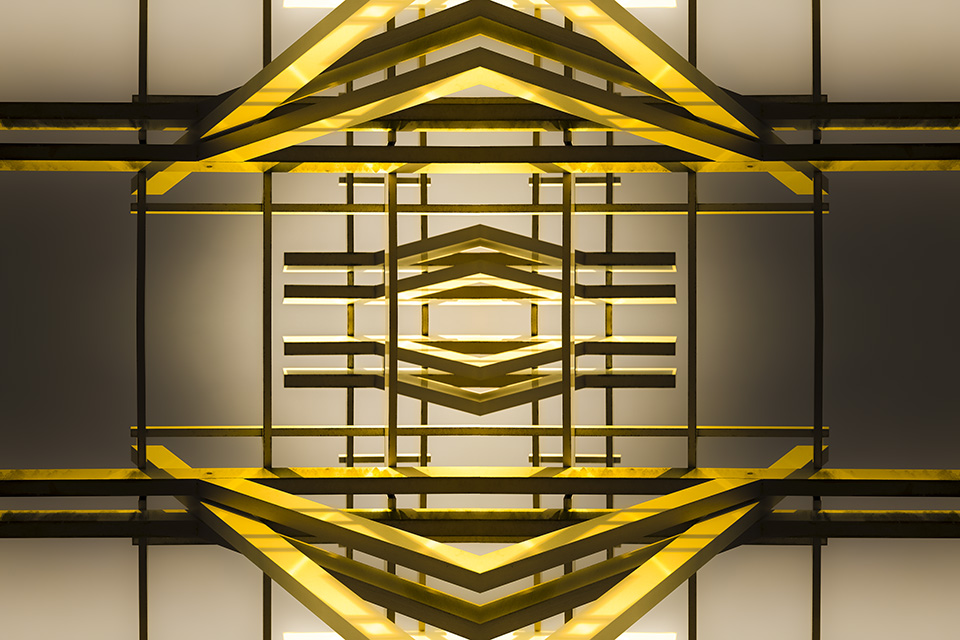
It already started to look kinda cool to me. But we can keep going! How about we repeat the entire process, this time using the newly created image and flipping it vertically? MADNESS, YOU SAY! WE MUST NOT DISTURB THE DELICATE BALANCE WE HAVE CREATED HERE!!! Well, let’s just see where this crazy train takes us. Another tequila shot…here we go!
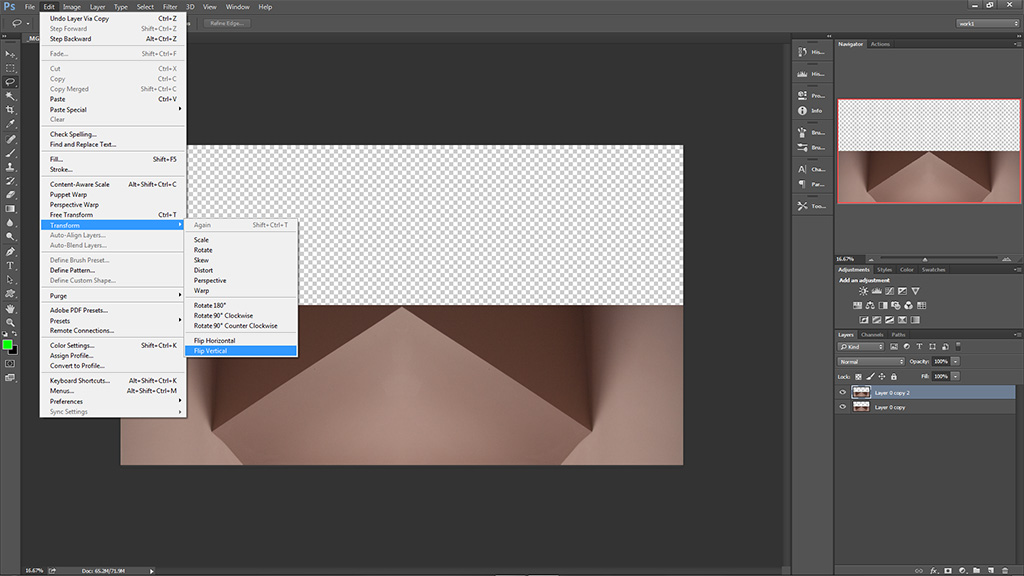
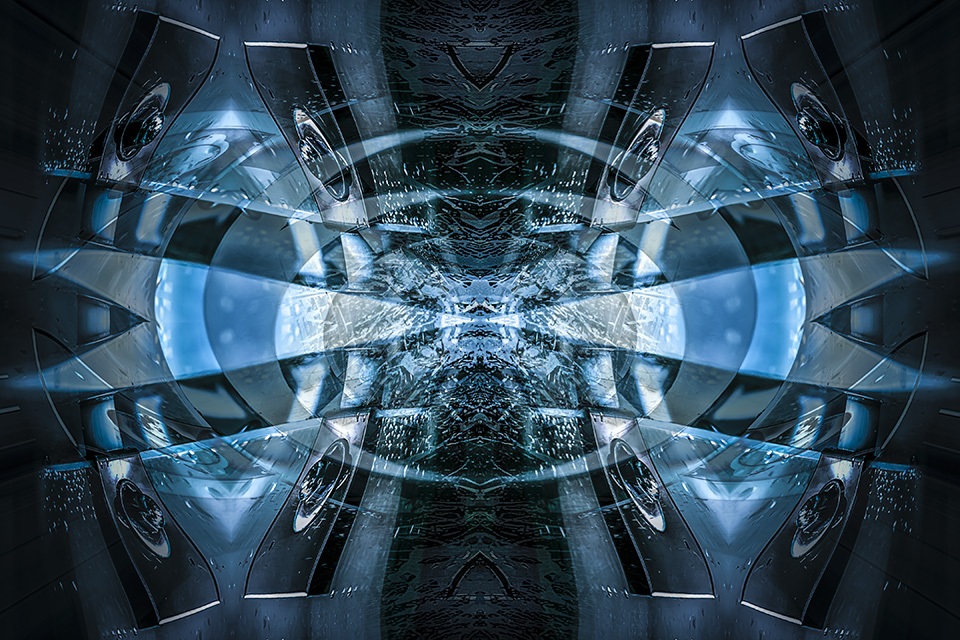
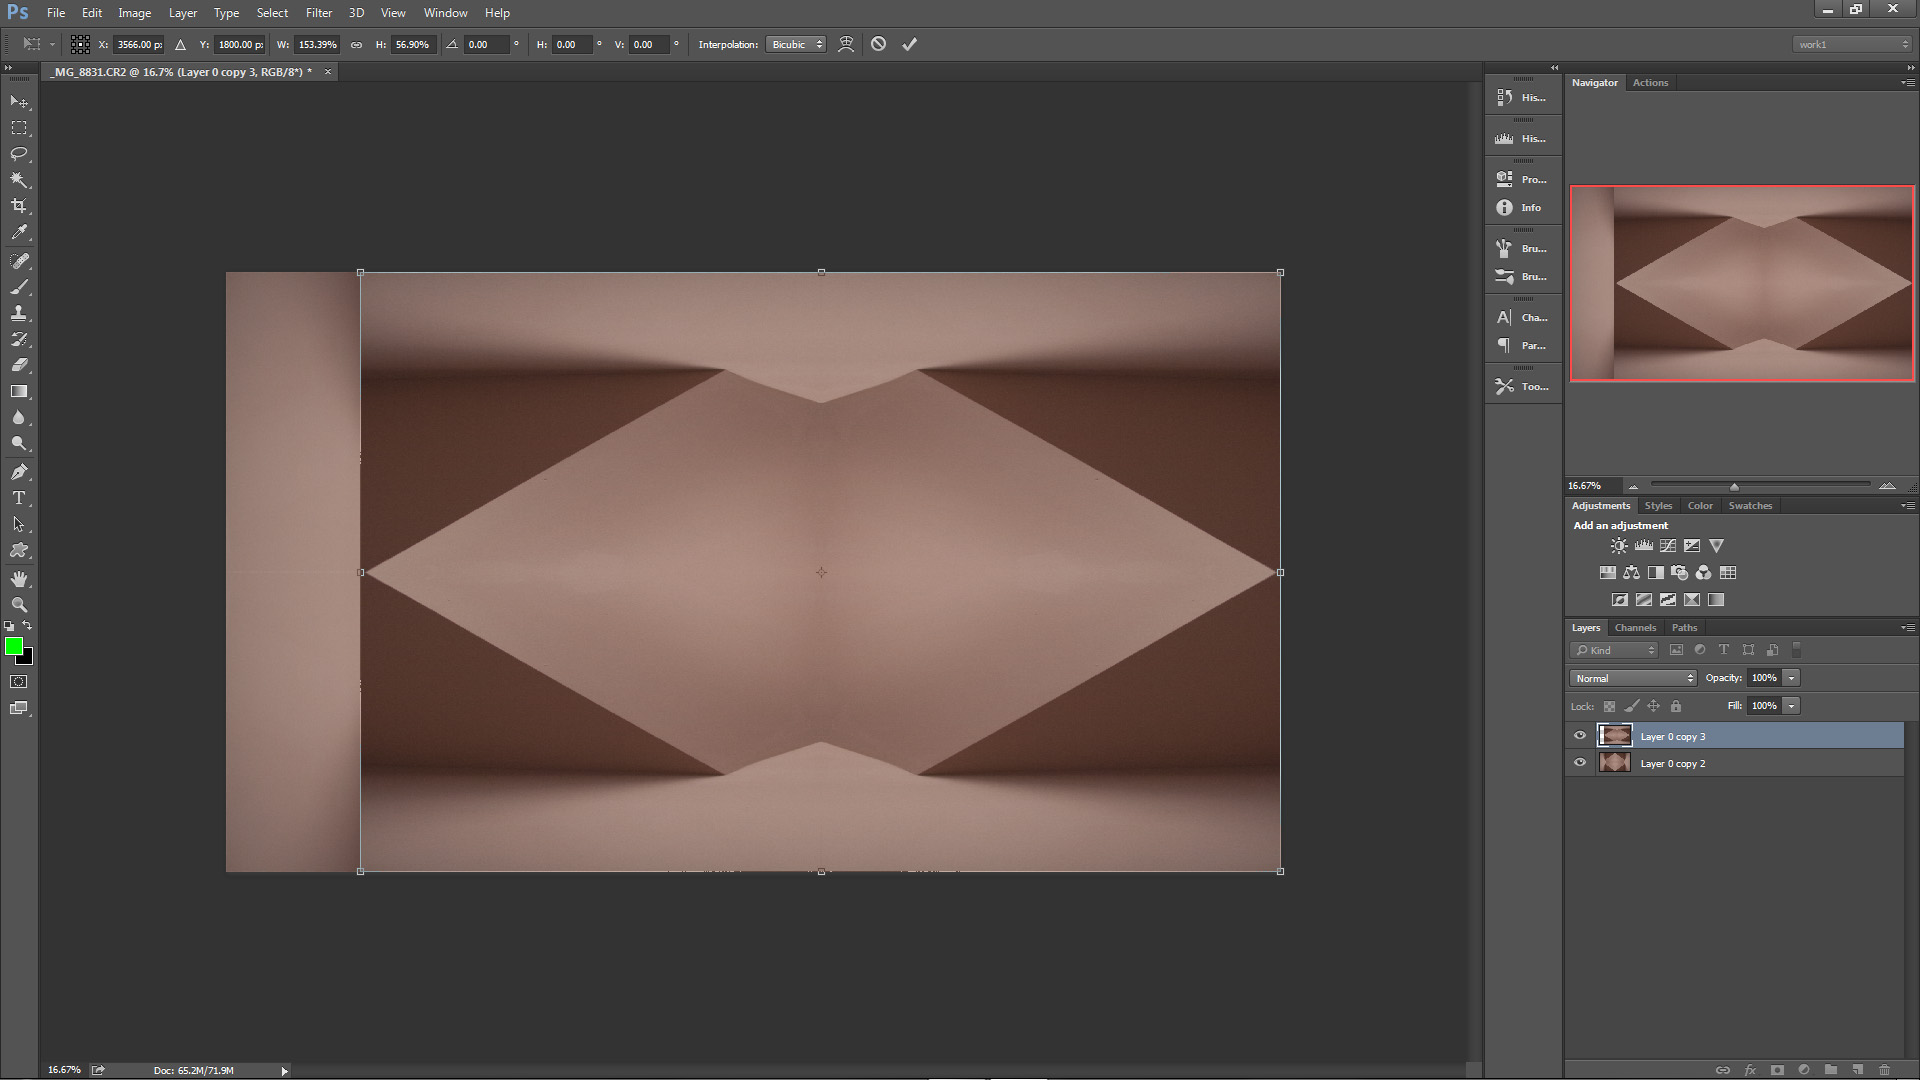
So I flipped it the same way but this time vertically. THEN–wait for it–DUPLICATED AND ROTATED IT! OMG! Image rotation! Below is a screenshot. You must be loving these by now, so official looking and chock full of information. I ‘squished’ the new layer to fit inside the boundaries of the image.
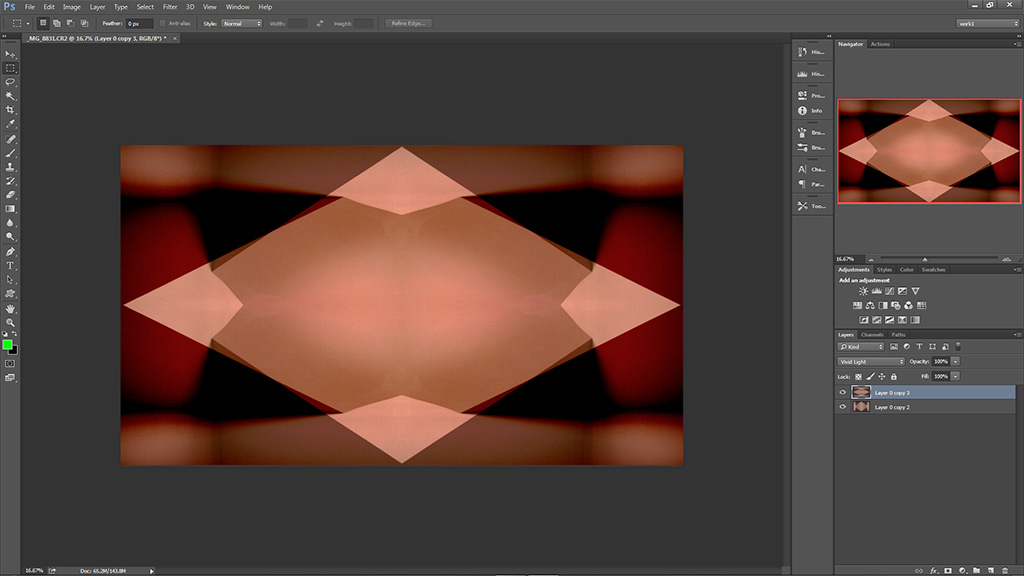
Now, for those of you still awake, experiment with blend modes! I simply play around with various modes until I get something that catches my eye. In this case, it was “vivid Light” mode. See the magical screenshot below!
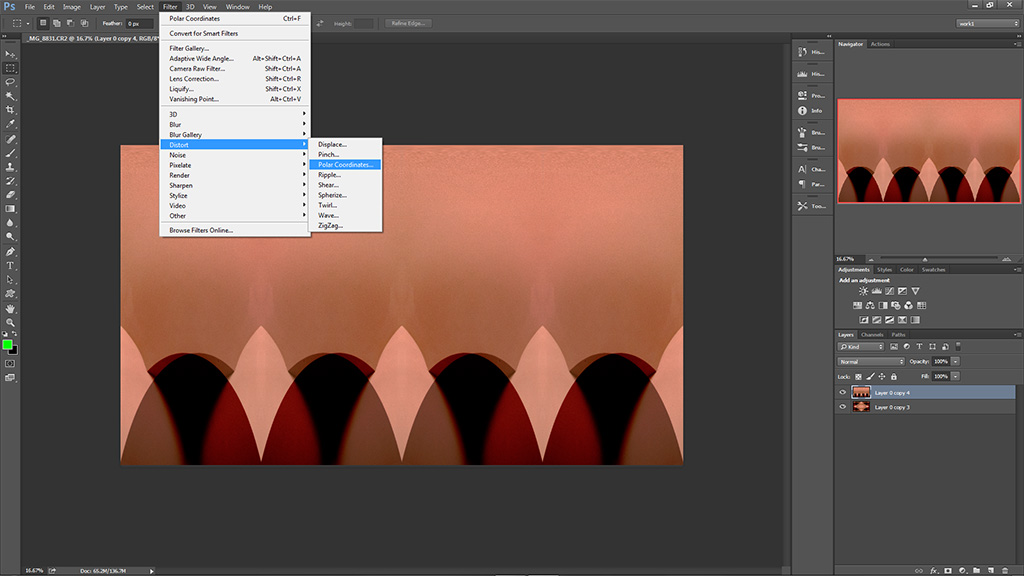
The last part utilizes a super secret weapon. Umm, well I guess it’s not so secret anymore. In fact, it was never really secret to begin with. It’s called the polar coordinates filter! That’s right! Now you too can partake in the wonderful world of psychedelic transformation by simply pressing a few buttons! It’s found under the filter>distort menu in PS. Most of the time, polar to rectangular works best, but sometimes the opposite is true. Experiment! Below is a screenshot of what can happen when you play around with it.
Some Other Creations
Below are some other abstracts I have created using the techniques discussed above. Remember to experiment as much as possible. This is also a great technique to create unexpected works of art from some of those old, ‘boring’ shots you may have laying around on your hard drive. Stuck inside on a rainy day? Photograph something mundane and challenge yourself to create something from nothing 🙂 Now, where’s that tequila bottle?