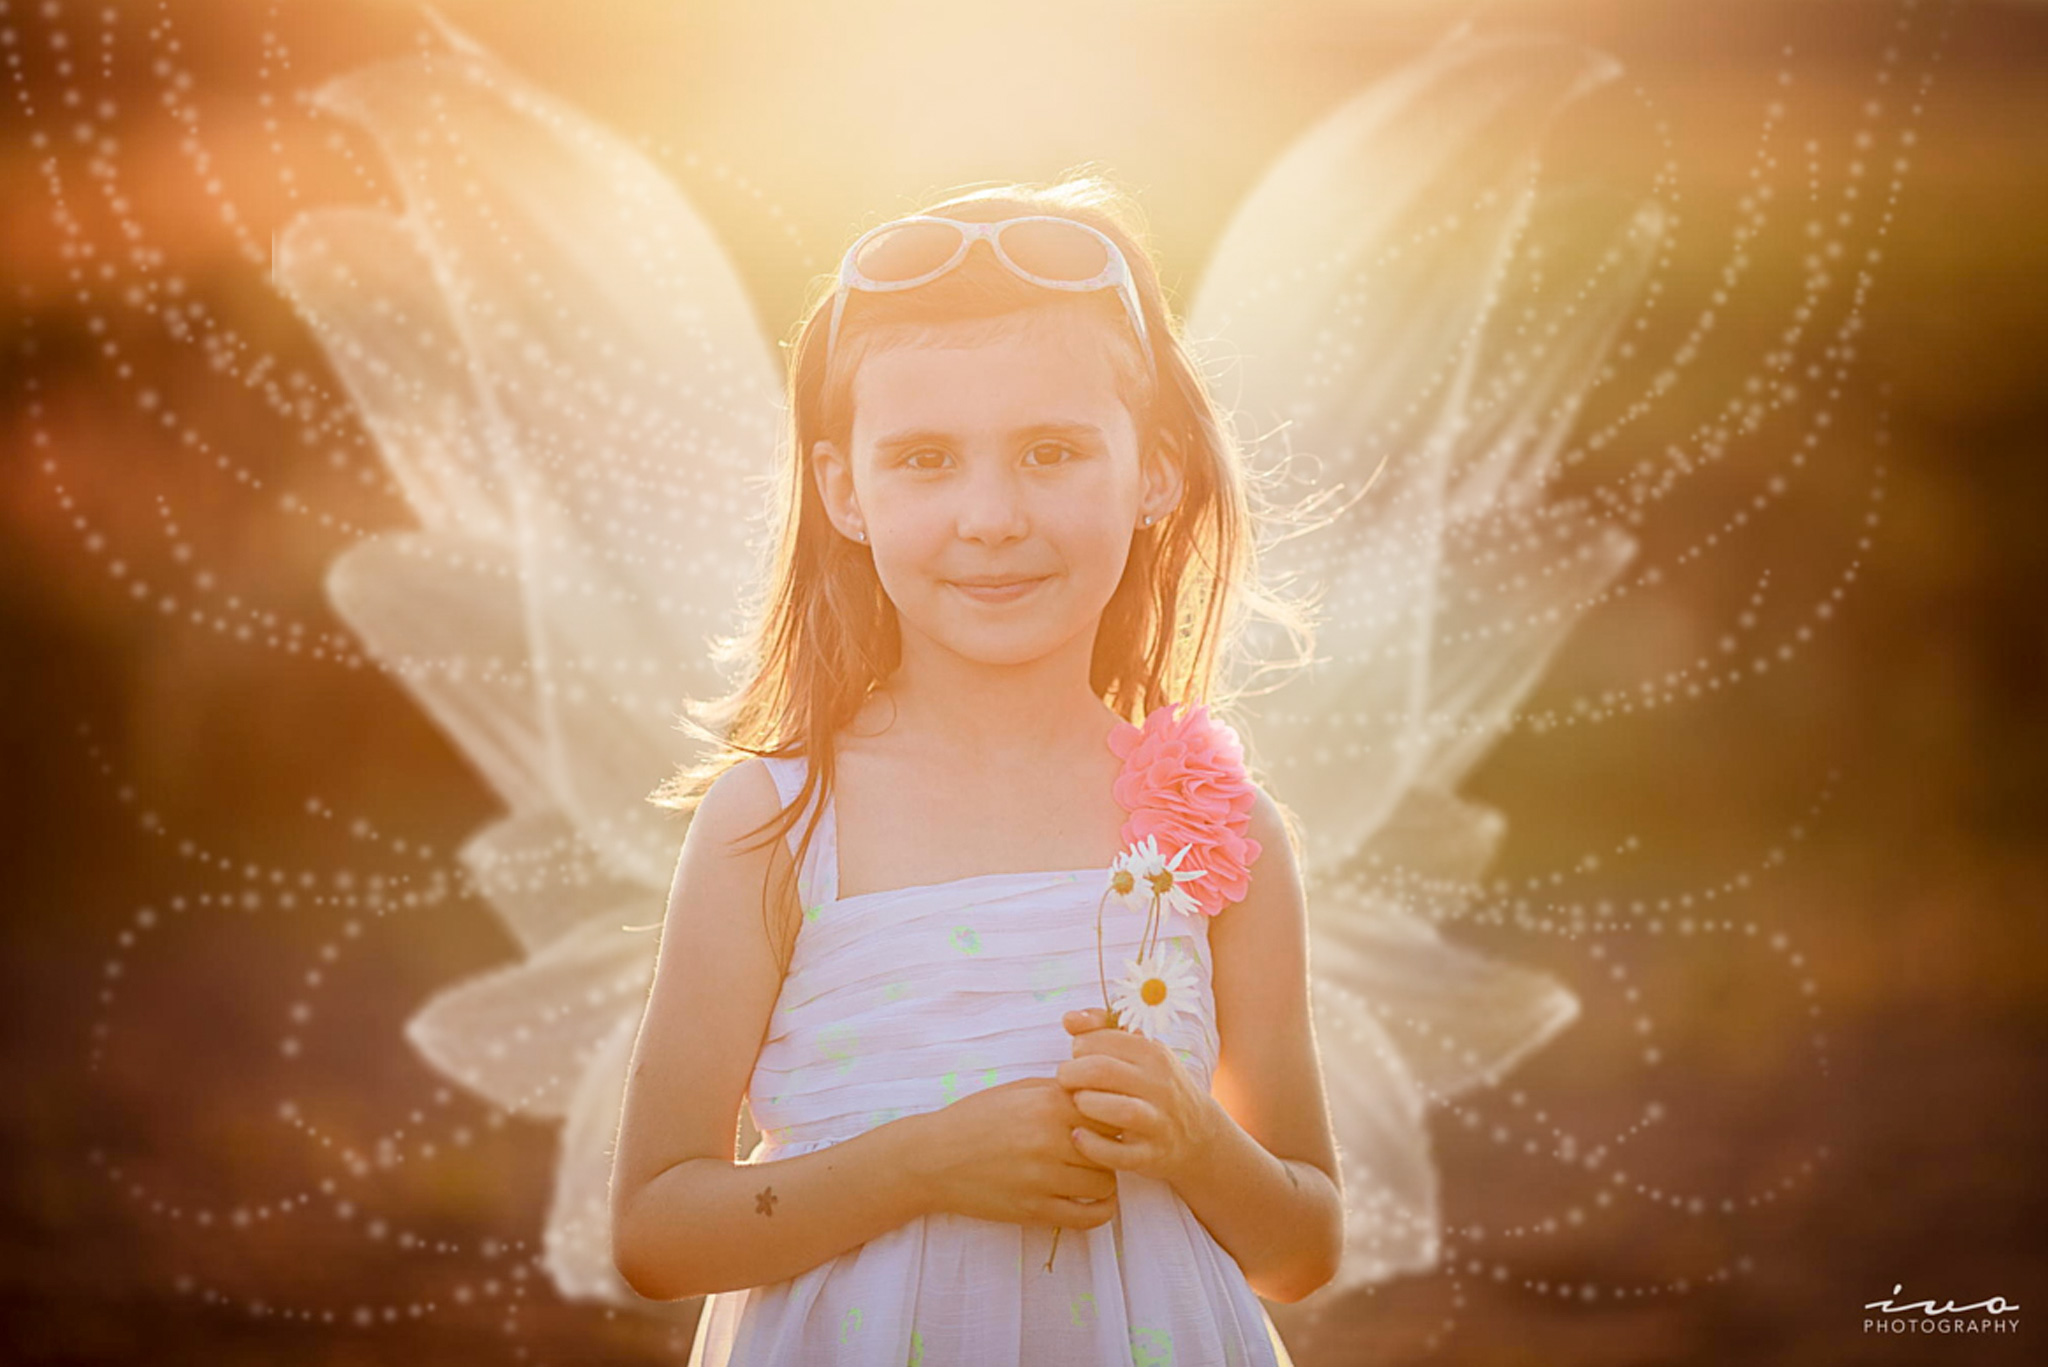

As the father of 3 beautiful kids I can tell you that kids LOVE a good story. My daughter Olivia is absolutely wild about fairies, princesses and all things magical. She often runs around dressed in her favorite Tinker Bell fairy dress with tiny little wings attached to the back, proudly showing it off to anyone and everyone willing to engage in a game of magical creatures and dance. So one day I thought, wouldn’t it be great to capture a golden hour portrait of her and paint on her some cute fairy wings using Photoshop? I had seen it done before online and set about making it happen.
Imagine the delight and joy on her little face when I showed her the finished photo and printed it out for her! So if you are parent who would like to do something similar for one of your kids or perhaps you are a photographer who wants to try something new when shooting family portraits with kids, then have a look at this short video tutorial. I hope that you find it helpful. The tutorial covers a simple technique on using brushes and layer masking to add a fairy wings effect to an existing photo.
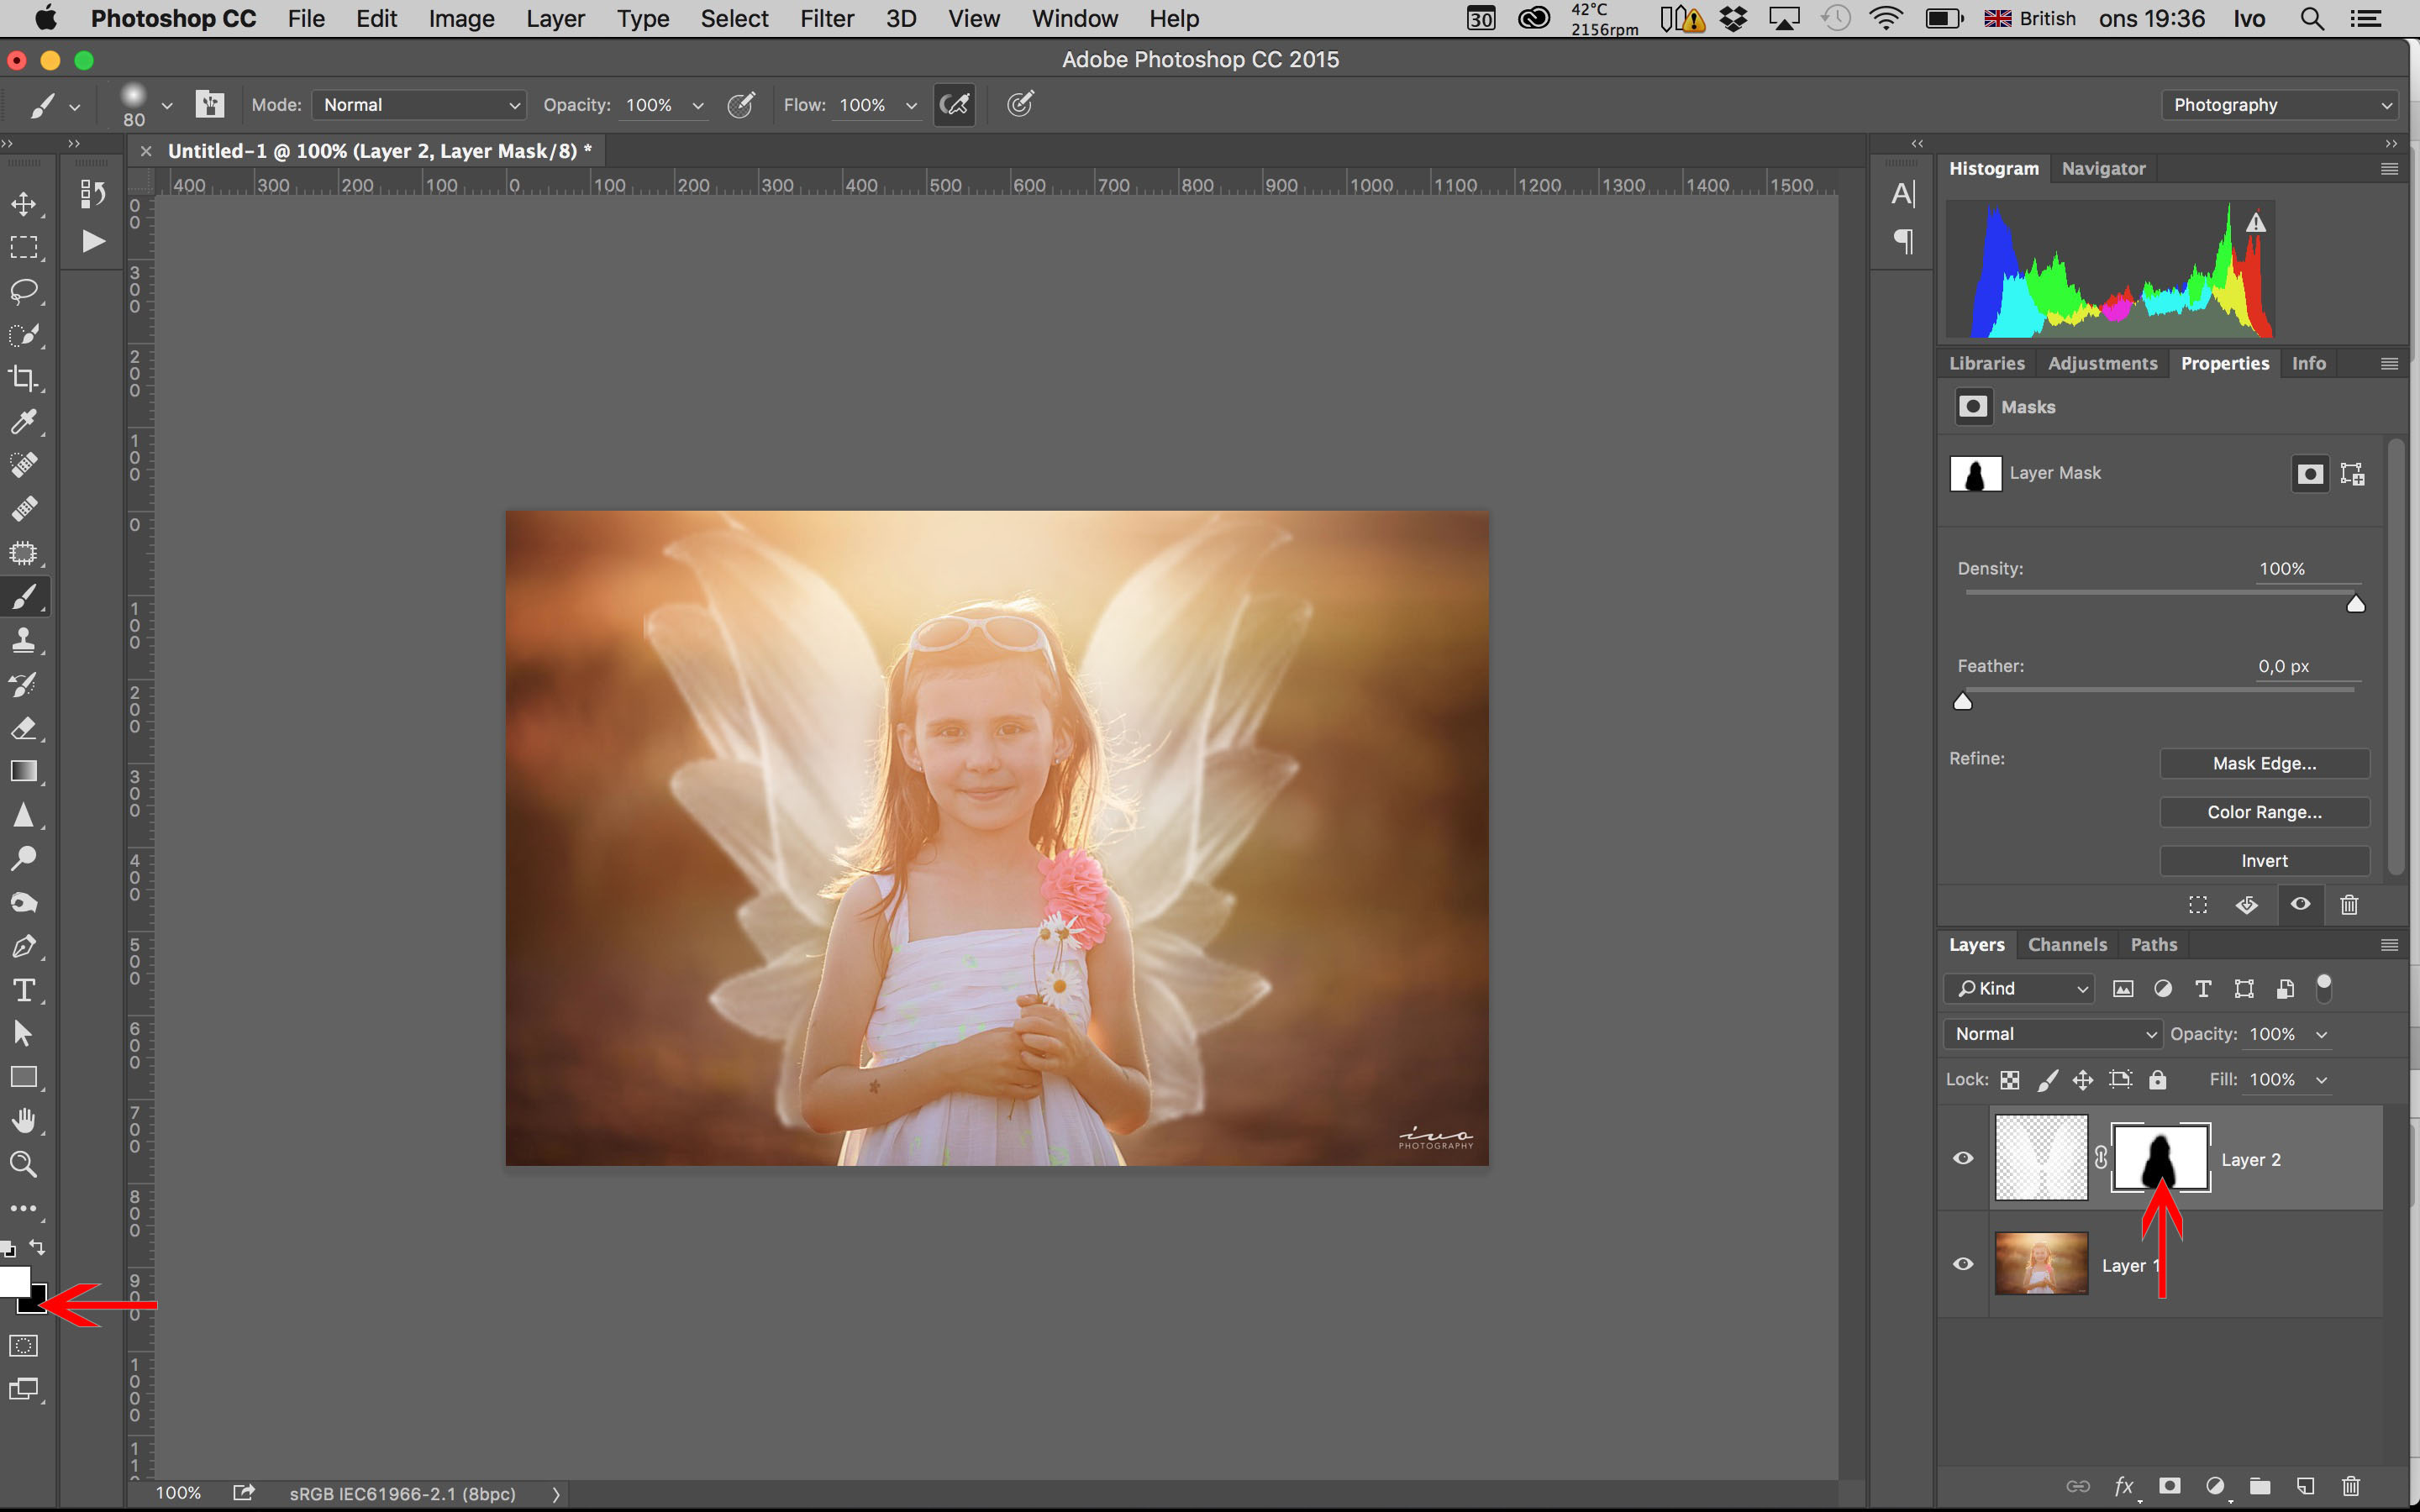
Step 1 – open image and create new layer
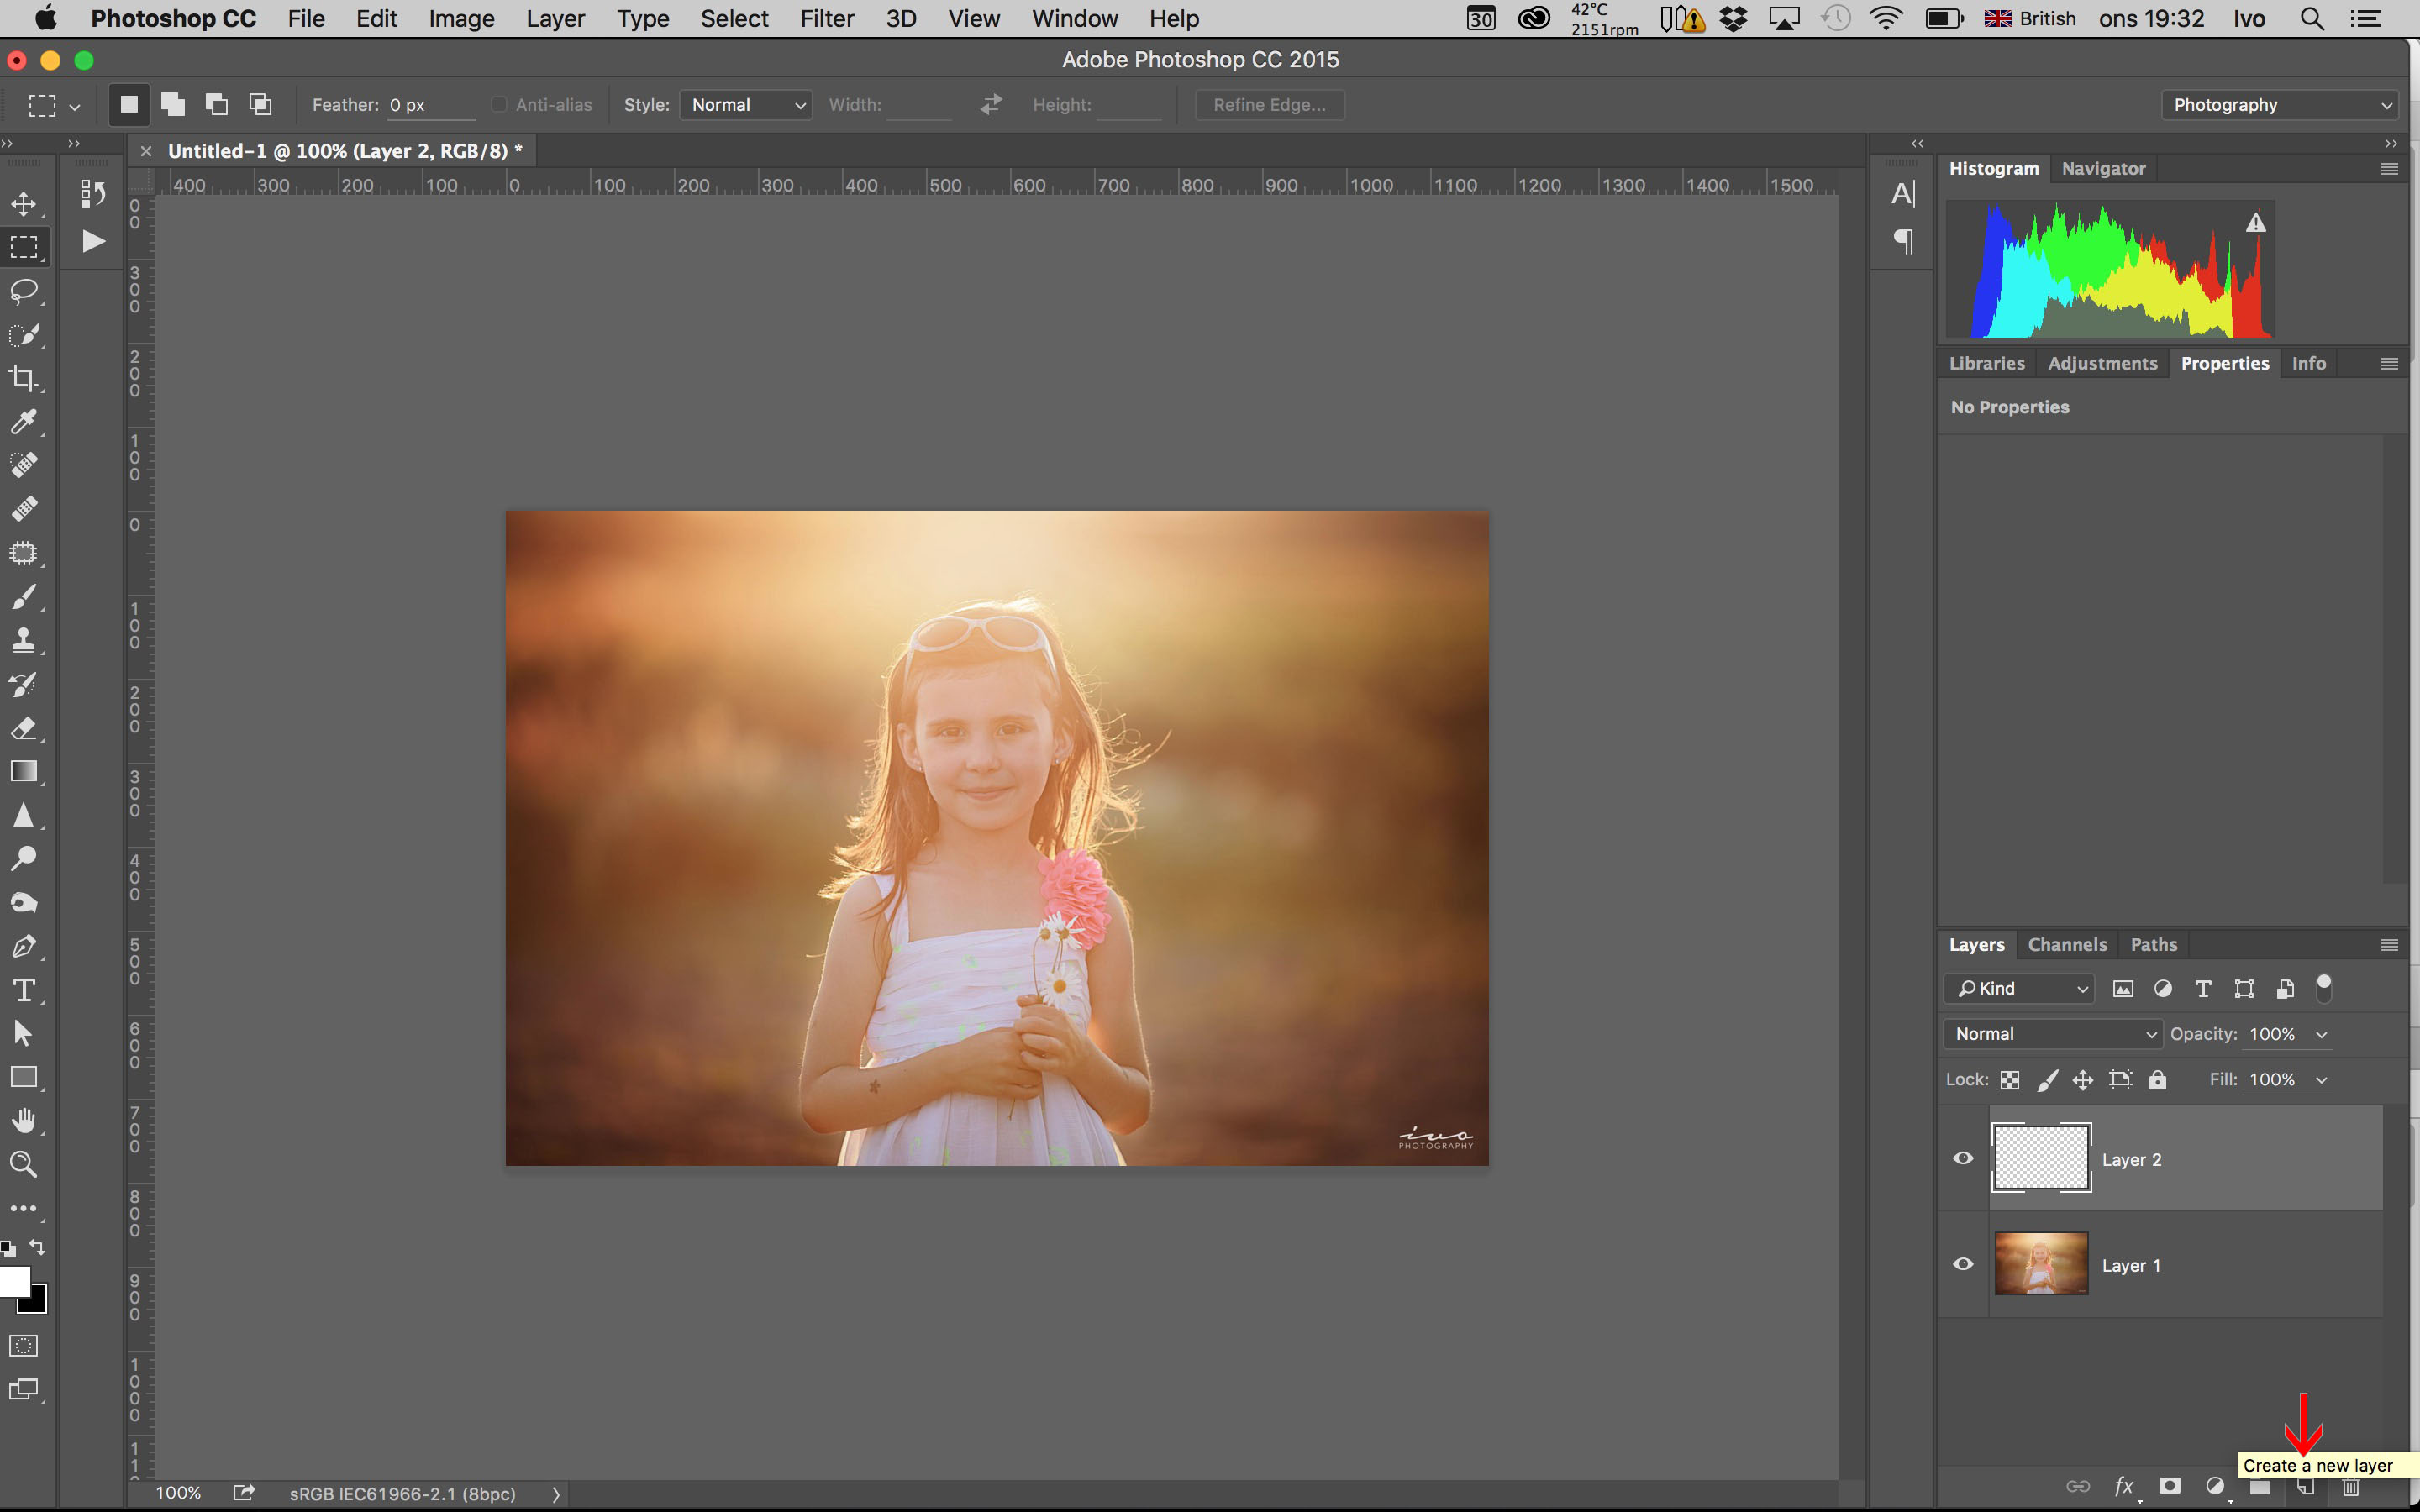
Open the image you wish to use in Photoshop. Tip: images with simple background work best.
Click the “Create a new layer” button in the bottom right of Photoshop (see red arrow)
Step 2 – choose the right brush
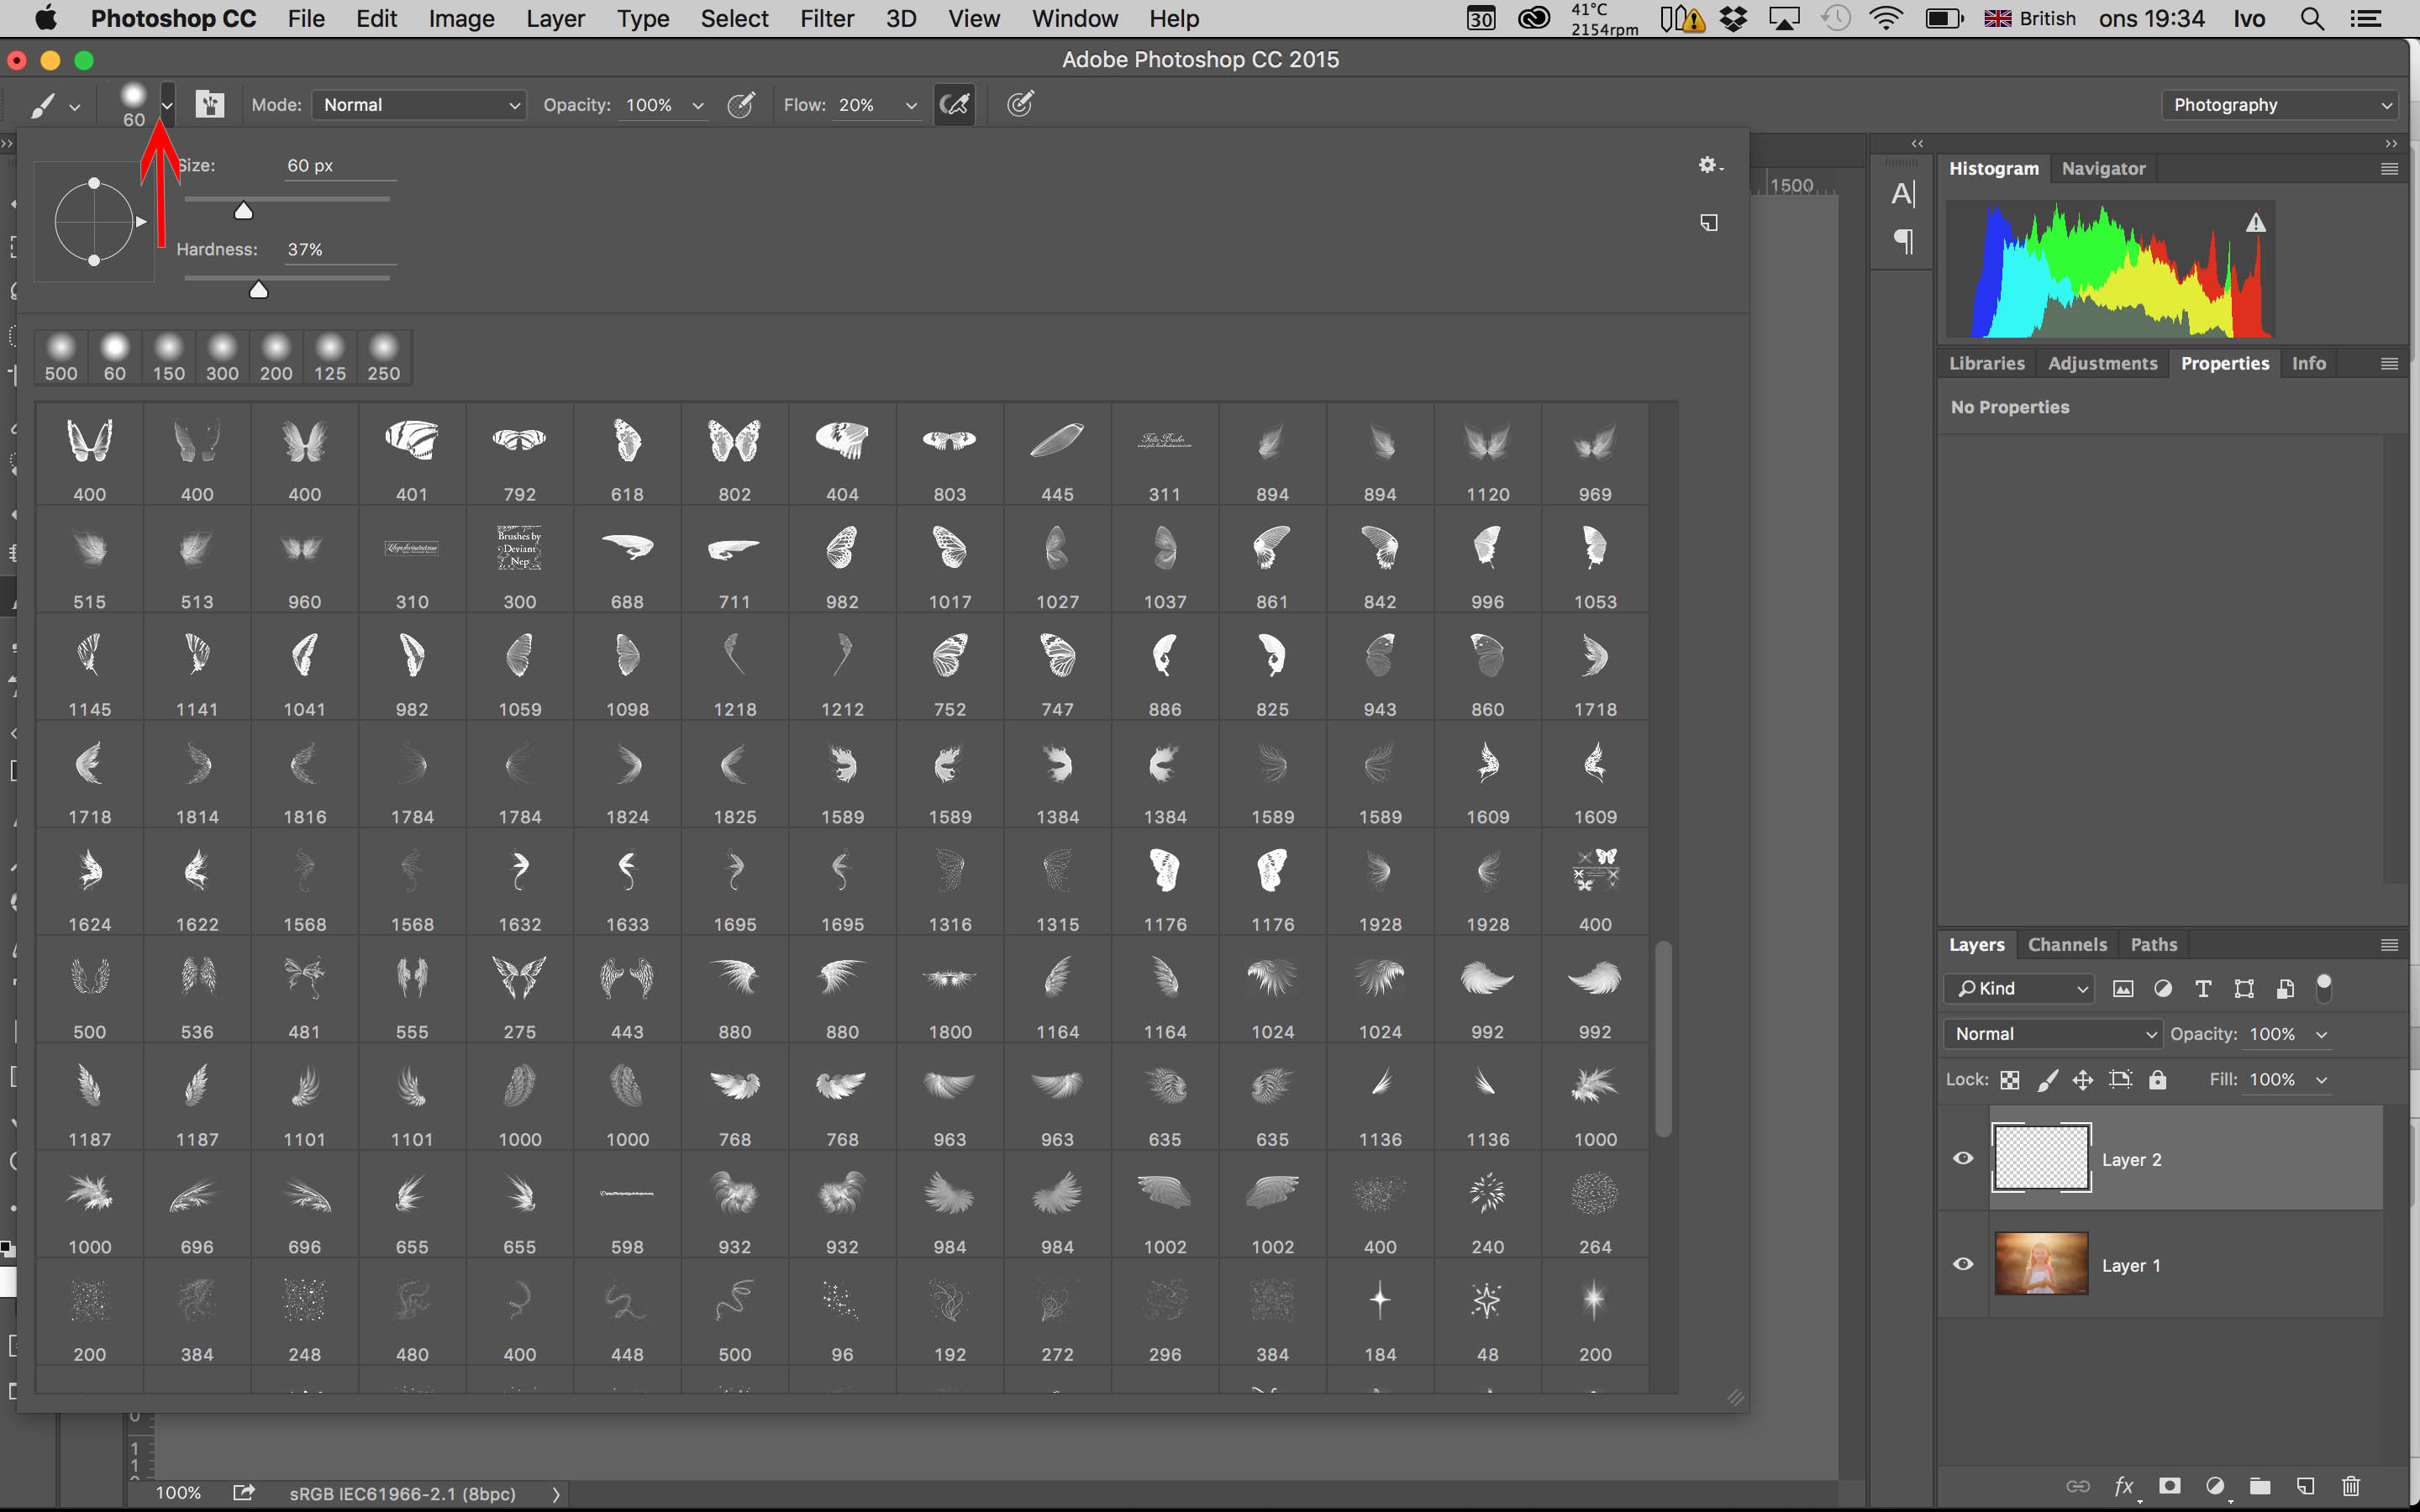 Press (B) on your keyboard to select the brush tool. Then press on the brush selection drop down menu at the top right (see red arrow) and choose the fairy brush wings which you wish to use.
Step 3 – paint the wings
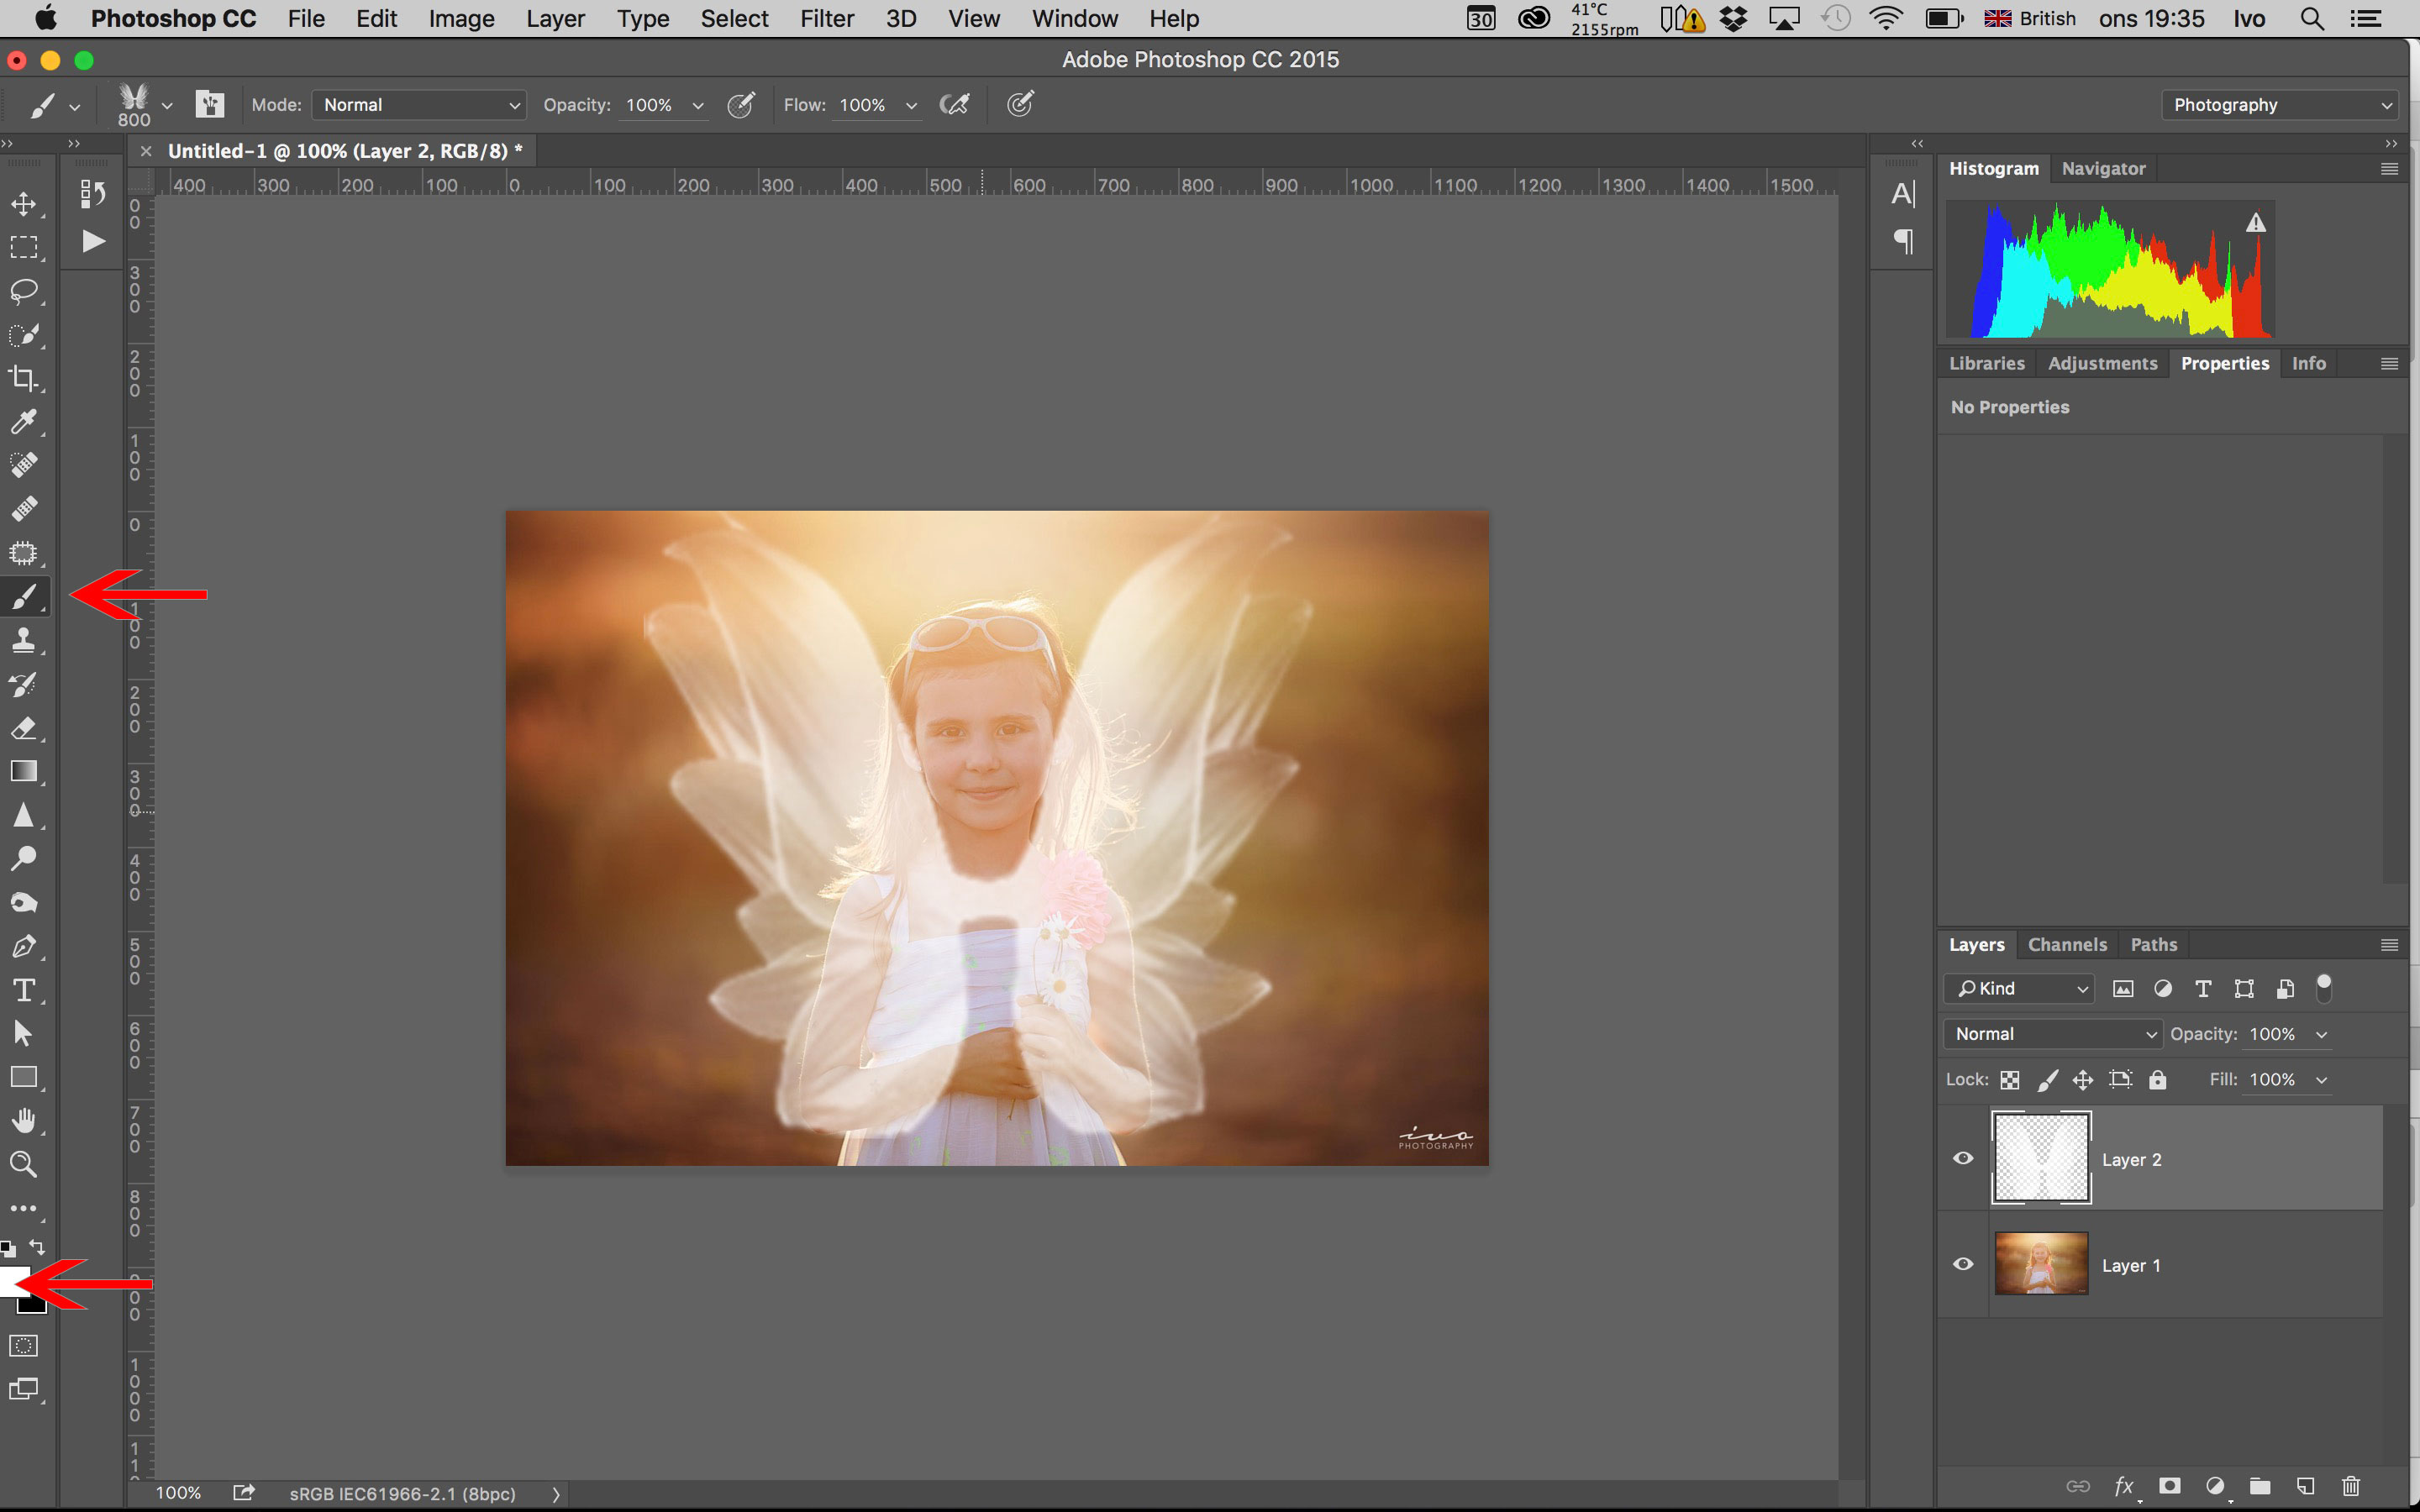
With the fairy wings brush selected, adjust the size of the brush by using ([) bracket keys (]) of your keyboard to suit the size of your canvas, then using a white mask at 100% opacity you paint the fairy wings on to Layer 2. Press (V) to move and position the wings so they sit symmetrically over the person. Press Cmd + T (on Apple) or Ctrl + T on (PC) to resize the wings if needed.
Step 4 – adding a layer mask
Chose a soft round brush at 100% opacity, select black color mask, click the layer mask to the right of Layer 2 and using the brush mask directly over the subject to remove and mask off the wings from the person’s face, arms and body. Remember that when you mask, black hides things and white reveals them. The beauty of using masking as opposed to the eraser tool is that this method is non destructive and can be reversed at any time.
Step 5 – add layer glow
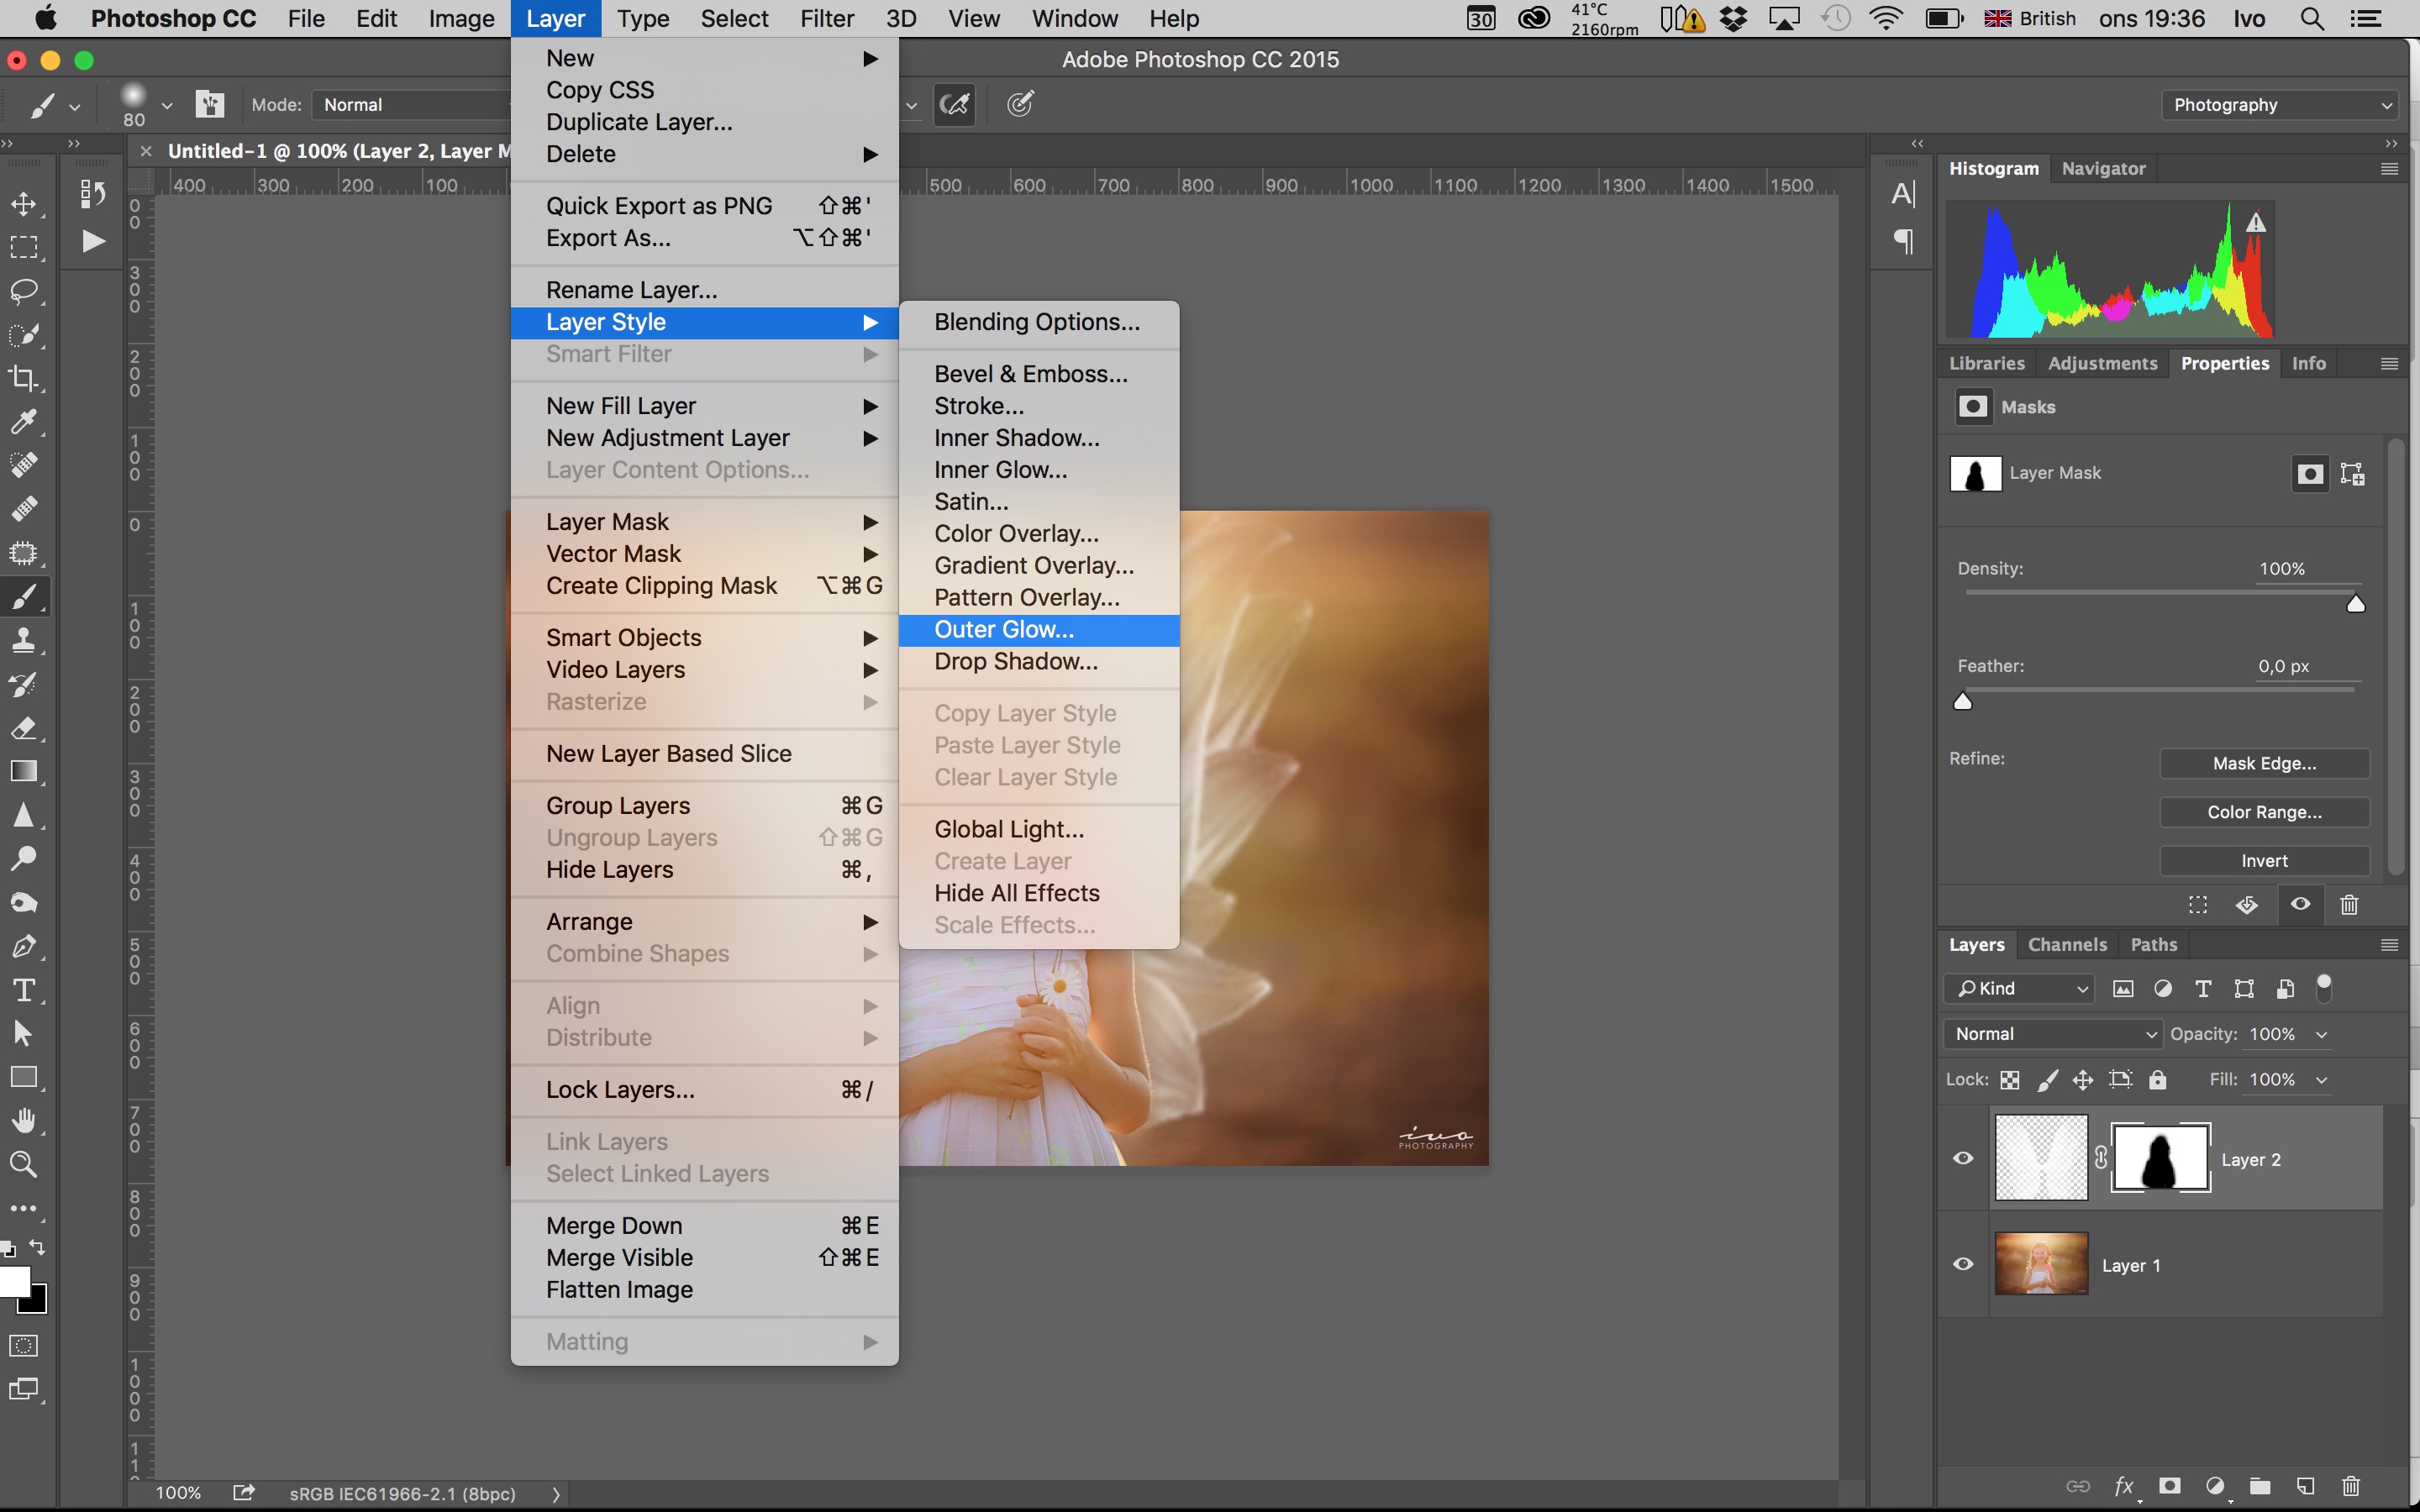
For some added whimsical effect you can go to the top menus and click on
Layer -> Layer Style -> Outer Glow
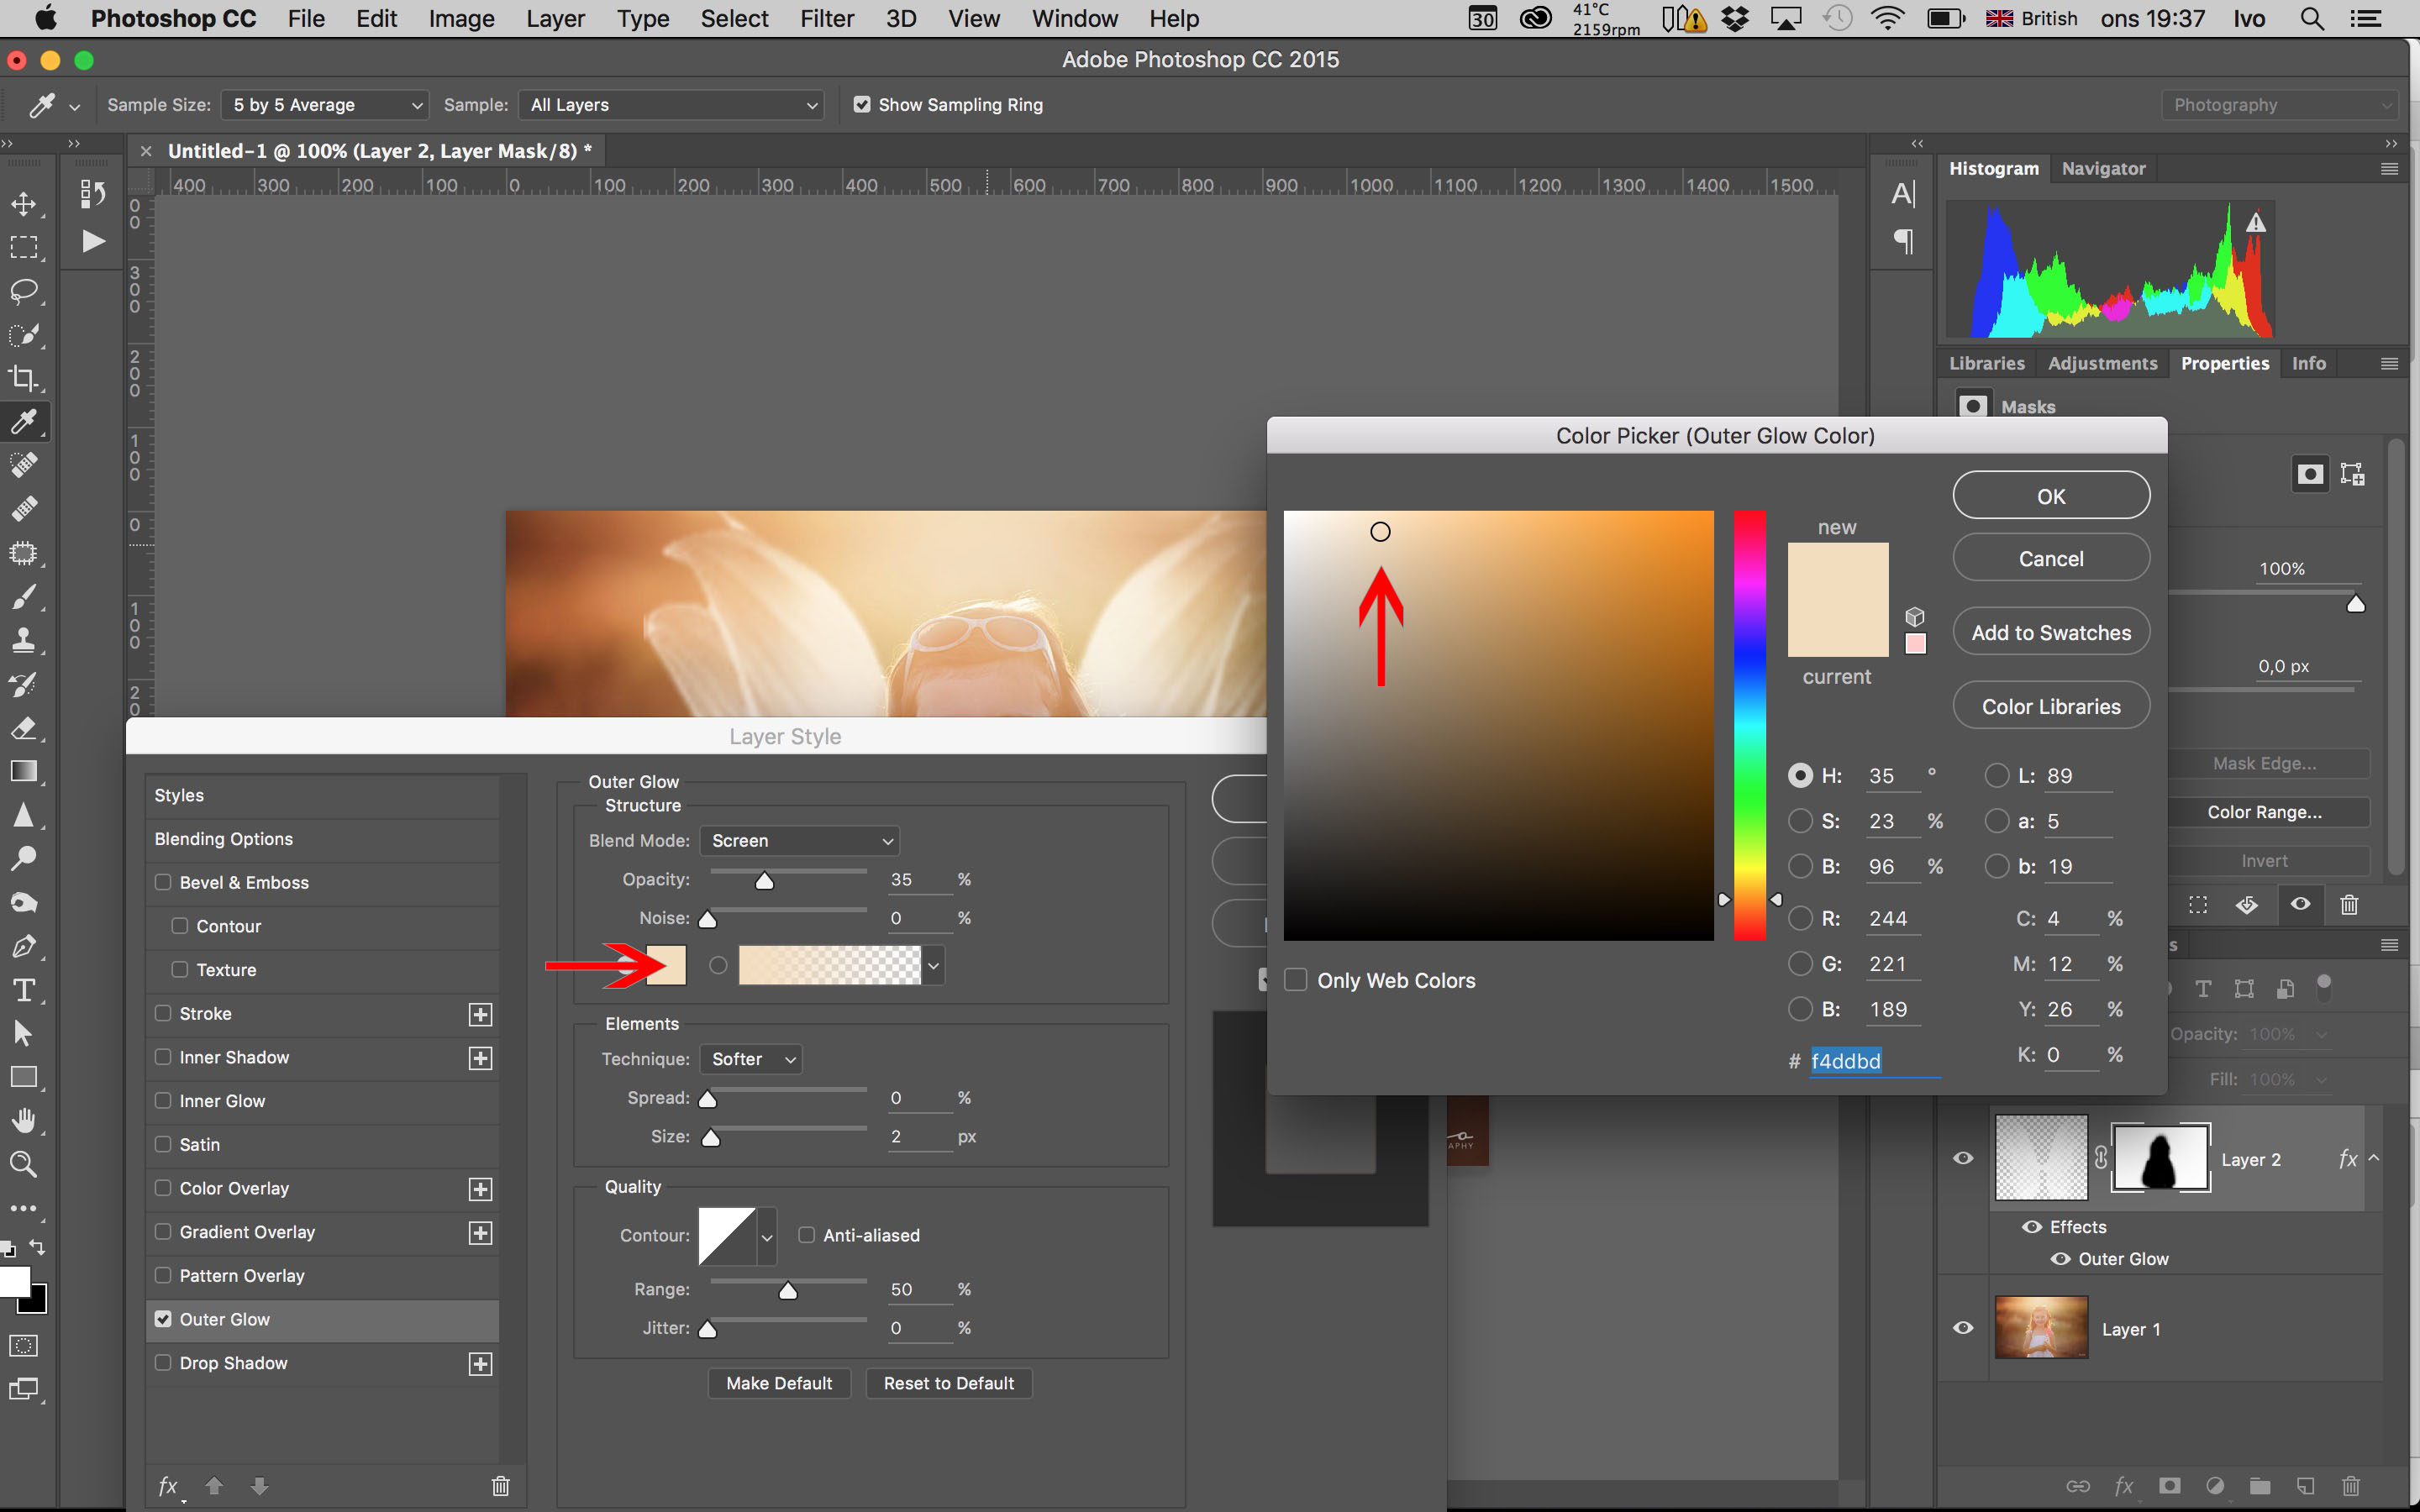
Using the eye dropper tools choose a soft light color for the glow effect. Using a color already present in the image helps you blend things better.
Step 6 – add more
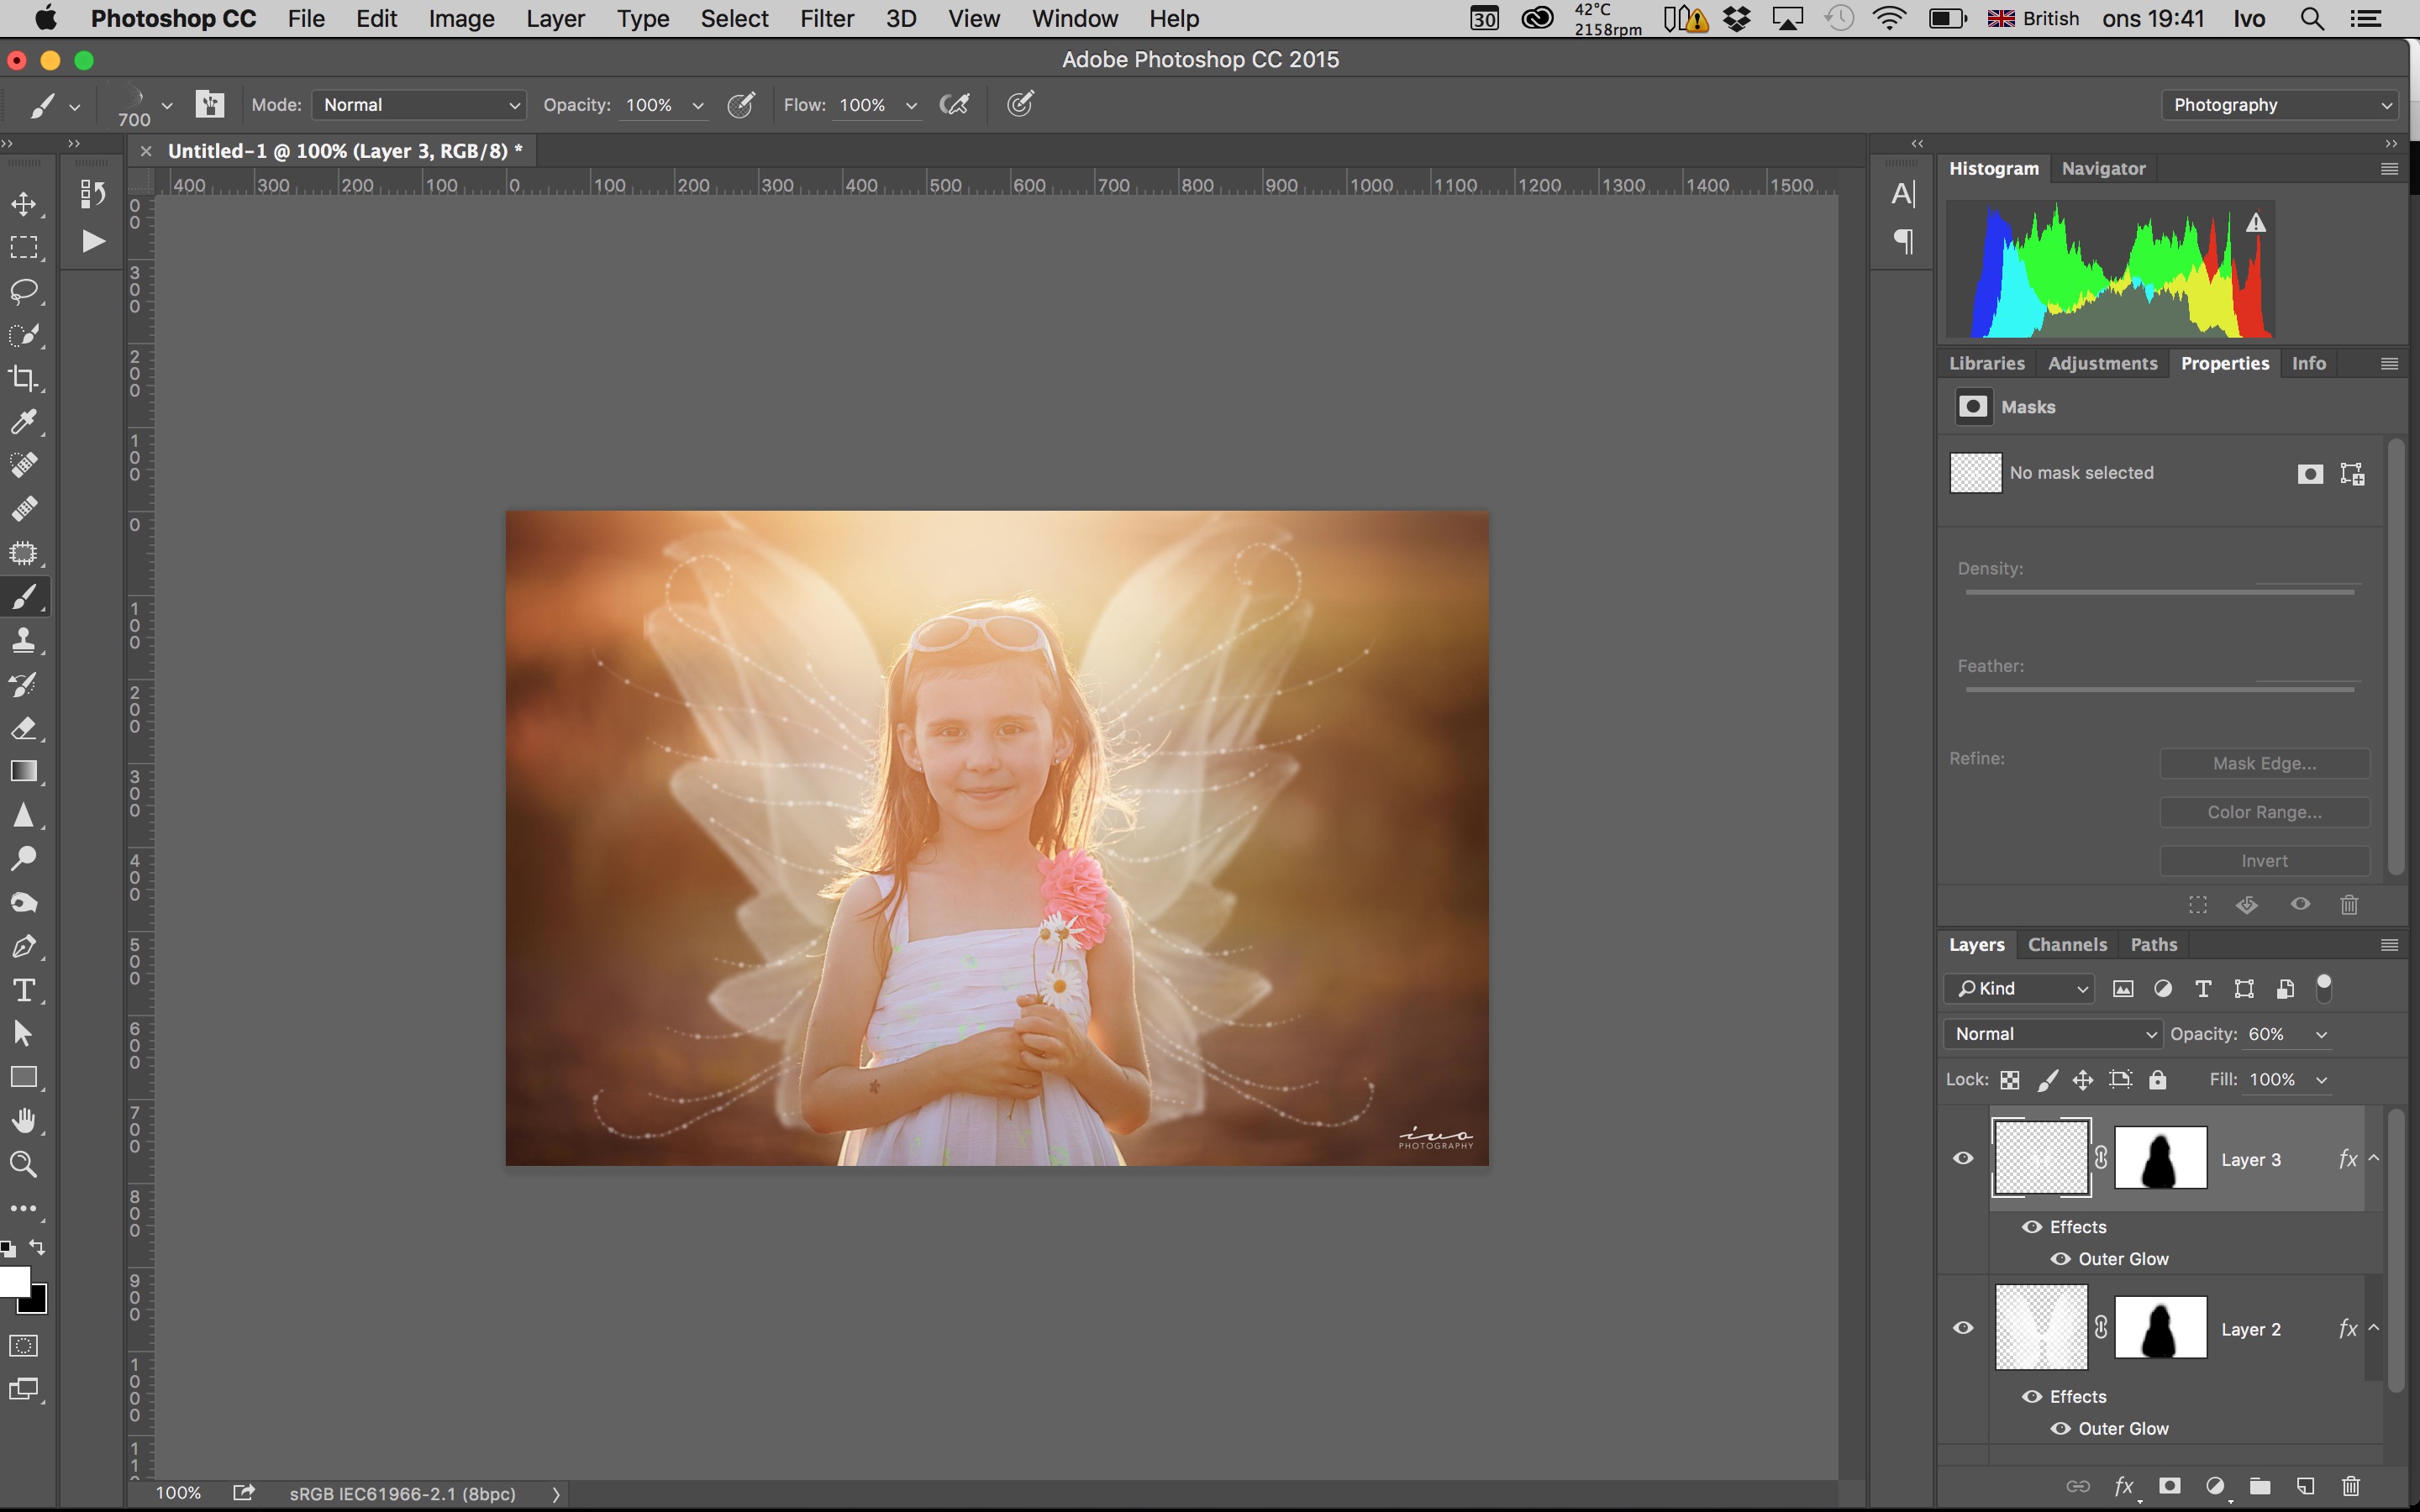
Repeating the same methods outlined in steps 2-5 you can create even more layers of additional wings, glitter or other magical fairy effects to complete your image.
Finally
Save and export your finished masterpiece as a high resolution JPEG for printing or uploading to social media. Remember that for best results on Facebook you need to Save for Web as 100% quality JPEG with the sRGB color space selected and exported at 2048px on the longest edge of the image.
The fairy_wings_brushes were created by Obsidian Dawn (www.obsidiandawn.com) and are available as a free download from a great creative resources website called Deviant Art where many artists post their Photoshop brushes for others to use.
I hope you enjoyed the video and I’m looking forward to seeing the photos you produce using this method.