While most photographic techniques were originally developed using film cameras, High Dynamic Range (HDR) photography is a relatively new technique that is only possible with digital cameras and powerful software. While many people think of HDR as a way to create dramatic and artistic pictures, HDR is primarily a practical way to overcome the limitations of modern digital cameras. https://www.youtube.com/watch?v=x7IE6cnkJ_c HDR overcomes several photographic challenges:
- Blown-out skies. Normally, you can only get outdoor pictures with nicely exposed skies during the golden hours. HDR gives you perfectly exposed skies in any conditions. You can even turn a boring, overcast sky into dramatic storm clouds.
- High contrast. Your eyes (and brain) are great at adjusting to contrasty lighting. If you look out a window on a sunny day, you can easily see both your indoor surroundings and the outside world, even when the outside world is more than 100 times brighter. With a single photo, you could only see one or the other—if an indoor photo included a window, the window would be blown-out. With HDR, you can capture both in separate photos and process them into a single picture.
- Noisy shadows. Even with a professional camera at ISO 100, shadow areas show a great deal of noise. HDR exposes shadow areas as highlights in your camera, and then adjusts them in post-processing to look like shadows again—but without the noise.
HDR also provides an artistic opportunity. HDR tone-mapping accentuates the contrast in a picture, allowing you to create striking and dramatic interpretations of the original scene. Tone-mapping is a feature of HDR software that adjusts the bright and dark areas of one or more pictures to either show a greater dynamic range in a single image or to accentuate the differences between shadows and highlights. https://www.youtube.com/watch?v=MfvwqcmM6FQ
HDR Overview
At a high level, the process of creating an HDR picture follows these steps:
- Set your camera to aperture priority.
- Take an autoexposed photo.
- Take an underexposed photo by increasing the shutter speed while keeping the aperture and ISO the same.
- Take an overexposed photo by decreasing the shutter speed while keeping the aperture and ISO the same.
- Copy the photos to your computer.
- Use HDR software to combine the autoexposed, underexposed, and overexposed photos into a single picture.
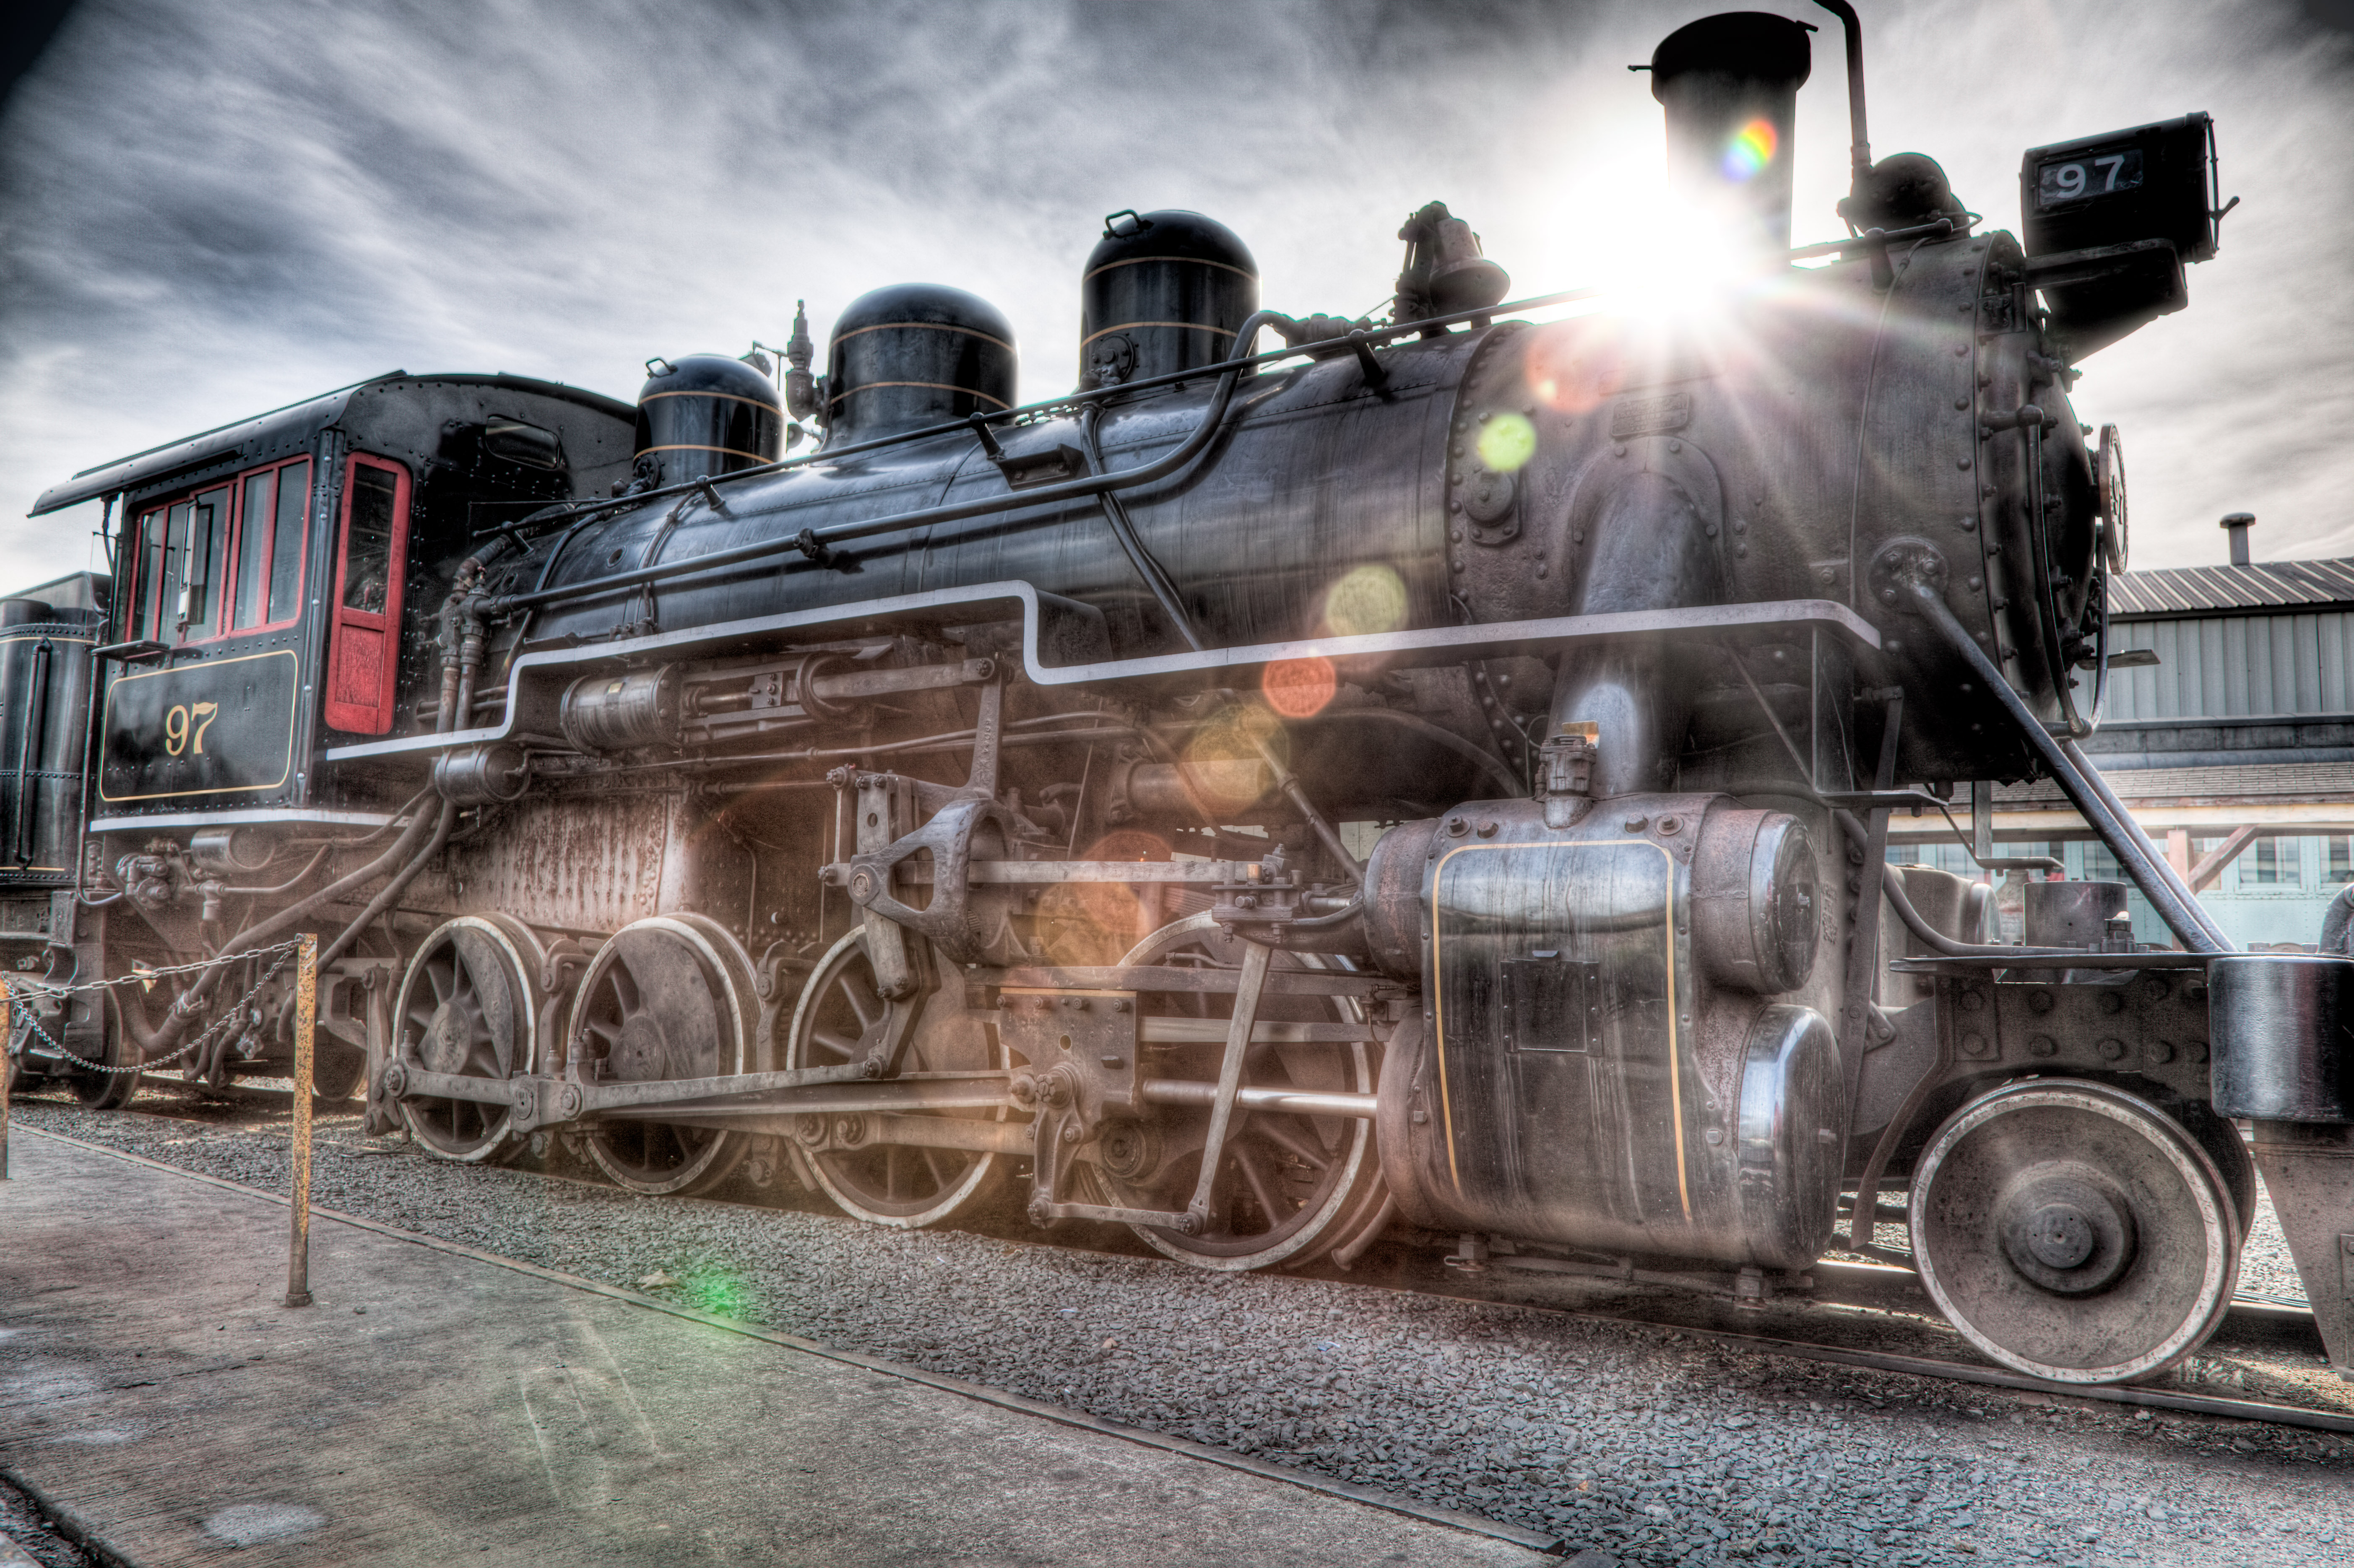
This figure shows a severely backlit steam engine scene that had too much contrast to photograph normally. I took these three photos at different exposures, and then used HDR software, Photomatix Pro, to blend them into two different HDR pictures: one providing a realistic representation of what I saw, and one providing a more artistic rendition (next).