Whether you want to grab snapshots of their kids in the pool or create ethereal underwater portraits, you’ll need to gear to protect your camera. This chapter provides an overview of the different options available for all different budgets. http://www.youtube.com/watch?v=Q92jY_qXDik
Equipment
Your first choice is to either buy a new camera specifically for underwater use (for as low as $10) or to buy an underwater housing for a camera you already own. Either way, your gear should:
- Allow you to grip the camera while swimming.
- Allow you to see the viewfinder and/or the LCD screen.
- Replicate the buttons on your camera so you can focus, zoom, and change settings underwater.
- Keep your camera dry.
- Float when you drop them.
Disposable Film Cameras
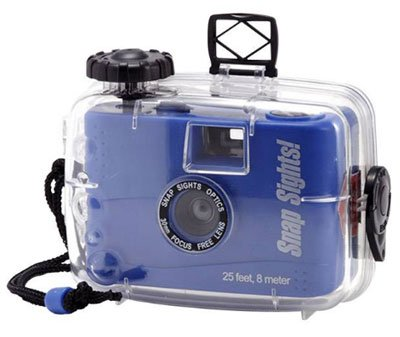 The cheapest way to grab underwater photos is to use a disposable film camera ($7-$20, plus developing costs). It will seem primitive; there’s no LCD display, and you’ll need to wind the film manually between each shot. The camera won’t even have a focusing system. After you take the photos, you’ll have to find a store that still develops film, or send your film to an online service (such as thedarkroom.com). It’s inconvenient, but it’s not a bad idea for a vacation. You don’t have to worry about ruining an expensive camera, and while the quality won’t be great, underwater photos rarely have great quality.
Waterproof Sports Cameras
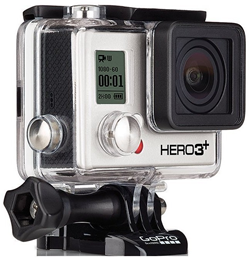 Sports cameras have become very popular in recent years. These compact and durable cameras can go almost anywhere, including underwater. While you wouldn’t want to make a portrait with them, they’re an excellent choice for casual underwater photography. While there are many different models of sports cameras available, the GoPro Hero is my top recommendation. Priced from $200 to $400, all the GoPro models include underwater housings. They’re not perfect, however. Some of the challenges are:
- No viewfinder or LCD display. Seriously, GoPro cameras do not include an LCD display or a viewfinder. If you want to see what you’re taking a picture of, you need to buy the GoPro LCD Touch BacPac for $80. Underwater, the display is very difficult to see. Therefore, I don’t recommend it for underwater photography. Instead, I recommend simply pointing the camera in the general direction of your subject, pressing the shutter, and taking as many pictures as you can. It sounds ridiculous, but it works better than using the LCD.
- An extremely wide–angle lens. The GoPro lens is essentially a fisheye lens, capturing an incredibly wide-angle view. This is both good and bad. It’s very hard to compose a picture carefully underwater, so the fisheye lens ensures you capture everything around you, and you can crop the picture later. The downside of the lens is that you need to be very, very close to your subjects to see much detail. Ideally, you would be about 18 inches (half a meter) away. Most marine life won’t let you get that close.
- Fixed focus. GoPro cameras have fixed focus. Combined with a super wide-angle lens and a small sensor, they have near-infinite depth-of-field. Everything from about 18 inches away to infinity will be in focus. If you get closer to a subject, it will be blurry. It’s not generally a problem with underwater photography, however.
Housing for Point-and-Shoot Cameras
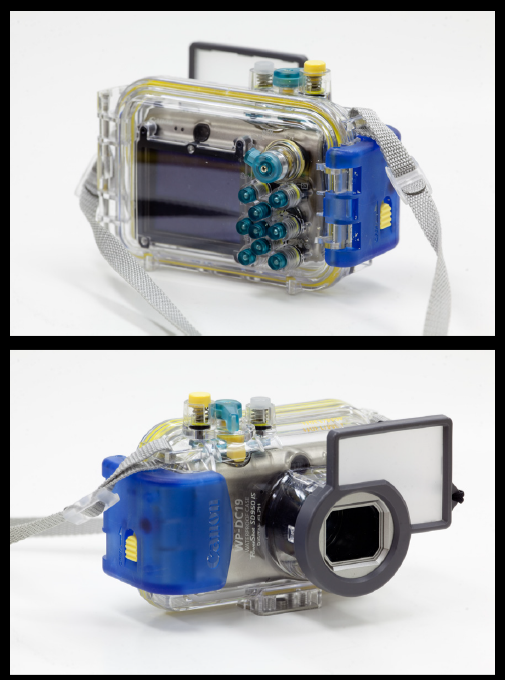 You must find underwater housing made for your specific camera model—that’s the only way the buttons can be reproduced. Every important button and dial on your camera will have a copy on the outside of the underwater housing, with springs and levers that push your camera’s buttons when you push the corresponding button on the camera housing. The murkiness of water won’t allow you to take advantage of your DSLR’s high image quality, anyway, so consider starting your underwater photography with an underwater housing for a point-and-shoot camera, as shown in the following figure. Purchase an underwater housing made by your camera manufacturer. Canon, Nikon, Sony, and Fuji all make underwater housings for their popular point-and-shoot cameras. Check eBay and see if you can find a good price on a used housing. If you have a Nikon, Fantasea Line might make a housing for your camera. Point-and-shoot housings typically add a diffusing screen in front of the camera’s flash, as shown in the previous picture. This will help just a bit, but they’re not bright enough to light up subjects in deep water. Also, because the flash is placed so closely to the lens, you’ll get backscatter, which causes particles in the water to reflect the flash back to the camera. If you go any deeper than thirty or forty feet (or less if it is not sunny or the water is not clear), you’re going to need external underwater strobes, which are flashes that attach to the bottom of the housing using the tripod connector and are triggered when your camera’s built-in flash is fired. You might also need to add weights to your case. While having the case float is helpful when you’re snorkeling, when you’re trying to dive, a floating case will be fighting you the whole way down.
Dedicated Interchangeable Lens Cameras
 Nikon makes two interchangeable lens cameras: the film Nikonos (starting at $150 used) and the digital AW1 ($750 new). Because they’re built specifically for underwater use, they’re less bulky and easier to use underwater. You can use either camera above water, too, though I’d only recommend them for the most casual above-water photographers.
Housing for DSLRs
Camera makers don’t make underwater housings for DSLRs. Instead, check out Aquatica, Sea and Sea, AquaTech, and my favorite (for the lower prices), Ikelite. You will need:
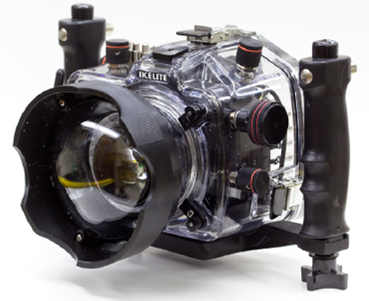
- A housing made for your camera body. This is the most expensive piece of equipment. When comparing housings from different manufacturers, check that all important buttons are replicated and that you can see the viewfinder and LCD clearly. Housings can be acrylic (see-through plastic, as shown in the following figure) or aluminum. Acrylic lets you see inside the housing, which is nice for making sure the o-ring is in place and that the case isn’t leaking. Aluminum can be more durable, though acrylic cases are strong enough to handle the inevitable bashing against the rocks. Housings should connect to your camera’s flash shoe and provide wiring to fire external strobes when required. Look for a housing that supports through-the-lens (TTL) metering for the external strobes.
- A super-wide angle lens (around 16-24mm). A zoom lens is useful, and high-end housings provide attachments to adjust the zoom. Wide-angle lenses are the right choice for most outings, especially when you’re just beginning. Wide-angle lenses allow you to take scenic views underwater, but more importantly, they allow you to photograph fish just a few inches in front of your camera. You’ll need to get that close to take clear pictures underwater.
- A diopter. If the lens can’t focus closer than 12”, you will need a +4 diopter—a filter that screws on the front of the lens and allows you to focus closer. The diopter is required because light passes differently through water. You know how things look closer underwater? Cameras have the same issue. Focusing will work normally underwater with the diopter, but on land, you’ll only be able to focus very close to the front of the lens. For that reason, and the fact that the underwater housing is cumbersome, it’s a good idea to bring a second camera to take pictures above water.
- Optionally, a telephoto macro lens (around 100–150mm). If you want to take pictures of individual fish, you’ll need a telephoto macro lens. It can be very difficult to align and focus a telephoto lens underwater, though, so it’s a good idea to start with a super-wide angle lens.
- A lens port that fits your lens (see the following figure). Housings ship with a big hole in the front, so you’ll need to buy a lens port to cover your lens. The lens port must be slightly longer than your lens (with any diopters attached). Check the maximum diameter of the lens port and verify that your lens will fit through it. For wide-angle lenses, use a dome port—a port with a rounded end—along with a diopter filter. For macro lenses, use a flat lens port.
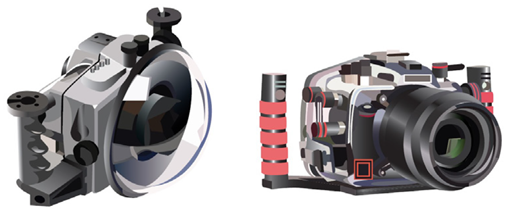 Tech details: Dome ports act as an additional optical element by shaping the water in front of your lens into an arc. This helps to reduce refraction, distortion, and aberrations caused by water. It also requires the lens to focus very closely, as if you were taking a picture of an image projected on the inside of the dome itself. That’s why you need a macro lens or a diopter when using a dome port. Flat ports don’t correct the problems that occur when light must pass through air, water, and then back through air again inside your housing. The distortion and aberration are unacceptable when using a wide-angle lens, but are mostly hidden when using a telephoto lens. That’s why flat ports are limited to telephoto macro lenses.
- Underwater strobes. Your existing flash won’t work; you’ll need underwater strobes if you’re going any deeper than 40 or 50 feet—preferably, two strobes, attached to the left and right sides of the housing. If you want to take video, be sure to choose strobes that act as hot lights—meaning they can give off light continuously. Be sure you have batteries or chargers for the strobes.
- Extra o-rings and lube. The watertight seal is created by an o-ring (a flexible piece of rubber that runs around the edge of the two halves of the housing). It’s a good idea to keep an extra in case yours gets damaged.
- Weights. On land, your underwater housing might seem incredibly heavy. It’s mostly air, though, and underwater, it might be too buoyant to easily dive with. You might, or might not, need to add lead weight to your underwater housing. The only way to find out is to try your gear out, but it wouldn’t be a bad idea to bring extra weights with you so you can add them as required.
As you can imagine, all this gear is expensive. If you’re using strobes, you’ll spend more than $3,000, and you can easily spend $5,000. It’s also heavy—you won’t want to carry the gear around on land.