Lights, reflectors, and even your computer can be attached to light stands. Light stands are like tripods with a narrower base. You can spend anywhere from $20 to $7,000 on a light stand, depending on the weight, features, and strength. Your first lighting kit will come with cheap light stands. As you add more lights, you can buy better quality light stands. Better quality light stands are cushioned, which makes it easier to adjust the height without jarring the strobe and possibly breaking the bulb. Monolights and strobes are ready to be mounted directly to light stands. Flashes, however, are designed to be mounted to a camera. To mount a flash to a light stand, you will need to use a flash light stand adapter (about $20-$30). Choose one that provides a place to mount an umbrella.
Folding Light Stands
 Traditional light stands have three legs that fold for storage or travel, like a tripod with short legs and a very long center column. These light stands are sufficient for most studios. If you frequently move them, you might consider adding casters (wheels) to allow you to roll them. Like with all light stands, you should have a sand bag on them to reduce the risk of the stand falling.
C-Stands
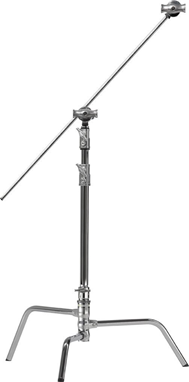 C-stands have fixed, rather than folding, legs. However, they can be disassembled for travel. They also tend to be sturdier and heavier than folding light stands. C-stands are better than folding light stands. Unfortunately, they’re also much more expensive. An 8-foot C-stand will cost $120 to $250, whereas a similar folding light stand might cost $15-$25. C-stands are a good investment for studios that receive heavy, constant use. Folding light stands can be fidgety, and a C-stand pays for itself if it saves a single broken light.
Microphone Stands
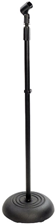 At the other end of the spectrum, microphone stands can be used to support lights or cameras (though you might need an adapter, depending on the threading). Microphone stands can be found slightly cheaper than light stands (as low as $10 each), but the primary benefit is a reduced footprint. Microphone stands have a heavy base that’s smaller than a folding light stand, providing stability while allowing you to more easily navigate around your lights in a very small studio.
Booms
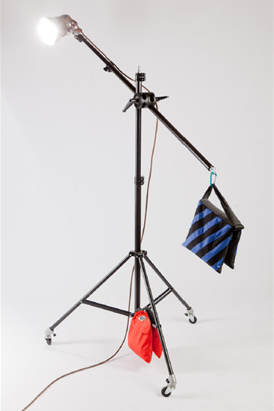 Once you get some practice with standard light stands, you’ll discover something frustrating: if you want a light directly in front of your subject, the light stand will be in the way of your shot. Booms work around this by hanging the light out on a long arm. I use a CowboyStudio boom, shown in Figure 6-38, that costs about $70. While it’s inexpensive, it’s only suitable for lightweight flash heads and light modifiers; heavier modifiers like large beauty dishes will cause the boom to twist. Booms are particularly unsteady, so use sandbags to both balance the boom and keep it from falling over. You will need to put sandbags over the base of your light stands (especially booms). Sandbags are surprisingly expensive, but if you don’t use them, it’s only a matter of time before you knock a light stand over. When that happens, you’ll definitely break a bulb (which is expensive to replace). You might also knock over other light stands, damage your backdrop, or hit a person—possibly burning them. If you use your studio regularly and you have flat, hard floors, put some wheels (known as casters) on them. Casters allow you to more easily move your lights, especially if you have them properly sandbagged.